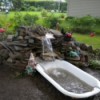
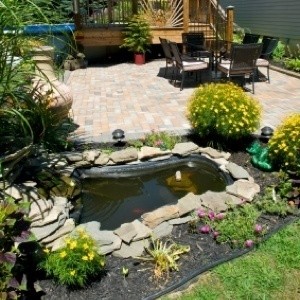
 Preformed ponds are an easy and relatively inexpensive way to get started in water gardening. Most box-garden centers offer several sizes and depths to choose from, including complete kits that contain everything you need to get started: the pond, the pump, and filters-for as low as $100. Installation is easier than digging and lining a free form pond, too. Depending on the size you choose, you can install a preformed pond by yourself in a single afternoon.
Shop online and research your options before making a purchase. Online retailers sell in volume and have a low overhead. Even with shipping charges, sometimes they can offer you the best deal. Preformed ponds are designed to be durable and puncture resistant. With proper care and maintenance, one made of at least 1/4-inch thick fiberglass can last up to 50 years.
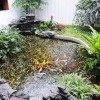
A pond featuring varying depths will accommodate the largest variety of plants and wildlife. Three different depths are ideal. Water lilies, lotuses, and other submerged plants need a depth of at least 18 inches. A depth of 6 to 10 inches will accommodate most marginal plants, and attract aquatic animals like frogs. Over-wintering plants and fish need a depth of at least 2 to 3 feet.
Note: In areas with harsh winters, be prepared to bring fish and plants indoors for the winter.
Start out with something small until you get the hang of the required maintenance. If you want to expand the size in the future, you can combine two or more preformed ponds together to form something larger and more dramatic.
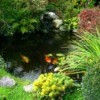
The ideal site for your pond will be fairly level, offer good drainage, and feature both sunshine and shade. Most aquatic plants prefer at least 5 to 6 hours of direct sunlight a day, and both plants and fish will appreciate some afternoon shade.
Try to locate your pond away from overhanging trees and shrubs. Not only will this save a tremendous amount of work in the way of maintenance (constantly removing fallen leaves), but you'll also be less likely to encounter tree roots while digging your hole.
Low-lying sites leave your pond vulnerable to runoff contaminated by fertilizers, herbicides, or pesticides. Even if you don't use them, maybe your neighbors do. Also, a pond located near an outdoor faucet makes filling and cleaning it more convenient.
A simple way to dig the correct shape for your pond is to flip it upside down in the desired location and dig around the perimeter. You can also outline it with chalk dust, move it out of the way, and start digging.
Dig your hole a 3 to 4 inches larger and deeper than the form. Make sure you dig your hole to match the angle of the walls. If your pond contains one or more plant shelves (varies in depth), you may need to move the form in and out of the hole several times to ensure you get a good fit. Remove roots, rocks, and other debris as you dig.
Once the hole is deep enough, level the bottom by tamping it down with the back of your shovel. Cover the bottom with several inches of builder's sand so that the bottom is level and the top edge of the form sits slightly above ground level. Using a carpenter's level on top of a board laid across the hole, check to see that the top of the hole is also level. Adjust the height of the soil at ground level if necessary.
Before setting the pond form into the hole, rinse it out to remove any dust and residue acquired during manufacturing. Place the pool into the hole and wiggle it into position. Check to see that both the bottom and rim all the way around the sides are level.
To prevent bulges from forming on the sides of the pond, you need to backfill the hole and fill the pond with water at the same time. Slowly start to fill the pond with water. As it's filling, backfill the gap around the perimeter of the pond by working your way around it several times, adding even amount of soil and tamping it as you go. Continue to fill the pond and backfill the hole so that you finish both at approximately the same time. When you're finished, the soil around the rim should slope slightly away from the edges of the pond to prevent runoff from getting in.
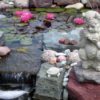
To give the edge of the pond a more natural look, disguise the plastic edges using rocks, or fieldstone. Secure them by digging them down into the surrounding soil or fixing them to each other with mortar. Note: Depending on the mortar you use, you may need to let it cure before being able to safely add plants or fish.
Before adding living things to your pond, run the motorized pumps and filters for a couple of days to ensure everything is working correctly. Water contains a variety of chemicals depending on its source. Check with local pond and fish suppliers to see what, if any, chemicals you need to add your pond water to make it safe for plants and fish. Expect to wait at least three days after filling your pond before adding plants, and a week or more before adding fish.
Check with the pond's manufacturer for their recommendations on the number of plants and fish your pond can sustain, and plan on starting out with less. Both your plants and fish have the potential to grow larger and reproduce. Besides, it's always easier to add more plants and fish than to try to correct a pond with oxygen and nutrient imbalances.