I've discovered how using a binder with a few simple office supplies and some slight creativity can be used to preserve greeting cards and special memories for years to come.
Total Time: 15 minutes or more depending on creativity
Yield: One Book of Smiles
Supplies:
- Store-Bought Supplies
- 1 3 to 4 inch, 3-ring binder (I found that the Binders with those clear plastic fronts work perfect for inserting your own paper with graphics or names to personalize it!) (Approx: $2.00 - $6.00)
- 1 Comes with about 25 sheets per package Clear Page Protectors (Approx: $7.00)
- 1 One package : Contains 250 sheets Cardstock Paper (Approx: $13.00)
- Household Supplies
- 1 One pair Scissors (Approx: $2.00)
- 1 One dispenser Clear Scotch Tape (Approx: $1.00)
- 1 One item Pen (Approx: $1.00)
- Optional Additional Supplies
- 1 One package Colored Gel Pens (to decorate) (Approx: $10.00)
*Prices estimated based on items found at Walmart.com
Steps:
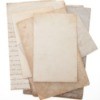
- Decide which parts of each card are a part worth keeping- be it a special printed greeting, a graphic, a handwritten note or a signature.
** Hint:
I found it helpful not to keep the whole card but just parts so that the resulting book is not too bulky. If you are interested, you can later give it creative flourishes to the page or card border itself. - Cut out the parts of the card that you want to keep, leaving room around the edges if you are interested in adding creating borders or flourishes to the page.
- Take the card and write somewhere on it (or on the page if you dedicate a whole scrapbook like page per greeting card) the name of the person who send it to you, the occasion (birthday, anniversary, etc.) and the date.
- Now is the time to figure out where you want the greeting card to fit on each page. When you have placed the segments where you want them to be assembled, tape them there with the Scotch Tape onto the Cardstock sheet.
*Note: I tried this originally using normal computer paper but found it to be too flimsy to hold most bulky cards, hence the reason I suggested Cardstock which is a tougher and stiffer paper. - If you are going to dedicate a whole page to each individual greeting card, keep in mind that the binder will end up being very bulky so you may end up with multiple binders- you could have a different binder per occasion or per sender if that is what you are interested in!
- Now that you have taped your card segments (dated and such) into place onto your Cardstock paper, feel free to decorate it as you like- you can even fill it with photos of that person or event. *Note: If you do decide to use photos, make sure you do NOT use regular tape or glue! Use special "Acid-Free" photo tape to prevent damaging the photos!
- Insert the decorated greeting card page into a clear Page protector- this will allow you to view the cards without you having to worry about fingerprints on your photos damaging it or accidentally tearing the greeting card.
When satisfied, add to your binder... Viola! - Now that you've successfully added one page to your Memento Book, continue with the same process to the next card!
** Hint: If you tend to amass these greeting cards or handwritten notes through the years as I do and don't have time to create a new page as soon as a new one arrives (who does??), you might want to consider having a separate storage space for greeting cards/etc that you want to keep. I use a hanging file folder labeled "Greeting Cards to Add" and put the greeting cards (whole and intact) in the folder AFTER I add the date and information so I don't forget later!
Add your voice! Click below to comment. ThriftyFun is powered by your wisdom!

September 13, 20150 found this helpful
Nice.
Add your voice! Click below to comment. ThriftyFun is powered by your wisdom!