social

Rewiring a Table Lamp


Silver Post Medal for All Time! 355 Posts
March 14, 2017

Rewiring a Living Room Lamp - finished lamp with shade and turned on
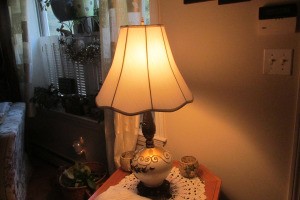
This will show you how easy it is to rewire a lamp yourself instead of paying some place to do it!


Advertisement

Supplies:

  • For a living room lamp, I chose gold/clear wiring with the plug attached.
  • socket
  • switch
  • end cover that goes around the socket and make sure it has a screw on kind.
  • wire cutters
  • phillips screw driver
  • wire strippers
  • pliers
  • a thick blanket to work on (especially if this is a precious old lamp)

Steps:

  1. Lay out a thick blanket on the kitchen table, under good lighting. This will help protect your lamp when you start to dismantle the lamp. You do not want the center globe to break or any parts to roll off. Remove the lamp shade, harp, and light bulb.
  2. Rewiring a Living Room Lamp - lamp lying on towel to protect globe while dismantling
     
  3. Unscrew from the bottom the bolt that holds the rod that goes through the lamp. Now your lamp will loosen and slowly fall apart. If you are doing this for the first time, using your cell phone, take a picture of the lamp as it lies on it's side. A few pictures close up, in case you can't get it back together the right way.
  4. Advertisement

  5. Pull off the socket, the cord can be pulled right out. Unscrew the wires from the old socket and set them far from your work space. This will help guide you through putting together the new socket wires.
  6. Rewiring a Living Room Lamp - socket removed
     
    Rewiring a Living Room Lamp - pulling wires
     
  7. Feed through from the bottom up, the electrical cord, through the rod up into the top of the lamp. Through any risers (these are small pieces that add height or decoration) on the top of the lamp.
  8. Now take your cord and with wire cutters cut through the center of the cord, splitting the cord in two. Pull the cord open about two inches. Using wire slicers, splice each cord (which just removes the outer plastic) and all you have is copper wire. Before you connect the socket, slip the wires through the round screw on cap that goes at the base of the socket, it screws onto the rod before you put together the socket.
  9. Rewiring a Living Room Lamp - split wires
     
    Advertisement

  10. Take your new socket, remove the outer brass looking cover, then remove the cardboard cover. You will see two screws, unscrew them both. Take each side of the copper wire and twist it together with your fingers. Wrap the wire around the screw on the side of the socket without leaving any wire showing, then tighten the screw. Do this to the other screw and wire. Again, making sure there are no copper wires showing and the screws are tightened.
  11. Rewiring a Living Room Lamp - remove brass covering on socket
     
    Rewiring a Living Room Lamp - remove cardboard cover on socket
     
    Rewiring a Living Room Lamp - loosen screws and wrap wires
     
    Rewiring a Living Room Lamp - closeup
     
  12. Now, replace the cardboard cover, the brass cover, attach this to the top of the lamp, by gently lifting and holding the lamp together carefully. The socket should snap onto that round screw on cap. You will here it snap on.
  13. Rewiring a Living Room Lamp - reassemble socket
     
    Advertisement

  14. Now, by pulling the cord from the bottom and turning the socket you can gently screw this lamp back into place. DO NOT force this too hard especially if you are working with a glass globe. You want it tight, but not too tight.
  15. Stand this up straight before you have given this a complete tighten, to make sure everything is straight, then tighten.
  16. Put a harp on it, a light bulb and plug this new (old ) lamp in. Wha-Lah!
  17. Rewiring a Living Room Lamp - add light bulb and replace harp
     
Comment Pin it! Was this helpful? 2

Comments


Gold Post Medal for All Time! 523 Posts
March 20, 20170 found this helpful
Top Comment

Jackie,

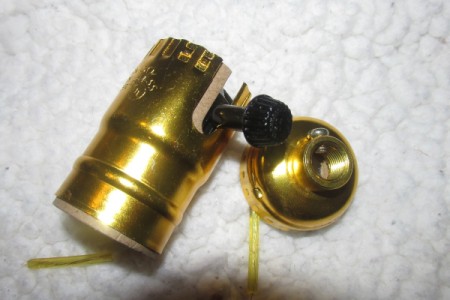
Most older lamps do not have a small plug in the base to secure the wire against being accidentally pulled out and risking the chance of a short. For that reason, I hope you wont mind if I suggest a different safety measure to take its place.

Advertisement

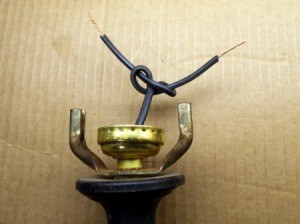
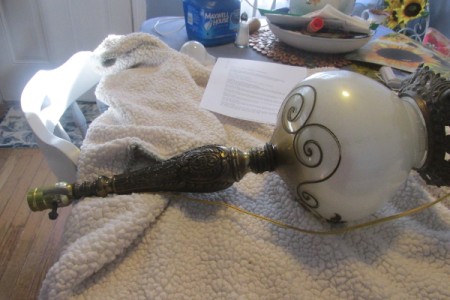
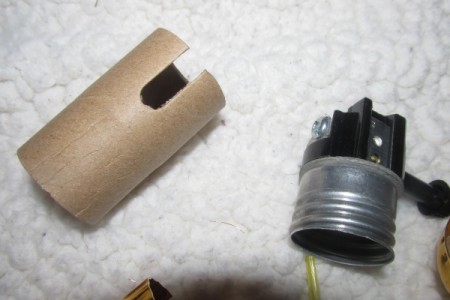
In order for the wiring to be UL approved, it requires a UL knot. The knot would be in the wire, within the socket, and just before the ends which will be screwed into the socket. I went to my junk shed and found a lamp to use as an illustration.

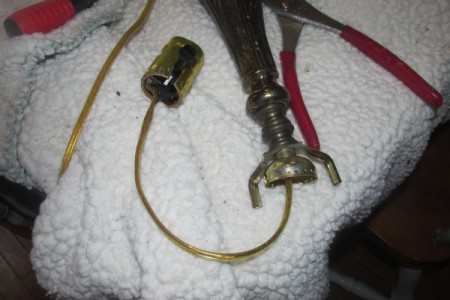
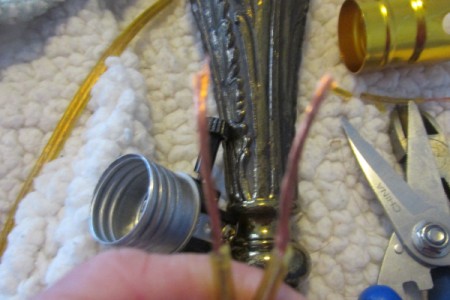
It may take a little work to get the socket seated with this knot in place. It will be a tight fit, but it can be done. I know, I have wired thousands of lamps.

Here is a video showing how to tie a UL knot:

www.youtube.com/watch?v=jpdTG1-YJpM

 
Reply Was this helpful? Yes
Read More Comments
Categories
Home and Garden Repair Home MiscellaneousMarch 12, 2019
Pages
More
🌻
Gardening
🎆
Fourth of July Ideas!
👔
Father's Day Ideas!
Facebook
Pinterest
YouTube
Instagram
Contests!
Newsletters
Ask a Question
Share a Post
Categories
Better LivingBudget & FinanceBusiness and LegalComputersConsumer AdviceCoronavirusCraftsEducationEntertainmentFood and RecipesHealth & BeautyHolidays and PartiesHome and GardenMake Your OwnOrganizingParentingPetsPhotosTravel and RecreationWeddings
Published by ThriftyFun.
Desktop Page | View Mobile
Disclaimer | Privacy Policy | Contact Us
Generated 2023-05-20 02:09:39 in 3 secs. ⛅️️
© 1997-2023 by Cumuli, Inc. All Rights Reserved.
https://www.thriftyfun.com/Rewiring-a-Table-Lamp.html