 My intentions were to respond to Jackie H.'s post, 'Hairspray for Creased Jeans'. As you might imagine, I got carried away and went too many miles down memory lane. Not wanting to impose on Jackie's post with an even longer response, I put my comments here.
Way back in the last century, around the 50s and 60s, most clothing was pure cotton. Polyester, blends and permanent press were practically unheard of. As a young adult, I hand washed my shirts, paying particular attention to the collar. It was scrubbed, vigorously. I checked for loose buttons or specks of lint in the pocket. If necessary, I turned the pocket inside out and scrubbed its inside bottom with a toothbrush. Lint showing through a white shirt pocket was not acceptable.
I always rinsed my shirts three times. Oxydol and Rinso made a lot of suds. After rinsing, they were treated to a medium starch rinse. And after that, the collars and cuffs were treated to a heavy starch. The shirts were then hung (hanged?) on a clothesline, where they dried and the sun further whitened the whites. Often, all that work was in vain and the shirts had to be re-laundered. It was heartbreaking to go to the clothesline and see my beautiful white shirts spattered with elongated purple spots; the gift from a robin who had gorged on mulberries and then shamelessly disgraced himself on my best and whitest shirts.
When dry, the shirts (those that were still clean), were brought in and dampened. Before I had a spray bottle filled with water, I use to use a little gadget made just for dampening clothes. It was made of plastic or aluminum, was full of holes, much like a tiny salt shaker, and fit nicely into the top of a Pepsi bottle filled with water. Back then, this was called 'sprinkling clothes'.
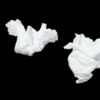
After sprinkling the shirts, each one was rolled into a ball and placed into a pillow case. The pillow case was placed into the refrigerator, where the shirts were kept fresh while the 'sprinkles' evened out to a uniform dampness.
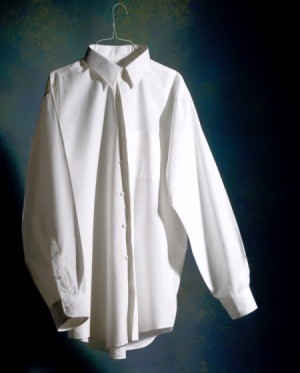
People, I could give Prince Charles' laundress a few lessons on ironing a white dress shirt. Mine approached perfection. Labor intensive? Yes, and I loved it. All the little grey haired ladies in the neighborhood would comment on how nice my shirts looked. And there was usually a comment about the crease in the arms being so straight and sharp, they looked as it they could cut you. I ate those comments with a spoon!
I won't give any tips on ironing shirts, here. I'm just reminiscing a bit. I will tell you one thing; a lot of time and work went into ironing a shirt just to be worn maybe six hours or less. Where did I find the time or energy?
They say to be completely in style, you have to be a little out of style. I can make do with that because, if washed, rinsed, starched, line dried, sprinkled, and ironed shirts come back in style, I'm going to be a whole lot out of style.
Those were the days.
This page contains the following solutions.
As a kid, I learned how to iron a shirt. Most important hint: Using a spray bottle, lightly spray shirt here and there and roll into a ball. Refrigerate in a plastic bag for 5 minutes to 5 hours. First do the back of the collar, then front.
Start by ironing sleeves, cuffs, belts and collars before ironing the body of the shirt. This will prevent you from having to re-iron the body of the shirt which is bound to get wrinkled when you iron the smaller part of the garment.
To iron a shirt, make sure to put water in the iron or use a spray bottle to moisten the shirt. Do the collar first, then yoke, then do the right side, back of shirt, then the left side.