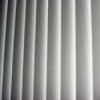
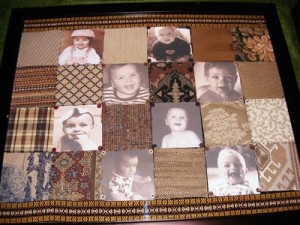
 Using discarded upholstery fabric, a clearance sale frame, felt, and printer fabric, I created this quilt-inspired wall art.
Approximate Time: A weekend
By jenn from Vineland, NJ
This page contains the following solutions.
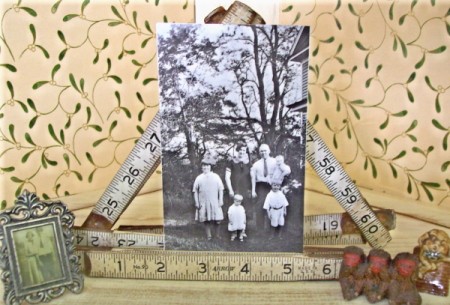
I love anything old with numbers on it. I'm funny that way. Here's a couple of old folding yardsticks that became frames for my photos. I like the B/W photos for these.
I always get school pictures of my grandchildren and was running out places to put them. Now I ask for 5x7 inch photos, use the same frame, and put the new photo in the front and the older ones are behind.
Have a coffee table or end table? Sure we all do. This holiday season, have a piece of safety glass cut to fit the top and slide pictures of past holidays under the glass.
I was working on a really cool photo wall in my room and I just couldn't keep a few of the photos up on the wall. I tried everything from tape to sticky tack. Then I found out that these Elmer's glue dots from Walmart work great!

You can go to a salvage yard and get some old window frames and use them. we are taking one and using the top section on one side of our cuckoo clock and the bottom on the other side, putting family pictures in each individual frame section.
I worked with a few craft teachers in a hobby and craft supply store. It was great to see people that have a store where they make money not only on resale of products, but services like picture framing and changing old frames.
Here are the questions asked by community members. Read on to see the answers provided by the ThriftyFun community.
I have a few pictures that I want to put up in my bedroom. Don't have money to buy frames. How else can I mount it? Maybe glue it onto a board?
One way is to have a little fun by covering a piece of cardboard or styrofoam borad with fabric and criss cross that with ribbon, Simply slide pictures behinf=d the ribbon for an interesting collage.
Have Fun!
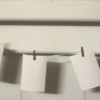
If you have some ribbon or twine you can either hang the photos (tie and bow) or paper clips.. If you have time you can weave the ribbon and insert the corners of the photos into the weave..

Buy an inexpensive poster frame and make a collage of pictures; place pictures randomly around the frame; use double-sided tape to attach pictures. Be creative and you could put captions under the pictures to describe the picture.
Most poster frames are black but you could paint it or use a small brush or a q-tip and make dots on the frame or paint the entire frame the desired color.
Another suggestion; buy some corkboard and cover a door; attach the pictures with colorful thumbtacks; also, add captions to the pictures.
Remember; always document on the back of your picture the name of the person, date and occasion of picture!
If you really want frames, you can find a surprising selection at dollar stores. You just have to pick through them to find something tasteful. And don't expect them to last forever.
I recently repainted my daughters' room and after all the time filling holes I said "No more!", but the kids still needed a way to display their art, personal photos and such. My solution was to get inexpensive narrow cotton clothesline and hang 2 "lines" across the entire wall.
Second hand stores have impressive frames at giveaway prices. Consider spray painting one, maybe silver?
Hello to Durban, I was there two years ago near the University, very wonderful trip! So many things in bloom, and my mind was blown learning about mature Aloes. We went to the animal sale at the big animal reserve park, stayed in the Drakensbergs, and I've had my toe in three oceans now! thanks for the memories. I can smell the Frangipani trees.
I found this really cute idea on a crafting group I belong to...thought it might give you a new idea!
www.annamariahorner.com/
God Bless,
Sheila in Titusville, FL
I found this really cute idea on a crafting group I belong to...thought it might give you a new idea!
www.annamariahorner.com/
God Bless,
Sheila in Titusville, FL
1-- You can take old puzzles pieces and paint them with craft paint in colors that will compliment the photo. I did black with white dots. Once paint is dry, glue the pieces together to form the frame. You can stack them on top of each other and make about 3 layers or you can stack them askew to be more abstract.
2-- Use an old or inexpensive plate, cut photo to fit the center and glue or used double sided tape to hold in place.
(you can find a wide variety of shapes, colors and sizes for almost nothing at thrift stores.
When I was in high school - I had a cork bulletin board on which I put my pictures. If they are not photos, you could put them on scraps of wood or pieces of cardboard and decoupage them with a solution of white glue thinned down with water. Or you can get acrylic sheets used for overheads, and use that for "glass" and mount the pix on a piece of cardboard....
How about this method using clothes pins on your curtain rod? You could decorate your clothes pins to match your room and just over lap your photos maybe even with corners pointing upward like triangle shape.
www.craftsayings.com/
How can I display pictures on my office bulletin board other than with a thumb tack? I have a cork bulletin board and we have lots of photos we took at an office picnic I would like to display. I thought maybe covering the bulletin board with light blue copy paper and then put the pictures on top. Any ideas?
By Onesummer
At church I used material to cover the boards; a very light flannel or other lightweight material. Then you can use tacks that won't damage the material or use glue dots. Also can put a metal (thin) behind cloth or paper covering and use magnets!
Hafwit seems to be on the right track. Maybe aluminum foil under the paper or fabric would work to hold the magnets. I suggest as heavy duty as you can get. Maybe the office could order some. There also is a product called Maptac. You put little balls of it on the back of pictures (one in each corner), after you have softened it in your fingers. Most office supply places carry it.
I have taped pictures (and cards) using tape loops on backs, to long pieces of ribbon in long rows top to bottom. I used this on a door and tacked the top and bottom of the ribbons on the top and bottom of the door where they wouldn't be seen. You can put a number of strips of ribbon on a door. This same technique could also work on a bulletin board.
If you want to use the copy paper, use the putty. Poster putty, sticky tack etc are other names for maptac. There are several different ones and it's available at WalMart. They work well IF you really soften them by pulling and pulling until they are soft and feel warm. You only need a very small piece in each corner and it's very easy to remove.
For years I have used a product that feels a little like bubble gum/ putty/ play doh called "Plastic-tac." It seems to never dry out, and is easily removed without leaving a spot. You tear off a piece and soften it a little between your thumb and finger. Press it onto the back of a picture then press onto the wall or board. I usually use more than one piece. Top, sides and or bottom. A packet of this product will last for years, and has lots in the package.
Karen in Salem OR
Thriftmeg, aluminum foil is not magnetic. You need to use something with steel in it for the magnets to stick.
Check out these photos.
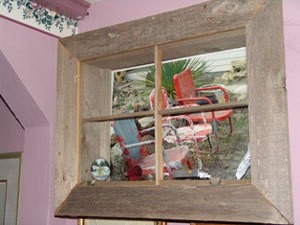
This photo was taken in my in-law's back yard. My father-in-law would set there when he wanted to smoke. My mother-in-law wouldn't allow him to smoke inside. So these lawn chairs were a part of him.
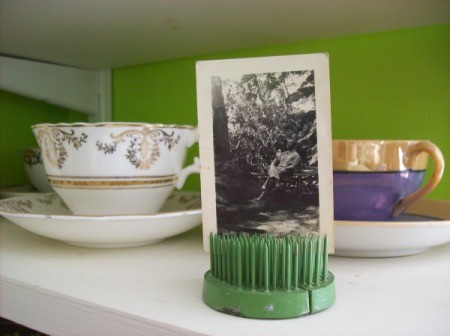
A flower frog makes a unique picture holder. Can't get much easier than this, folks. Would work well as a recipe holder, too. They come in other shapes and sizes and can be found at garden stores, craft stores, or florist shops.
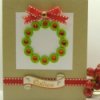
This photo clip banner project includes the instructions for making the cute recycled water bottle flowers seen at the end of the ribbon hanger. Learn how using the detailed steps below.