Home |  Index |  Submit Request |  Share Photos |  Share Tips |  Active Topics |  New Feedback  |  Contact Us  |  Search
 User Login:  Username:    Password:      Forgot It?  | Register

 Popular Topics
 - Beauty
 - Budget and Finance
 - Christmas *
 - Cleaning
 - Consumer Advice
 - Craft Projects
 - Craft Tips
 - Food Tips
 - Garage Sales
 - Gardening
 - Gifts
 - Green Living
 - Home Improvement
 - Organizing
 - Parenting
 - Parties
 - Pest Control
 - Pets
 - Product Reviews
 - Recipes
 - Repair
 - Thanksgiving
 - Weddings for Less

More Topics

Google Search:

Web thriftyfun.com

About:
RSS Feed
About Us
Media
Advertising
Contact Us
Privacy Statement
Disclaimer

Foam 'Foto' Frame

By Marnie McCown-Guard
1x1
Date: 07/12/2005 Topics: Craft Projects > Framing > Decorative | Photos > Crafts  
1x1
1x1
Post Feedback! | Email Friend | Print | Get Responses | Bookmark | del.icio.us | Link | Rate: Thumbs Up Thumbs Down
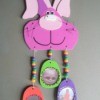
This is a fun, easy project for any family member. A great project for kids that allows them to express themselves and customize their favorite photos!
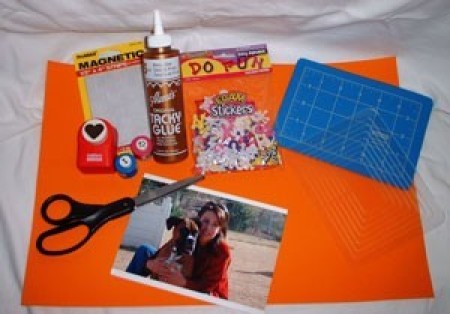
You will need:

  • A large sheet of craft foam (shown measures 17 _ inches by 11 _ inches)
  • Magnetic strips w/ adhesive
  • Craft glue
  • Craft Knife (do not let children use a craft knife) and Cutting Mat
  • Decorative Embellishments
  • A favorite photo
  • Scissors

Optional material:

  • Decorative accents
  • Die cut stamps
  • Coordinating color of foam
  • Coluzzle Mat Cutting guide

You will want to be sure:

Children are supervised around craft knife and scissors

Estimated Cost:

  • Craft Foam Sheet 99 cents
  • Foam Letters $3.29 (leaves PLENTY of letters left over for your next project!)
  • Glue $1.50

*materials purchased at a large craft retail store.

Estimated Project Time: 20-30 minutes

To begin, be sure you have all your materials assembled and a clean workspace. This makes any project a lot easier.

Decide what size your frame will be and cut out the back piece. (Use a cutting mat)

Cut a similar size for the front and trim out a middle section for your photo.

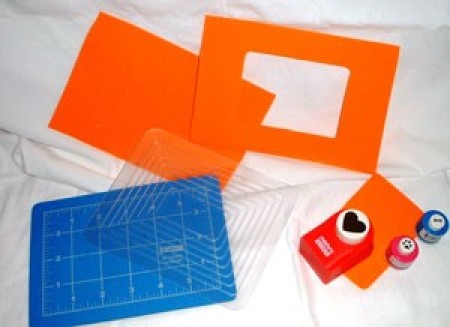
Once you have cut out the middle out glue the front and back together using a small amount of craft glue on the top, bottom and right edges. DO NOT glue all the edges together because you need to slide your photo in somehow.

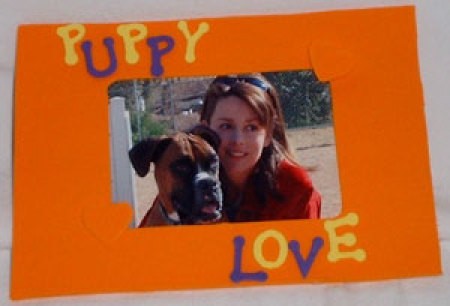
Once the glue is dry, you can decorate your frame any way you desire.

Once the front of the frame is to your liking, turn it over and apply 2 magnetic strips. One along the top edge and one along the bottom.

Remember: Be sure to use magnetic strips that are strong enough to hold your frame on a fridge, locker door or any metal surface. These are a great project for rainy summer days! Pull out a box of photos and have at it!

Optional embellishments:

  • Die cut shapes
  • Any embellishments that relate to your photograph

© 2005 ThriftyFun

About The Author:
Marnie McCown-Guard is a freelance writer/photographer. Her work has appeared in magazines, newspapers, the Internet and even audio CD. Currently at work writing her 2nd how-to book, she tries to exercise her creativity with crafts whenever possible. Her favorite piece combines her love of writing and photography in a 24-page scrapbook she created for her husband to celebrate their first wedding anniversary. Visit her at http://www.ProfileProfessionalWriters.com
Jump to Feedback | Post feedback
Related Links:
Previous: Tiny Sugar Ants ThriftyFun Next: Need a Small Bit of Wallpaper
1x1
 Feedback
1x1
1x1
1x1
1x1
 Sponsors
1x1
1x1

Post by ThriftyFun (4042) | (07/12/2005)
Profile |Blog! |Contact
This is a great craft for children. You buy some foam and make frames. Let the children take pictures of an outing and then put the pictures in the frames and then place in fridge!

By Noelia Gutierrez


Post by natasha13 (5) | (06/25/2005)
Contact
WOW! I have never thought of this! thanks for the great idea i know i will be making some of my own ! :) natasha


Post By Jennifer, CA (Guest Post) (06/24/2005)
I share the same love for these! We love to make photo frame magnets for holidays they make great ornaments too!


1x1

Post Feedback:
Login using the form on the top of the page to post feedback if you have registered with ThriftyFun. If you have not yet registered, click here. It's FREE!. If you are not registered you can post feedback as a guest below. Please don't use your email address for your name because spam robots can dredge it from our site. Please do not post your feedback more than ONCE. We need to approve all guest feedback and it may take from minutes to hours for that to happen.
(1x1 graphic )
Your Name

Subject

Feedback

text tool text tool text tool text tool

Image Upload: Add an image to your post! Click the "Browse" button below and select an image from your hard drive. Please only select gifs or jpegs. If you have any problems, just email the image to images@thriftyfun.com


If you want to post your email address for responses from readers, obscure it in some way like put spaces between the name and @ sign and service address with (remove spaces) behind it or name (at) server (dot) com . This is for your protection from those creepy Robots.

(1x1 graphic )

© 1997-2008ThriftyFun.com - Design by Cumuli Design
Disclaimer: ThriftyFun.com cannot accept any responsibility for any injury or damage that you may cause to yourself, others, or property when following any advice given on this site. Read the full disclaimer. If you find any information on ThriftyFun.com or in our newsletters that is either erroneous and/or potentially harmful to others, please Contact Us, immediately.