social

Buying and Transplanting Bedding Plants


Gold Post Medal for All Time! 858 Posts

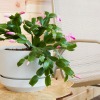
Each spring nurseries and garden centers offer a wide variety of bedding plants. Because many of these plants are already blooming (or nearly ready to), they will instantly perk up your home and garden with color while you wait for seeds and perennials to catch up. Here are some tips to help make the transition from garden center to garden soil as smooth as possible.

Advertisement

What are Bedding Plants?

The term 'bedding plant' refers to any herbaceous plant that has been grown to blooming or near blooming size before being sold to be planted in the garden. These plants are usually started from seed and grown in a greenhouse and are sold in flats or trays containing 6 to 12 plants, or in 4 to 6 inch pots containing individual plants. The majority of bedding plants are annuals or tender perennials (meant to be treated like annuals), but vegetables may also be grown as bedding plants.

Examples of common bedding plants include begonia, geranium, marigold, impatiens, pansy, and petunias. Tomatoes, peppers, and members of the brassica family are popular vegetable transplants.

Selecting Healthy Plants

Bedding plants are typically planted in masses for their visual impact. Because they are considered "temporary" plants, they are often less expensive to buy than other type of garden plants. Even cheap plants are no bargain if they fail to last, so here are some tips for selecting healthy plants:

Advertisement

  • Go for short, stalky, and nearly blooming. Once a plant starts to bloom, nearly all of its energy is focused to matters above ground. Small, stalky transplants are still focused on growing so they tend to establish themselves more quickly than the larger plants. If you want really productive plants, look for short, stocky plants that are nearly ready to bloom and steer clear of the tall, spindly plants that are already blooming.
  • Check the foliage color. Always check the color of the leaves. Healthy plants will have dark green foliage. Pale or yellow (unless bred for), may be a sign that the plant has had insufficient access to water or fertilizer. Once transplanted, these plants are more likely to sacrifice flowering in order to direct their energy into new growth.
Advertisement

The Ideal Planting Conditions

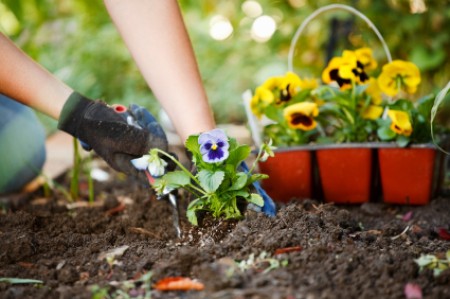
Seasonally, most bedding plants can be planted outdoors after danger of frost has passed in your area. Transplanting can be stressful to young plants, so the sooner you can get them into the ground after bringing them home, the better. A calm day with overcast skies is ideal. This allows plants time to recover before being exposed to full-on direct sun.

If it's particularly hot when your seedlings are ready, try to hold off until a cooler time of the day - either morning or afternoon - to lessen the possible effects of transplant shock. If you are unable to set the plants in the ground the day you buy them, put them where they will get good light and keep them watered.

Hardening-Off Greenhouse Plants: Bedding plants purchased from indoor greenhouses or garden centers should not be planted directly into the garden until they have been hardened off. Unlike plants sitting in the open air at big box garden centers and discount stores, plants grown in greenhouse conditions will need a little bit of extra time to acclimate to intense sun and strong winds.

Advertisement

Start by placing the plants in a shady, protected site. Harden the plants by gradually exposing them to sun and wind for increasingly longer periods of time each day. Watch moisture levels closely - watering the plants when the surface of the soil starts to dry. After 7 to 10 days of hardening, your bedding plants should be ready for planting.

Steps to Transplanting

  1. Water the prepared planting bed a day or two before transplanting so that it will be lightly moist when you set out your plants.
  2. Once you get your plants home, water your seedlings thoroughly and let them stand for a few minutes while you go and gather any necessary tools. The moistened soil will make it much easier for you to remove the seedlings from their containers.
  3. Mark desired planting spots with small twigs or a pinch of all-purpose flour. Individual potted plants can be move to their intended spots and arranged as needed. Plants in cell packs can be cut apart from their plastic trays with a scissors and positioned in their appropriate spots. Once you make your final decisions, use a trowel to dig a hole for each plant that is slightly wider than its root ball.
  4. Advertisement

  5. Before removing the plants from their containers, look at the bottom of the flats or pots and check for small roots protruding out of the drainage holes. These can be snipped off with a scissors and discarded to make removing the plants easier.
  6. Remove the plant from its container by gently pushing and squeezing the bottom. If the roots ball doesn't come out easily use a sharp knife or scissors to cut a lengthwise slit down the side of the pot or cell pack with a scissors. Avoid pulling on the top of the plant and causing damage to the stems. To divide multiple plants growing in the same cell in a pack, run a knife between the plants, and carefully separate each plant along with its roots and soil.
  7. Use your fingers to gently tease the tangle of roots at the bottom of the root ball and set the plants into their holes at the same depth they were growing in their containers. Work quickly. Don't let the plants sit on top of the soil for more than a few minutes or the roots may dry out.
  8. Advertisement

  9. Gently tamp down the soil with your hands to help remove any pockets of air. Water in plants individually before moving on to the next plant.
  10. Mulch around the base of plants with 2 to 3 inches of organic material such as shredded bark or pine needles. This will discourage weeds and reduce moisture loss. Pinch back or deadhead plants as recommended to encourage branching and keep flower production in full swing.

Planting pansies
 

About The Author: Ellen Brown is an environmental writer and photographer and the owner of Sustainable Media, an environmental media company that specializes in helping businesses and organizations promote eco-friendly products and services.

Add your voice! Click below to comment. ThriftyFun is powered by your wisdom!

 
June 3, 20110 found this helpful
Top Comment

Rather than marking a spot for your plants with a dab of flour, try using a dab of epsom salts. Epsom salts helps root growth. Thank you jerry baker, master gardener, for this tip.


Bronze Feedback Medal for All Time! 231 Feedbacks
June 2, 20110 found this helpful

One thing to be aware of is that nurseries typically stock plants that have been "forced" into bloom a little early. While there's nothing wrong with this, you have to realize that when you then plant that rose bush in your own garden it won't bloom as early the next year. We all want instant gratification, but.....


Add your voice! Click below to comment. ThriftyFun is powered by your wisdom!

 
In This Page
< Previous
Categories
Home and Garden Gardening FlowersJune 2, 2011
Pages
More
💘
Valentine's Ideas!
🎂
Birthday Ideas!
🍀
St. Patrick's Ideas!
Facebook
Pinterest
YouTube
Instagram
Categories
Better LivingBudget & FinanceBusiness and LegalComputersConsumer AdviceCoronavirusCraftsEducationEntertainmentFood and RecipesHealth & BeautyHolidays and PartiesHome and GardenMake Your OwnOrganizingParentingPetsPhotosTravel and RecreationWeddings
Published by ThriftyFun.
Desktop Page | View Mobile
Disclaimer | Privacy Policy | Contact Us
Generated 2024-01-24 17:04:51 in 7 secs. ⛅️️
© 1997-2024 by Cumuli, Inc. All Rights Reserved.
https://www.thriftyfun.com/tf23119031.tip.html