ThriftyFun Logo
Home   Find   Ask   Share   Answer   Join   Index   Login  
 
 User Login:  Username:    Password:      Forgot It?  | Join ThriftyFun!

 - Beauty
 - Budget and Finance
 - Cleaning
 - Consumer Advice
 - Craft Projects
 - Craft Tips
 - Food Tips
 - Garage Sales
 - Gardening
 - Gifts
 - Green Living
 - Home Improvement
 - Organizing
 - Parenting
 - Parties
 - Pest Control
 - Pets
 - Product Reviews
 - Recipes
 - Repair
 - Weddings for Less

RSS Feed
About Us
Media
Advertising
Contact Us
Privacy Statement
Disclaimer

Craft Project: Pin Pal Pincushion

1x1
Date: 04/02/2008 Topics: Craft Projects > Gifts | Photos > Crafts  
1x1
Post Feedback | Get Responses | Bookmark | Link | Print | Print (With Feedback) | Rate: Thumbs Up Thumbs Down | Bookmark and Share
Pin Pal Pincushion
Pin Pal Pincushion
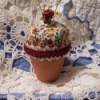
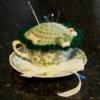
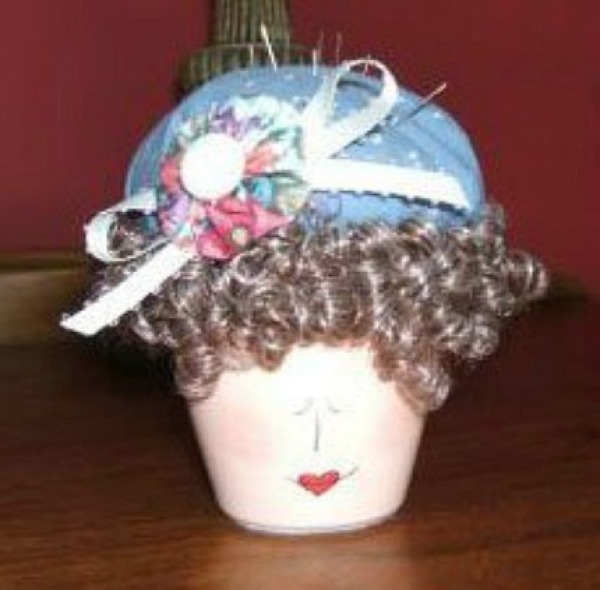
Place this pincushion miss on your dresser for a pin keeper or top her off with ornamental hat pins. These would be great to make for Mother's Day or birthdays.

Approximate Time 30 minutes

Supplies:

  • 2 1/2 inch clay pot
  • flesh tone acrylic paint
  • red acrylic paint
  • small paintbrush
  • 6 inch square of cotton print fabric
  • 2 inch square of cotton print fabric
  • textured doll hair or decorative fringe
  • 1/4 inch pastel satin ribbon
  • 3/8 inch button
  • polyester fiberfill
  • fine-tip black permanent marker
  • sewing needle
  • matching threads
  • glue gun and glue sticks
  • scissors
  • ruler
  • pencil

Instructions:

Basecoat the clay pot flesh tone. Let dry. Lightly draw face with pencil on center of pot as shown in photo. Paint the heart mouth red. Use the pen to draw face details. Use some blush and a cotton swab to make her some rosy cheeks. For the hair, apply glue around pot rim. Press hair or fringe over the glue covering the entire rim; trim excess if necessary. To make the pincushion hat, cut a 6 inch fabric circle. Hand sew a gathering stitch 1/8 inch from the edge. Pull threads to gather, stuffing with fiberfill as you go; knot thread. Apply glue around inside of pot rim. Place the "hat" in the pot with the gathered side facing down. To make the yo-yo flower, cut a 2 inch fabric circle. Hand sew a gathering stitch around the edge; pull threads to gather at center and knot. Flatten center. Sew or glue the button to the center of the yo-yo. Tie a ribbon bow and glue it to the back of the flower yo-yo; trim ribbon ends if necessary. Glue the flower to the hat.

By Mom of 1 from Wilkesboro, NC

(1x1 graphic )
Previous: My Frugal Life: A Love Affair With Used Goods ThriftyFun Next: Raised Garden Bed
(1x1 graphic )
1x1
1x1
 Feedback
1x1
1x1
1x1

By jkl (29) Profile Blog! Contact
Hi, She is so cute. Possibilities are endless. I was thinking for the hair you could use a steel curly scrubber(oops forgot the name). You could do a cat face, or dog, baby & bonnet! Thanks for sharing.

Posted on 08/03/2009 | Report Spam or Abuse

By nanaverm (59) Profile Contact
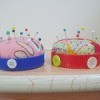
This is so cute! It would be great as a purple hat with red flower for Red Hat Society ladies. Have to try it! Thanks.

Posted on 04/02/2008 | Report Spam or Abuse

1x1
1x1
 Post Feedback:
1x1
1x1
1x1

Login using the form on the top of the page to post feedback (if you are a registered user). If you have not yet registered, click here to do so. It's FREE!.

1x1
(1x1 graphic )

© 1997-2009 ThriftyFun.com - Design by Cumuli Design
Disclaimer: ThriftyFun.com cannot accept any responsibility for any injury or damage that you may cause to yourself, others, or property when following any advice given on this site. Read the full disclaimer. If you find any information on ThriftyFun.com or in our newsletters that is either erroneous and/or potentially harmful to others, please Contact Us, immediately.