Does anyone know what the best way to repair dry wall after removing paneling in a kitchen. It goes half way up the wall and there is wallpaper on top. I wanted to remove all of that and smooth the walls to paint.
Add your voice! Click below to answer. ThriftyFun is powered by your wisdom!
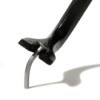
Assuming the drywall is in one piece with no breakage, these are the steps I suggest (been there done that!) I'm no pro but working alongside my husband when remodeling and adding on to our home, this is how we prepped drywall for painting. We used spackling compound, which is like plaster- (either premixed or dry, but we usually mixed our own so it wouldn't go to waste). With a putty knife or scraper, fill in the nail holes. If there are large areas to repair, I would suggest using a "mesh" screen specifically made for larger repairs so as to give the plastered area more support and prevent cracking later on. This is put over the spackled area, then a thin layer of spackling compound is applied over the screen.
This is what my girlfriend and her husband, who are drywall finishers recommend.
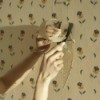
Depending upon the size of the area, go to your local hardware store or similar store, purchase some dry wall mud and a large putty knife. If needed, mix the mud with water according to directions. Put enough mud on the knife to smooth across it leaving a good foundation. Scrape the knife extra back into your mud "bucket". Take the knife over it again going through the center first, then the outer edges using equal pressure.
Hope this helps.
Janet in Georgia
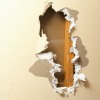
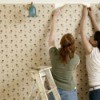
When we removed the panelling from our living room, we had no choice but to put up all new sheetrock. The panelling was apparently glued to the walls and when we pulled it of it ripped the sheet rock pretty badly.
Add your voice! Click below to answer. ThriftyFun is powered by your wisdom!