ThriftyFun Logo
Home   Find   Ask   Share   Answer   Join   Index   Login  
 
 User Login:  Username:    Password:      Forgot It?  | Join ThriftyFun!

 - Beauty
 - Budget and Finance
 - Cleaning
 - Consumer Advice
 - Craft Projects
 - Craft Tips
 - Food Tips
 - Garage Sales
 - Gardening
 - Gifts
 - Green Living
 - Home Improvement
 - Organizing
 - Parenting
 - Parties
 - Pest Control
 - Pets
 - Product Reviews
 - Recipes
 - Repair
 - Weddings for Less

RSS Feed
About Us
Media
Advertising
Contact Us
Privacy Statement
Disclaimer

Craft Project: Jar Lid Pincushion

1x1
Date: 07/28/2009 Topics: Craft Projects > Recycled > Other | Photos > Crafts  
1x1
Post Feedback | Get Responses | Bookmark | Link | Print | Print (With Feedback) | Rate: Thumbs Up Thumbs Down | Bookmark and Share
Craft Project: Jar Lid Pincushion
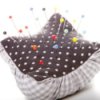
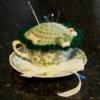
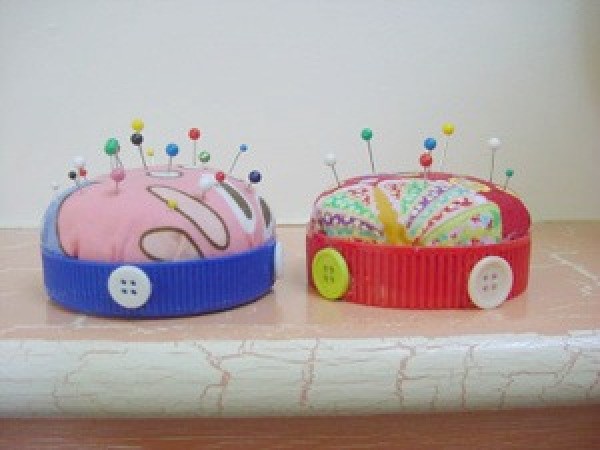
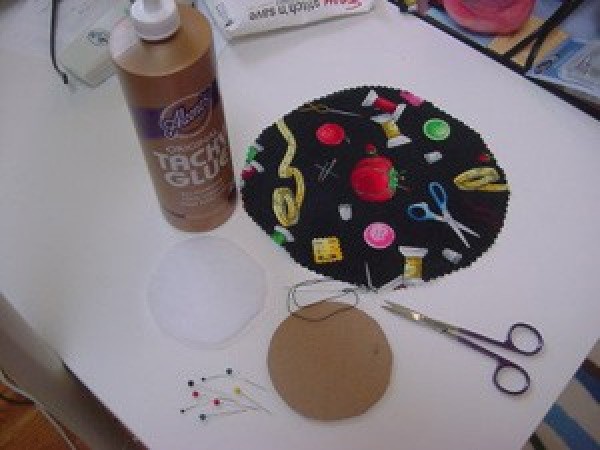
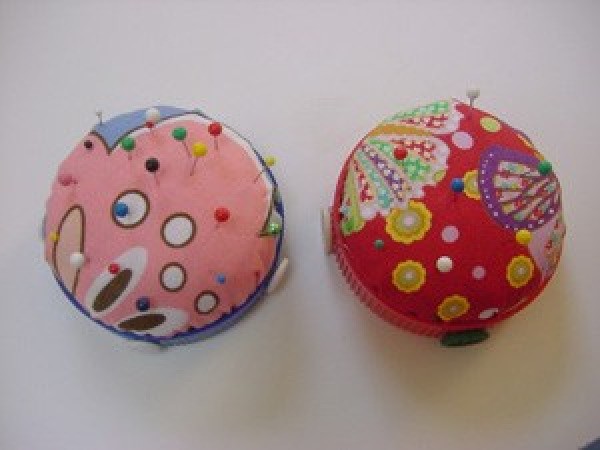
Handy little pincushions made with quilt batting, fabric and a jar lid or small metal can.

Approximate Time: 45-60 minutes

Supplies:

  • plastic jar lid or small metal can
  • cardboard
  • needle
  • glue
  • fabric circle
  • quilt batting
  • thread

Instructions:

  1. Measure the width of your lid/can.

  2. Cut a cardboard circle just a bit smaller than this measurement. For example, if your lid measures 4 inches, cut a cardboard circle to 3 3/4 inches inches so the cardboard will fit inside the lid.

  3. Cut 6-8 layers of quilt batting using your cardboard circle as a template.

  4. Cut a fabric circle two inches larger than your cardboard shape (4 inch cardboard means a 6 inch circle of fabric). Try to pick a fabric that coordinates well with the color of your lid.

  5. Thread your needle with some strong thread. Use a length long enough to do a running stitch around the outer edge of the fabric circle. Be sure to knot your needle before you start so the thread doesn't pull through.

  6. After stitching all around the circle, spread the fabric flat and insert the 6-8 layers of quilt batting and lastly the cardboard circle. Be sure the wrong side of the fabric is facing you when you insert the layers.

  7. Hold the layers and cardboard in the center of the fabric circle with fingers of one hand. With the other hand, pull the thread taut encircling the batting/cardboard. (Check the top of the fabric and be sure you like the print design. If something you planned to have on the top has shifted, move the layers a little to one side or the other to adjust.)

  8. Use the needle and thread to do a couple whip stitches on the backside to hold the fabric circle closed.

  9. Clip the thread once the circle is secured.

  10. Place glue in the bottom and sides of the lid. I use a tacky craft glue for this. Place the padded fabric circle into the lid. Use a pointy object (like a chopstick) to push the puffy fabric circle into place.

  11. Allow the glue to dry for a few hours and insert your pins.
Enjoy.

Make one for your sewing table, one for your cutting table and one to use wherever you sit to do your hand sewing projects.

For this project, I like to use peanut butter or mayonnaise jar lids.

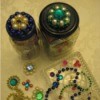
When using cans, tuna or cat food cans work well. The outside edges of the lid can be decorated with buttons (as shown), beads, paint, etc.

By Pam from McMinnville, TN

(1x1 graphic )
Previous: Store More With Freezer Bags ThriftyFun Next: ThriftyFun Recipes - July 28, 2009
(1x1 graphic )
1x1
1x1
 Feedback
1x1
1x1
1x1

By bdon1 (18) Profile Contact
Pam, just learning to sew-at 68yrs. I never thought to use a plastic lid to make a pin cushion. I would have kept on pinching my fingers, picking the pins out of it's plastic box. Thanks, Joanie

Posted on 08/04/2009 | Report Spam or Abuse

By jkl (29) Profile Blog! Contact
So Cute! I love looking at other people's ideas. I was thinking of using a tin which you could cover with same or complimentary fabric to the top. Great.

Posted on 08/03/2009 | Report Spam or Abuse

1x1
1x1
 Post Feedback:
1x1
1x1
1x1

Login using the form on the top of the page to post feedback (if you are a registered user). If you have not yet registered, click here to do so. It's FREE!.

1x1
(1x1 graphic )

© 1997-2009 ThriftyFun.com - Design by Cumuli Design
Disclaimer: ThriftyFun.com cannot accept any responsibility for any injury or damage that you may cause to yourself, others, or property when following any advice given on this site. Read the full disclaimer. If you find any information on ThriftyFun.com or in our newsletters that is either erroneous and/or potentially harmful to others, please Contact Us, immediately.