EllenB
Gold Post Medal for All Time! 858 Posts Most herbs dry easily, and if properly preserved, will retain their flavor and aroma long enough to carry you into the next growing season. As with a lot of gardening, timing is everything. Here are some tips for gathering, drying and keeping them fresh while in storage.
Tips for Gathering Herbs
- Don't harvest your perennial herbs to heavily in their first year. Give them time to settle in. Once established, gardeners in warmer zones can harvest up to 2/3 of the foliage at a time-once in the spring and again in the summer. Gardeners in cold climates should only take 1/3 of the foliage each time and stop harvesting 5-6 weeks before the first expected fall frost so roots have time to store food for the winter.
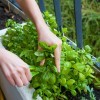
- Harvest your herbs early in the morning, just after the dew has dried, but before the sun warms them up too much. This is when the volatile oils are at their peak.
- Once harvested, remove insects and any damaged leaves. To keep the volatile oils from dissipating, try to keep herbs out of strong light while preparing them for storage.
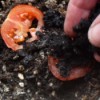
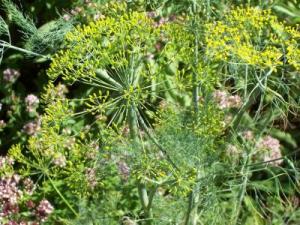
- Culinary herbs will have the best flavor if harvested just before their buds have opened (when harvesting leaves), as soon as the buds have fully opened (when harvesting flowers), after the seeds have turned from green to brown (when harvesting seeds), or at the end of the growing season (when harvesting roots). Stems can be harvested as needed early in the morning on a dry day.
- To cut stems cleanly and avoid damaging the plant, always use a sharp shears or scissors. Select only the highest quality foliage and blossoms when harvesting.
- Catch ripe seeds as they fall by tying a piece of cheesecloth or an old nylon stocking around the seed heads. Avoid plastic bags. They can trap condensed moisture which can lead to mold.
Tips for Drying Herbs
- The best place for drying herbs is someplace dry and dark, with good ventilation. Attics, closets, the tops of appliances like hot water heaters or refrigerators, or inside a gas oven (with a pilot light) are all ideal locations. Some people also use the interior of their cars while parked in the shade.
- If necessary, you can speed up the drying process by using fans or dehumidifiers. You can also use your oven (set on the lowest temperature setting possible) but keep in mind that herbs will dry very quickly, and should be monitored closely.
- Herbs can also be dried in the microwave oven. Sandwich them between paper towels and place a cup of water next to them. Set the microwave to run for 1 minute on the lowest setting. After one minute, check their progress. If you see sparks or if the leaves or stems are starting to turn black, try drying them for shorter increments of time.
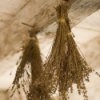
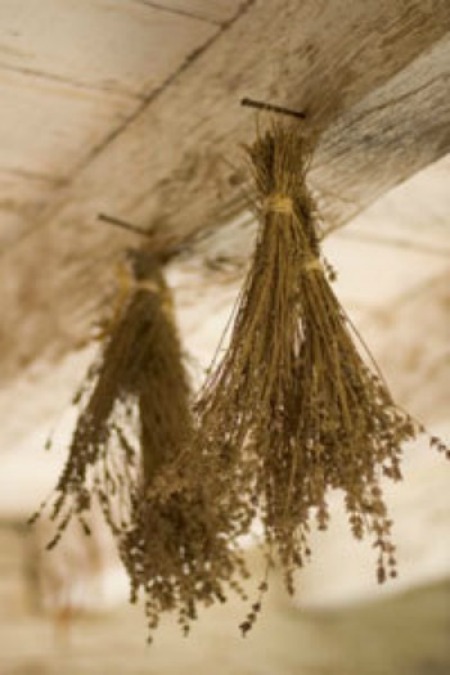
- Long-stemmed herbs (lavender, mint, yarrow) are easiest to dry in small bunches tied with a string or small rubber band. Hang bunches from hangers or nails to dry them. If your drying herbs in area prone to dust (like a barn or attic), cover the bunches with small paper bags. If you prefer not to hang them, separate the stems and lay them across drying racks, or spread them out on cookie sheets.
- Seed heads can be blanched in boiling water to remove any unseen insects before being hung up to dry. To dry them, cover the heads with paper bags or cheesecloth to catch the seeds as they fall.
- Leaves and flowers can be left on their stems to dry. Roots should be given a quick cleaning with a stiff bristled brush and cut into 1 inch slices. Lay the slices in a single layer on racks or trays to dry.
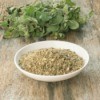
- Flowers and leaves will turn crispy when they are finished drying. Root slices are finished with they turn hard and woody.
Tips for Storing Herbs
- Decorative herbs can be secured with ribbon and hung in bunches around the kitchen or elsewhere in the home.
- Herbs used for culinary purposes should be placed in airtight glass or metal containers or in plastic bags. Keep them cool, dry, and away from bright light.
- Herbs can also be stored in the freezer. Harvest them at their peak, clean them, and place them (either chopped up or whole) into airtight containers or freezer bags. When you're ready to use them, simply break off as much as you need and return the rest to the freezer.
- Another easy and convenient method for freezing herbs (and especially good for entertaining) is to fill ice cube trays with water and chopped herbs. For example, add cubes of lemon verbena to a pitcher of lemon aid. For the holidays, try freezing fun shaped cookie cutters with chopped herbs and water You can wrap the cookie cutters with foil to keep in the water.
- Many herbs tend to look alike once they are frozen or dried. You'll thank yourself later if you take the time to label your containers carefully before storage.
About The Author: Ellen Brown is an environmental writer and photographer and the owner of Sustainable Media, an environmental media company that specializes in helping businesses and organizations promote eco-friendly products and services.
Add your voice! Click below to comment. ThriftyFun is powered by your wisdom!
By murfaeb69 AT yahoo.com (Guest Post)
October 3, 20080 found this helpful
Thanks for the information.

October 3, 20080 found this helpful
I've been drying herbs for about 5 years now. It is exciting using the herbs and sharing them with friends and family. I've tried different ways to dry them and now I spread them out on brown paper bags topped with a piece of paper towel , if the herbs are really wet at first I will turn a fan on for a few hours just to get that extra moisture off them. Once they have dried a week or two I can stack the brown bags on top of each other, I've also used paper plates when I have a small amount of flowers or leaves I've plucked. Our local farm market uses brown paper bags so I always have several and I use them over and over through out the season. I also write the name of the herb on the paper towel because even though I generally can tell which herbs they are, they somtimes look like other types once they've dried and I get fooled, especially when you have two different types of an herb such as Thyme and Lemon Thyme or sweet basil and Thai basil or bush basil and so on. Through the season I clip the flowers off the herbs to keep them growing more leaves, I do leave some so the bees have something to make their honey with.
By Ysteb (Guest Post)
October 3, 20080 found this helpful
I am a new gardener with spotty results so I really want to preserve what little we've grown. THANK YOU!
By (Guest Post)
October 4, 20080 found this helpful
Excellent article. I am just beginning to grow herbs and learned a lot. Thanks.
October 5, 20080 found this helpful
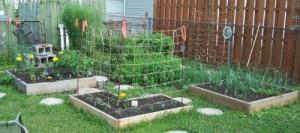
My garden is only about 6' x8' and I have 3, 4'x4' raised beds. you can grow a lot of herbs in a small area.

Add your voice! Click below to comment. ThriftyFun is powered by your wisdom!