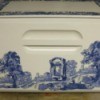
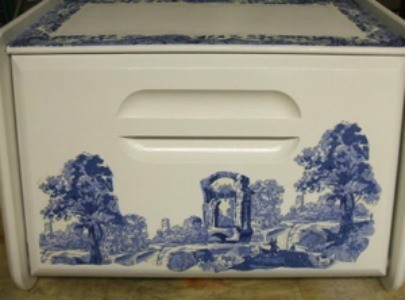
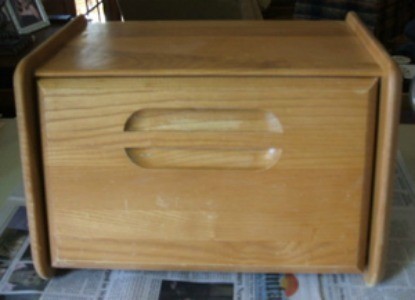
My sister-in-law purchased a plain, wooden bread box at a second-hand store for $3.00. She knows I'm "crafty" and asked if I would paint and decorate the bread box with some type of blue and white design. After priming and painting the entire bread box white, I used a napkin applique technique to embellish it. I am happy to share the end result.
Approximate Time: About 3 hours plus drying time
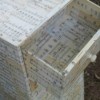
If necessary, wipe down bread box with a damp cloth before beginning and allow to dry.
Lightly sand the bread box and wipe with a clean, dry rag or paper towel to remove any dust.
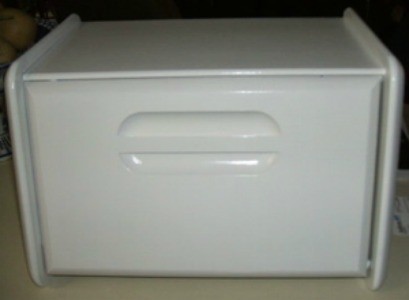
Apply primer to bread box and allow to dry overnight.
Lightly sand again, if needed.
Paint bread box white and allow to dry overnight.
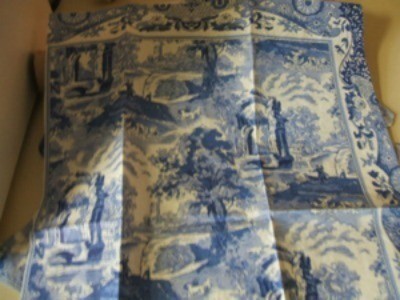
Separate the layers of the napkins so that you end up with the printed single layer only. Cut out your desired designs from the napkins. It is easier to work with small pieces, as the delicate napkins tear easily.
Apply a thin coat of the decoupage glue to the bread box where you want to adhere your design.
Place napkin piece over glued area. Gently smooth out design and apply a thin coat of decoupage glue over top of the design, being careful not to tear the napkin.
Note: Don't worry about getting the design completely smooth, it will not affect the end result.
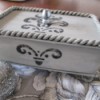
Once you have appliqued the desired areas of the box, allow the glue to dry.
Apply a coat of clear gloss and let dry completely.
By Rachel's Mom from Wilkesboro, NC
Add your voice! Click below to comment. ThriftyFun is powered by your wisdom!
That's beautiful, I've never seen anything like it!!
Its gorgeous, effective and more importantly one of a kind!
Awesome job. I forgot about the"napkin"appliqued technique. It's nearly impossible to find the"old"dip in warm water appliques anymore. Thanks for sharing.
This is wonderful!
I looked at it and was thrilled, and then thought, wow! This would also make a wonderful organizer for papers, small boxes of items etc inside. It could also be used as a Secretary desk with the bills [yuck], stamps, paper etc inside.
I love this. Your Sister-in-law was right.
Add your voice! Click below to comment. ThriftyFun is powered by your wisdom!