 Making handmade plantable paper is a beautiful way to share the beauty and bounty of your flower and vegetable garden with fellow gardeners, while recycling paper into garden compost. You can modify the following directions to create inexpensive ornaments, invitations and note cards-or whatever your creative imagination can dream up!
This recipe assumes your paper will end up planted, and avoids the use of chemicals, inks and dyes that can be harmful to growing plants and the environment. Different papers will produce different effects so have fun experimenting with colors, textures and weight.
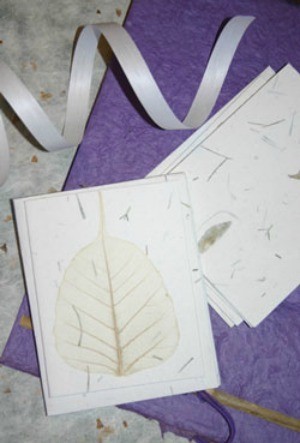
For great gifts, use cookie cutters or stencils to trace holiday shapes. Cut them out and attach a ribbon for thoughtful gifts that last beyond the holiday season. Other uses for home made paper include scrapbooks, stationary and note cards, journal or photo album covers, lampshades, etc.
Tear off bits of paper containing seed and plant directly in the ground-the paper will compost naturally. To pre-sprout the seeds, place dampened paper into a plastic bag and check periodically that paper remains moist. Keep the plastic bag at the appropriate temperature until seeds sprout and transplant them into pots or directly into the garden.
Here are the questions asked by community members. Read on to see the answers provided by the ThriftyFun community.
I've been making paper at home for a few weeks and recently I stumbled upon your article, How to Make Home Made Paper You Can Plant. I was hoping you might be able to help with a few problems I've had with this:
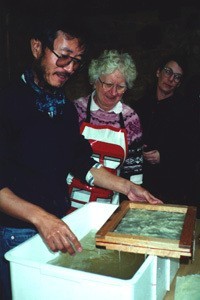
Chelsea - what are you using to make your paper in? If you have an old picture frame, staple a piece of window screen to fit and pour the paper pulp into it, that's what makes it flat.
The easiest way to make thin paper:
Use a large container to mix your paper pulp in & don't add too much pulp {I use Egyptian cotton linters in rubbermaid containers and mix it with a paint mixer attached to a drill or even my handheld blender} then put your frame {with the screening} down under the paper & water and lift straight up, if it's too thick just dump it back in & practice lifting, deciding how far you need to put the screen down into the water to get the amount of paper you want.
You can also make a quick easy screen by using nylon screening and a plastic embroidery hoop, the kind with the screw tightener.
To make the paper very stiff you can add laundry starch to the water but know that once the starch is in the paper it won't be reusable so only add the amount you need.
You can also pour a plaster "bat" {just some plaster any size you like} and dry the paper on it, it will absorb the water faster and make the paper smooth, put another on the top and let it dry. You can also carve pix into the "bat" after it hardens and then throw your paper on it & push into the lines with a thick towel and let it dry, it won't stick when you pull it out and you can make some beautiful pix to give as cards or frame and hang.
I use iron on embroidery transfers {I can't draw a lick!} and then use nails, knives, files, pins or whatever to carve into the lines and make my pix.
Deckled edges are beautiful if you take a fork or cake cutter and pull the edges of the wet paper, stringing them out. I also use cookie cutters and various other things to make my paper, just put them on the screen before dipping into the paper and remove the excess afterwards.
ThriftyFun is one of the longest running frugal living communities on the Internet. These are archives of older discussions.
How do you make plain plantable paper?
How do you make plain plantable paper?