Use recyclable #6 plastic containers to make your own Shrinky Dinks at home.
Approximate Time: 1 hour
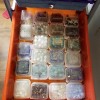
Be sure the plastic container has a triangle with a 6 in the middle. Otherwise the plastic is too thin and may burn or cause a fire.
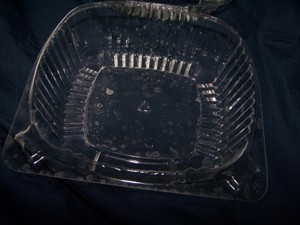
Cut off a flat piece from the plastic.
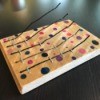
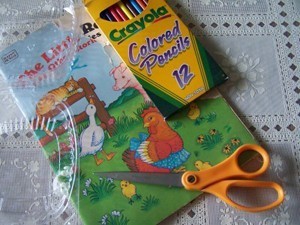
Using a permanent black marker draw a picture. It may be easier to trace a small one from a coloring book. You can write names too for charms.
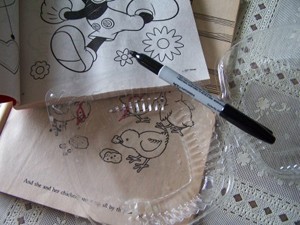
Color with colored pencils or markers. Have a child do this so they can get involved.
Cut the picture out using scissors.
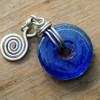
Use a nail or sharp object to make a hole if you'll be using it for a charm, a sun catcher or on a mobile.
Preheat oven to 350-375 degrees F.
Place the plastic pieces on aluminum foil and carefully place in the oven for 30 seconds to 1 minute.
The plastic will curl but flatten as it's finished.
Cool before handling.
It may shrink 75%. You may want to experiment to get the correct size you are looking for.
By Little Suzy from OH
Editor's Note: Make sure to supervise younger ones with the oven.

Add your voice! Click below to comment. ThriftyFun is powered by your wisdom!
Shrinky Dinking is one of my favorite things to do. I have a giant stack of plastic lids from my Chinese take out for this purpose. Now if only I had an oven to bake these in. This is such a fun craft to do and free for all the mommys on here with limited funds. Try it! The kids will love their customized tiny drawings, so awesome.
If you have plastic cups from fast food restaurants in the trash, they work as well ( quick tip so you don't have to search and search for #6 ). Great way to reduce your recyclable pileup.
Will you please give some better examples of what kind of plastic you are using? Will Soda bottles work? I don't get it yet.
Thanks!
This looks like so much fun!
Becca25, if you were a neighbor I'd tell you come on over right now and use my oven :-)
Rosepearl, the number being mentioned is a plastic rating number (#1 through #7). It's stamped on the bottom of plastic containers. The stamp is a triangle with the number inside the triangle.
The best thing to do is just check by holding it up to a light. The numbers are sometimes hard to see. They are clear plastic and have a triangle with a number in the center. I've noticed the #6 are getting harder to find. I think you can also buy the shrinkable paper in a craft store. Look in the quilting section. Or ask a clerk. They are always so helpful. I go to JoAnn's.
This is the very best tip I've seen! (& I've read them all!)
I thank you for taking the time to post it! I've been making shrinky-dinks for years, but I never knew I could get by without purchasing the "real" thing!
NUMBERS in triangles: The numbers are for identify which plastic can be recycled & which can't... Also, the recycling places need to keep different types of plastic separate from each other.
PRINTING Shrinky Dink Plastic: Here's a tip for all you shrinky-dink fans: You can put sheets of (real) shrinky drink plastic through your ink jet printer. (but NOT a laser printer or it will melt!) You either have to buy the type made for printing, OR you can simply sand a sheet of the regular shrink-dink opaque plastic with a VERY fine grit of sandpaper like 400 - Wet/Dry (the black stuff). After sanding, wash it off really well. I wipe it off with a tiny bit of rubbing alcohol on a paper towel or old cotton T-shirt rag, but you need to get all of the plastic sanding "dust" off of it before it goes through the printer. Me? I'd rather buy the type made for printing (even though it cost's twice as much) but if you can't find it, you can always try the sanding technique. If you buy it, there is a right & wrong side (for printing) simply lick your finger & touch the shrinky-dink plastic, if it sticks, it's the right side!
* You'll need to set your printer for printing the lightest color in "best quality" mode, or use your computer (in place of printer) to lighten the artwork. Your printer picture should end up looking "washed out" or very, very light... This is because the colors darken quite a bit after it shrinks so if you don't lighten your picture you'll end up with a picture that's way to dark.
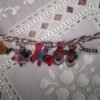
* One of the coolest things you can make with printable shrinky-dink plastic is charm bracelets for grandmas of all the grand kids & family.
NO OVEN NEEDED: Don't worry if you don't have an oven, the best thing to bake them in is a toaster oven! I bought my toaster oven at the thrift store (second hand) but they have them new for only $20 at Walmart...
HEAT GUN/BLOWDRYER: The second best thing to use if you have no oven is a heat gun or hot blowdryer... Simply hold your tiny cut-out piece down with a stick of some kind (a wood skewer or a knitting needle work fine) so you won't burn yourself. Now put your shrinky-dink on a piece of tin foil (for blow dryer) or something VERY heat-resistant if you're using a heat gun then hit it with the heat gun or blow dryer. It will first curl up, then when it un-curls it's done. Now, stop the heat. If it doesn't totally flatten, you may have to put a heavy glass baking pan or something flat on it while it's still a bit warm to make sure it totally flattens.
HOLE PUNCHER: A 1/4" hole-puncher from the dollar store works wonderfully instead of drilling or poking holes. These holes are neat & tidy... For very tiny holes use a 1/8" hole punch, but remember, these holes will shrink a BUNCH! So punch a hole much bigger than you think you'll need in the end!
* When using Shrinky-Dinks, keep in mind that the object will shrink to 1/3 it's original size and becomes 9 times thicker.
--> Using Styrofoam Trays for Shrinky dinks:
kidscrafts.suite101.com/
--> Making Luggage Tags with Shrinky dinks:
www.microsoft.com/
--> Shrinky-dink Q & A:
www.shrinkydinks.com/
--> Sanding your own Printable Shrinky dink Plastic:
inkstainswithroni.blogspot.com/
I've also posted a craft to make a shrinky dink charm bracelet but it's not been posted yet. Enjoy Shrinky Dinking.
I love this idea! I have done shrinky dinks before but it was with the certain type plastic you buy in the kits. I heard you can use the plastic that comes in bacon packs but its opack. This would make great key chain pulls for bookbacks just by punching a hole in it and I will love doing pirates for my grandsons bookbag, or dog tags would be so darn cute too! Love this post> you should win the best pic! I'll be doing a thumbs up for sure! thanks
Question for everyone: can you use #1 plastic, instead? I was checking my kitchen for recyclable plastics, and have exactly the same shape of container as is pictured in the tutorial, but it's not #6- same thickness, though! Also wondering if anyone's used peanut butter jars- they're #1's and #5's, but even thicker....anyone....?
Do not use jars. No glass jars. Sorry I thought when you said peanut butter jars that meant glass. The PB jar I have is a #1 also. Not correct to use. That seems too soft. It should be the rigid plastic containers. We got pie to go at Bob Evans. The was a #6 container.
The peanut butter jars I'm referring to are definitely plastic, up to and including the recycling number on the bottom! LOL I'd use the torch for anything glass! ;o)
I believe you can buy shrinkable plastic paper in sheets in a craft store. Maybe try that.
I'm sorry but I forgot in the instructions that you have to sand the surface lightly with fine sandpape to get the color to adhere. Otherwise it's too smooth and will not be able to color. An emery board that you file your fingernails with will work too.
Cyinda,
Thank you! I thought I was the only shinky dink nut around lol
I make s d fridge magnets for everyone for Christmas, family usually send me the professional pix they had taken of their kids during the year and I scan them in and then print on the s d special paper.
I use magnets on the back and then coat them with clear nail polish. I also do this with friends who have pets instead of kids. You can also make a small slit at the bottom of the pix befiore cooking and then make a crosswise piece with a slit and then they can stand up on a desk or shelf.
Even if you have to buy the paper it is an inexpensive gift and very personalized. I found that buying the paper from the s d website cheaper than I can find it at any craft store.
If you have a craft group you can also get together and buy in bulk.
Just remember that if a pix has a lot of black or real dark colors they won't come out as well as pix with more light colors in them.
You can make dice with the kids pix as well and they can make up a game or just play with them; they make great keychains, fan & shade pulls and you can customize them by going thru pix on the web and using them such as victorian pix or cameos depending on your decor.
Back in the late 60s, one of my distant cousins was working at Kentucky Fried Chicken and he and his co-workers found out they could put the lids from small containers in the oven and they'd shrink into a hard medallion of plastic, with the picture of the Colonel. A few years later, everyone was doing Shrinky-Dinks.
i dont understand! it doesnt work! I used number 6 plastic and it just shrivelled up but didnt straighten up again! so sad, took so long decorating them :'(
Can i use number 5 plastic? Because the number 6 plastics i hav are the kinds which are hard to cut...
Add your voice! Click below to comment. ThriftyFun is powered by your wisdom!