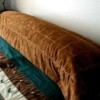
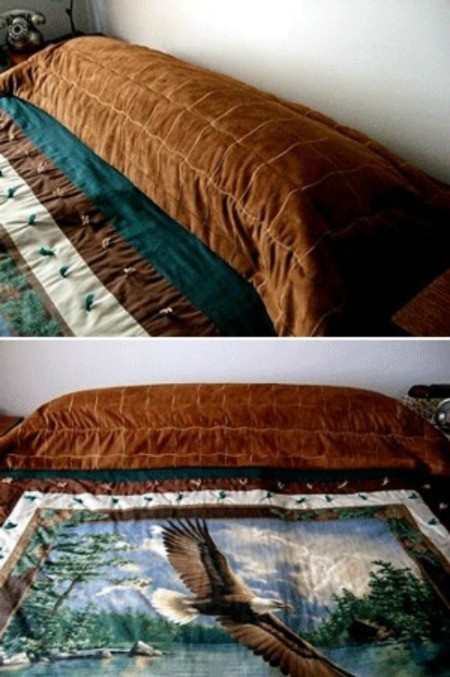
This is a pillow topper that I created to replace the typical sham. I just place it over my pillows in the morning. This is much easier and time saving than having to put on shams and it adds to the overall beauty of my bedroom.
Approximate Time: 5 Hours
Supplies:
- sewing machine
- tread to match fabric
- fabric of your choice
- batting
Instructions:
- What will be needed is a piece of material long enough to reach to both sides of the bed and wide enough to cover the pillows adequately. You will need to double the width as you will be sewing batting into the center. I used material with a pattern that made it easy to create a quilted look. My mattress measures 64 inches wide. I added 8 inches to that so my pillow topper would hang some over the sides of the bed. My pillows measure 16 inches wide. I added 8 inches in order for the topper to completely cover them. Then you will will need an extra 1 inch to fold on each side to avoid fraying when sewing the pieces together, so my fabric measured 74 inches long by 42 inches wide.
- I cut the material lengthwise in half. Then folded the material inside about 1 inch on all 4 sides. I sewed 3 sides together on the outside edges on the right side of the fabric and left one long side open to insert the batting on the inside. I measured the batting so it would be just shy of the inside edges and inserted it into the center. I then sewed the last opening.
- The last step was to sew around the pattern of the fabric to create a quilted look.
By Jean from Forest Lake, MN
Add your voice! Click below to comment. ThriftyFun is powered by your wisdom!

Athena
Bronze Feedback Medal for All Time! 215 Feedbacks July 8, 20080 found this helpful
That is so neat. Thanks for sharing it. Zig

July 8, 20080 found this helpful
Great Idea! I'm going to try this one for sure. Thanks!

July 8, 20080 found this helpful
Love it and I think I need to do that when I amke my new bedding (if I ever get the time!) I have seperate pillows just for the shams so I dont have to change them all of the time but I like this idea better!

janice
Bronze Request Medal for All Time! 53 Requests July 9, 20080 found this helpful
What a great idea. Love it. And love the Eagle blanket, where did you get that at? We collect anything/everything with Eagles on it. Thanks for sharing. I will be using this idea.
Add your voice! Click below to comment. ThriftyFun is powered by your wisdom!