First, grab some card board. Now it doesn't have to be fancy card board, just reasonably thick. You could even go to your pantry and rip up the box from the cookies you've been dying to polish off!
One side of your card you might want blank, (the inside if your using that cookie box!) Now if you've got card that's waxy on one side you'll want to use that side for this next bit.
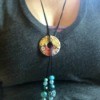
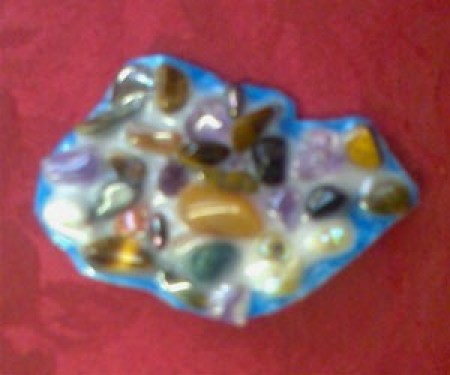
Second, grab some little things like beads or small, I mean tiny, shells or semi-precious gems.
You may have some lying around from previous craft projects, if not, get creative, go into the garden and find some pebbles from the soil or even raid the kitchen drawer and ball up bits of foil, don't worry about the healthy grilled chicken you had planned for tonight, it'll wait!
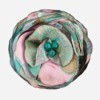
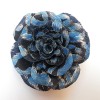
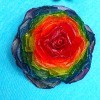
Third, and now for the fun part! Get some glue like Aquadhere (this is only available in Australia, but any clear drying glue will work) something that will set clear, and squeeze a dollop on the side of card you want as the seen side of your brooch. The dollop should be the size and shape you want your brooch to be. Sprinkle randomly or arrange with painstaking precision the little things you found before so they are set in the glue. (It's really up to you!)
Fourth, waiting, and waiting and waiting. If you used Aquadhere you might have to wait a couple of days for the glue to dry, depending on the thickness of it, and the temperature of where you are. When the glue has set cut around the edge of the glue and there will be the main body of your brooch.
Fifth, use clear nail polish to varnish the back of the brooch. Alternately you could use the glue you used, but then you you will have more drying time, or you could even use, say, varnish! For those who reckon it's a good idea why not try egg white?!
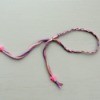
Sixth, and the last bit really! Put a bit more glue on the back of the brooch and attach either a safety pin or a brooch back you can buy from most places that sell craft supplies. Depending on what you used in your brooch you may want to varnish the front as well.
For a fun addition to the process, colouring the card with pencils and metallic pens can be really quite eye catching.
Please, above all, enjoy!
By Banshee from Tasmania, Australia
Add your voice! Click below to comment. ThriftyFun is powered by your wisdom!
Dear Banshee, Thanks for the great idea. I am going to try it today, however I will use Craft Smart Tacky Craft Glue as this dries clear and dries quite quickly. You can get it at Spotlight.
INTERESTING! Too bad I don't wear my suit jackets
much anymore. Perhaps this will inspire me to do it on occasion to church and out with a friend! Thank you. Your's is LOVELY!! I can see how this could also be used for earrings, perhaps, if made with light weight beads on, say, styrofoam strips and finished on both sides?
Now this is cool, plus it gave me scores of new ideas! Thanks for posting and for the articulate & humorus manner in the way you described how to make it :)
dear downunderchick,
i didn't know how else to respond to your lovely letter. thanks for the tip on the glue!! to the other two people that sent feedback, thankyou, it is very encouraging <:o)
to anybody else reading this, have fun!!!! <:o)
Add your voice! Click below to comment. ThriftyFun is powered by your wisdom!