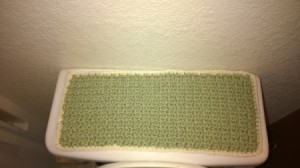
 I have been taking out the black and red from the bathroom and replacing it with accessories in soft green and cream. The first step was making a toilet lid cover.
Total Time: 5 hours
Supplies:
- 2 oz soft green yarn, doubled
- 1 oz cream yarn, single
- size K hook
- size J hook
- scissors
- 1 small paint brush
- shellac
- 1 oz green ceramic paint
- 1 oz cream ceramic paint
Steps:
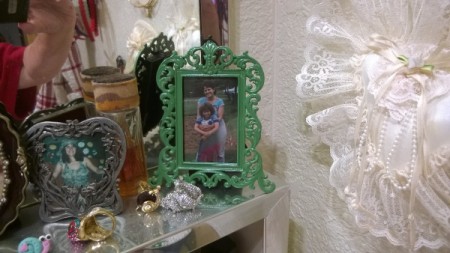
- I have the before and after shots for the little things I repainted. Most were red and black before. But I did them after the crocheting.
- I crocheted 20 and measured it to make sure it was the right size. My stitch was linen, which is chain 1, skip 1, make a single crochet in the next chain.
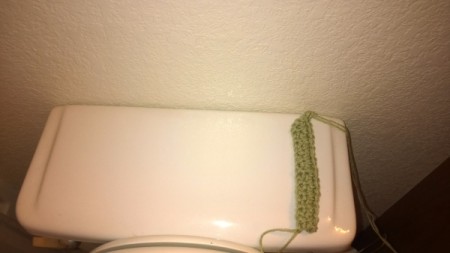
- Continue this step till your have the length you want. If you want a border like I had, just use the single strand and crochet a single in each stitch on the end and up the edges.

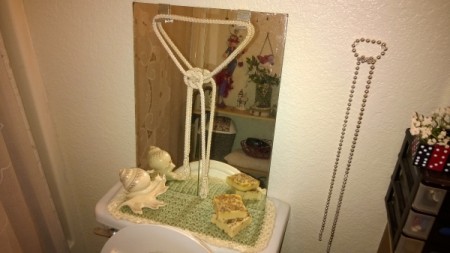
- Work in your tails and you are done. I sat my old medicine cabinet mirrors on the back and hung a cream colored faux pearl necklace on it. Then I found some pretty soaps and a cream snail. I think it really looks nice.

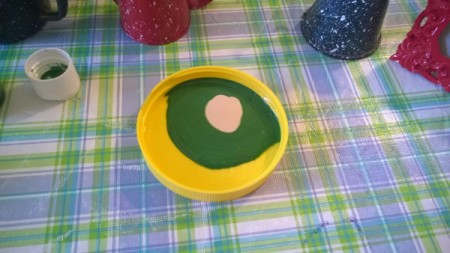
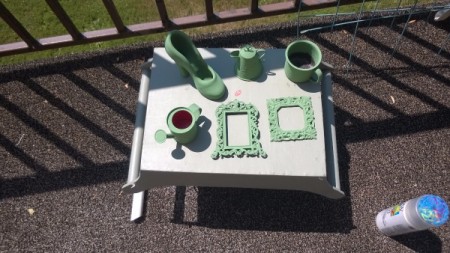
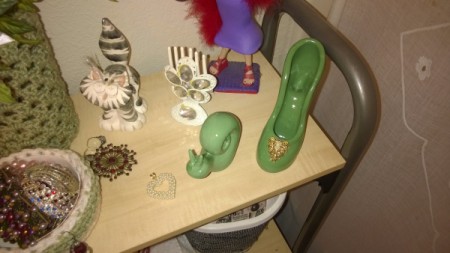
- I gathered some little frames, snails, shoes, and tins I had that were in need of new paint. They were all going to be painted a soft green that I had to create on my own, mixing deep olive green with cream.
- Once the paint was mixed, I put the first coat on and let it set overnight. You don't have to let it sit that long, but I was ready for bed.
- Then the second coat goes on. If you need to, put on a third coat. Your work will have a dull finish. Then spray it with shellac and let it dry. I let mine dry about 1 hour. I embellished the big shoe with a pretty button and set them up where they were before. Adding some pretty faux flowers helps, too. N-JOY!
Add your voice! Click below to comment. ThriftyFun is powered by your wisdom!