social

Making a 'My Tooth' Pillow

January 12, 2015

tooth pillow front
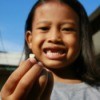
For my nieces', nephews', and close friends' 6th birthdays, I make small tooth pillows. I ask their favorite colors, and it's nearly always pink and purple for the girls, and red and/or blue for the boys.

Advertisement

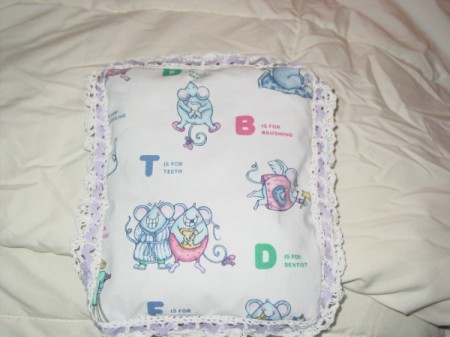
You will need two 7 1/2 X 9 inch pieces for the pillow. I use solid color fabric scraps and some printed dental smock fabric with pictures of teeth, and with words like, "brush, floss, etc.", which I found on eBay.

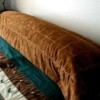
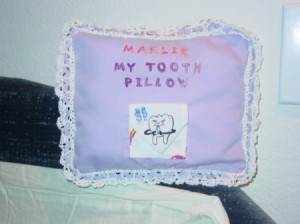
On the front, I embroider "My Tooth Pillow" and the name, using a large font (Hog Bold works) that I trace on the fabric. Over the years, I've also used fabric paint; you can get as creative as you like. I use the printed fabric on the back, but it could be a coordinating fabric. Mattress ticking is nice for boys.

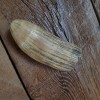
I make a small pocket with a snap closure for the tooth (and the money) and sew that to the front. The pocket is made from one 3 x 7 inch rectangle.

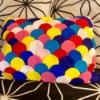
These pictures are of the latest one I did. I crocheted the lace edging and wove rickrack through the openings.

It makes it much easier for the tooth fairy to find those tiny teeth without rooting around under a big pillow, and so far, every child I've done one for has loved it.

Advertisement

Total Time: 2-3 hours, maybe less

Yield: Depends on how much scrap fabric you've got stashed.

Source: Very old Redbook magazine from over 40 years ago.

tooth pillow back
 

Supplies:

  • 1 3x7 inch fabric scrap, old dress shirts of my husband's ($0)
  • 2 7 1/2 x 9 inch fabric scraps - use what you have ($0)
  • 1 yd rick rack- for this last one, I used crochet thread and rick rack I'd inherited from a late aunt's stash of sewing supplies, which made it special for her great-great niece (my great-niece). (0-$5)
  • 1 yd of lace or ruffles, you could do binding or piping, too, if it's for a boy and you want it to be less frilly
  • 4-5 oz fiber fill for stuffing, very little will be needed (0-$3)

Steps:

  1. For pocket, turn under 1/4 inch along both long edges and one short edge and press. With right sides facing, fold lengthwise in half and stitch across unpressed end, (1/4 inch seam), which will make a point. With wrong sides together, fold square end toward pointed end, 2 1/2 inches.
  2. Advertisement

  3. Embroider "My Tooth Pillow" and name on front, center, or put in the corner, whatever you like.
  4. Fold down flap of pocket and stitch pocket (around lower edge) to front of pillow, using Velcro or a small snap to hold the pocket shut.
  5. I put ruffles or lace around the edges and sew it all together, leaving an opening to stuff with fiber-fill, and then sew it closed.
  6. Add dollar signs to pocket, if you wish, using a Sharpie.
Comment Pin it! Was this helpful? 2
In These Pages
Categories
Crafts SewingDecember 15, 2016
Pages
More
🌻
Gardening
🐰
Easter Ideas!
🍀
St. Patrick's Ideas!
Facebook
Pinterest
YouTube
Instagram
Contests!
Newsletters
Ask a Question
Share a Post
Categories
Better LivingBudget & FinanceBusiness and LegalComputersConsumer AdviceCoronavirusCraftsEducationEntertainmentFood and RecipesHealth & BeautyHolidays and PartiesHome and GardenMake Your OwnOrganizingParentingPetsPhotosTravel and RecreationWeddings
Published by ThriftyFun.
Desktop Page | View Mobile
Disclaimer | Privacy Policy | Contact Us
Generated 2023-02-20 11:11:11 in 3 secs. ⛅️️
© 1997-2023 by Cumuli, Inc. All Rights Reserved.
https://www.thriftyfun.com/Making-a-My-Tooth-Pillow.html