lalala...
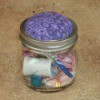
Gold Post Medal for All Time! 899 Posts Having a portable sewing kit is very helpful. This Mason jar sewing kit also has a built in pin cushion.
Approximate Time: 30 minutes
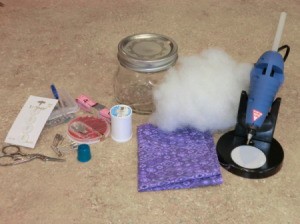
Supplies:
- Mason jar, small
- fabric, 6 in. square
- scissors
- pen
- hot glue gun
- fiber fill
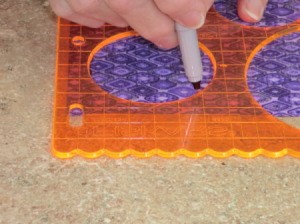
- scrapbooking circle template (optional)
- scrapbook paper (optional)
- sewing kit supplies
Instructions:
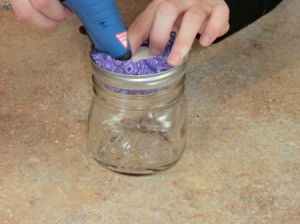
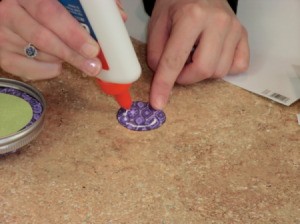
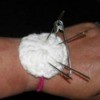
- Remove the Mason jar lid from the ring. Lay it on your fabric and draw a circle that is approximately 1 inch larger than the lid.
- Take a handful of fiber fill and put it between the lid and fabric.
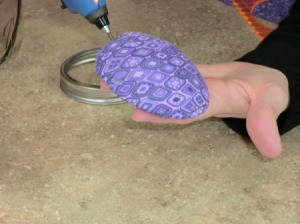
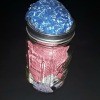
- Then put the lid with fiber fill and fabric back into the Mason jar ring so that it protrudes from the top. (This is going to be the pin cushion.)

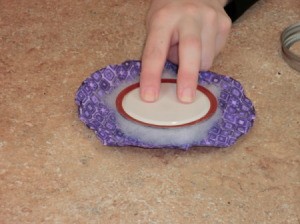
- Place the whole thing upside down onto the jar so that the underside of the lid is up. Gently pull on the fabric to get rid of any big puckers in the pin cushion.
- Using your glue gun, start folding the fabric towards the center of the lid and gluing it down.

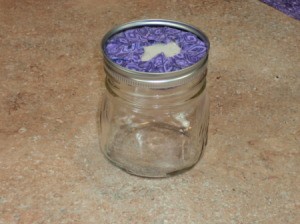
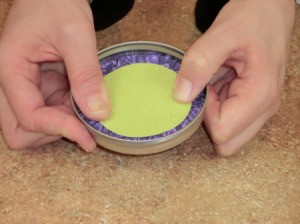
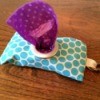
- Once all of the fabric has been glued down you can cut either a piece of coordinating scrapbook paper or some of the fabric into a circle, slightly smaller than the lid, to cover the glued edges. Glue this down to the lid. I have included photos of preparing a smaller fabric circle, as an option.
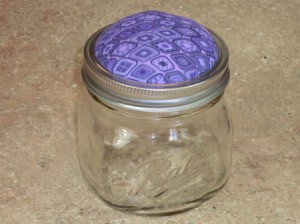
- Remove the pin cushion lid from the ring and place a few dots of glue around the edge, then push it back into the ring. I recommend screwing the lid onto the jar so that it adheres in the correct place while it is drying.
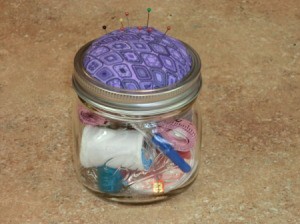
- Once your pin cushion is properly stuck to the ring, remove it from the jar and put your sewing kit items inside. You now have a super cute and handy sewing kit.
By lalala... from Port Orchard, WA
Add your voice! Click below to comment. ThriftyFun is powered by your wisdom!
Pixiedust7
Gold Feedback Medal for All Time! 679 Feedbacks April 29, 20120 found this helpful
I love this! It's a great idea & turns out so nicely! Thanks for this idea, and thanks also for the excellent step by step photos! You have my vote!
KIM HOGGAN
Bronze Post Medal for All Time! 114 Posts April 26, 20170 found this helpful
Nice and cute idea ! :)
March 18, 20180 found this helpful
Thank you for this! I can make them and give them as gifts. They turned out great. I didn't want to buy a bag of fill so I used an old pillow that I was going to replace.
It was so easy! Thanks again.
Add your voice! Click below to comment. ThriftyFun is powered by your wisdom!