Mary
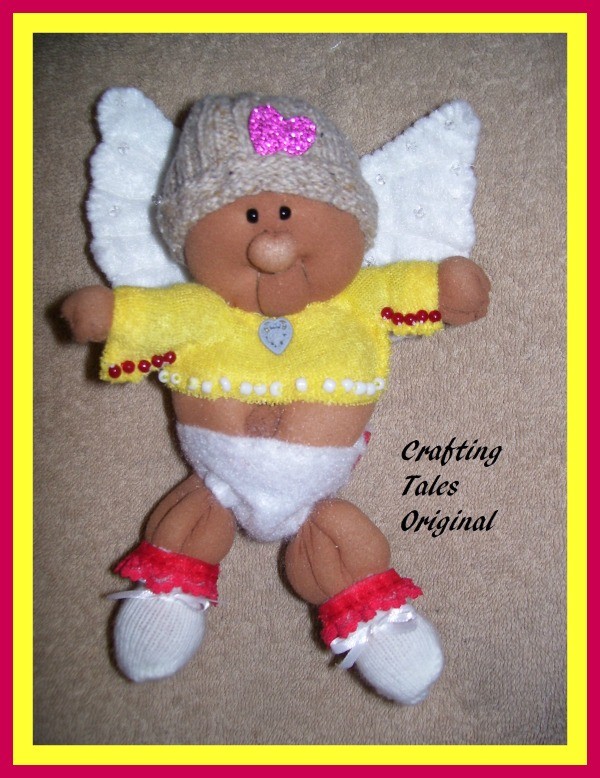
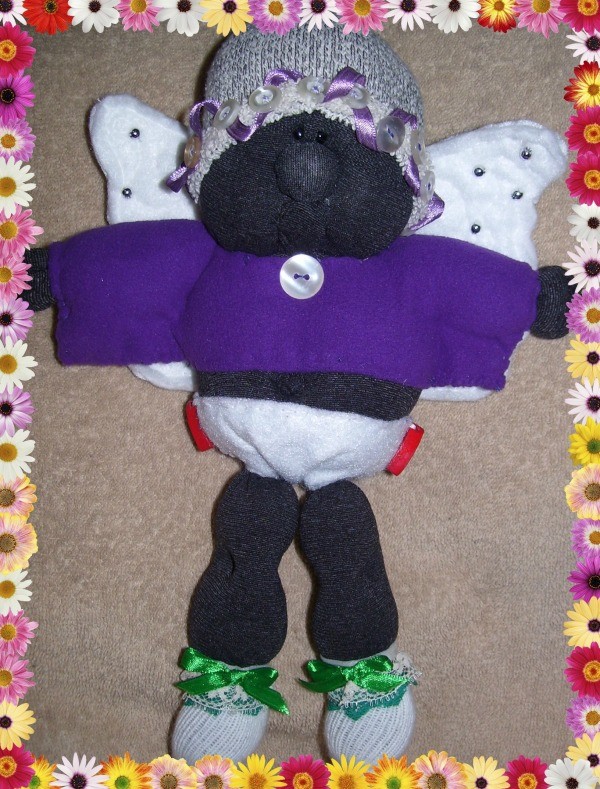
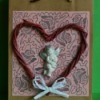
Bronze Craft Medal for All Time! 52 Crafts Recycle your pantyhose into an adorable Cupid for Valentine's Day. He will for sure bring a smile to someone's face. Pair him up with some chocolates or candy and you will have a great gift.
Approximate Time: Time will vary
Supplies:
- one pair of adult panty hose or tights
- stuffing
- material such as fleece
- white felt for diaper and wings
- beads and trims
- unwanted socks, sweaters, etc. for clothes
- needle and thread
Instructions:
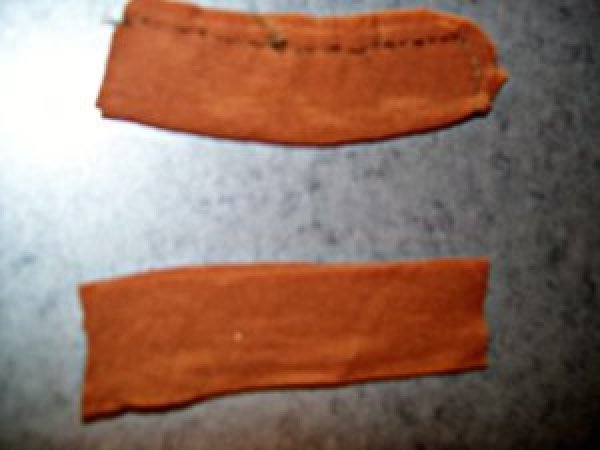
- Cut off legs of panty hose at the top, right below the thicker top area. Cut 4 inches off across top of legs. Reserve this piece.
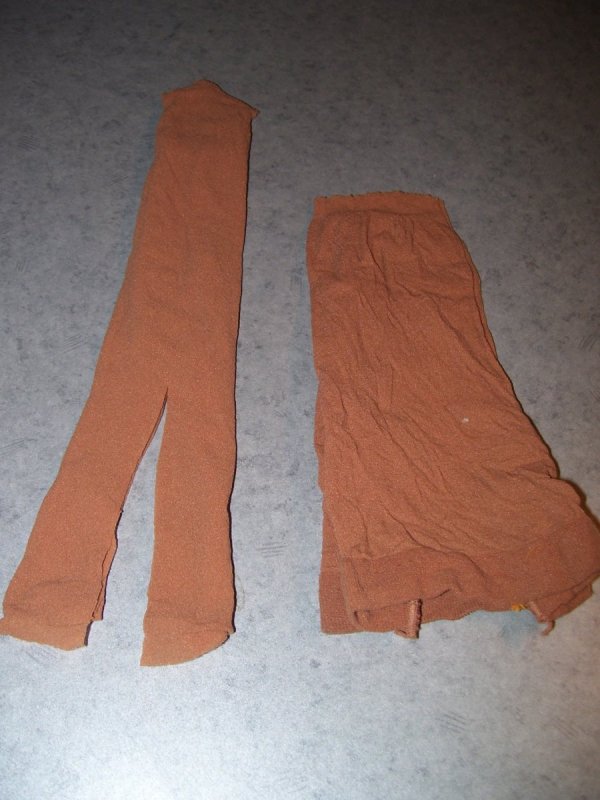
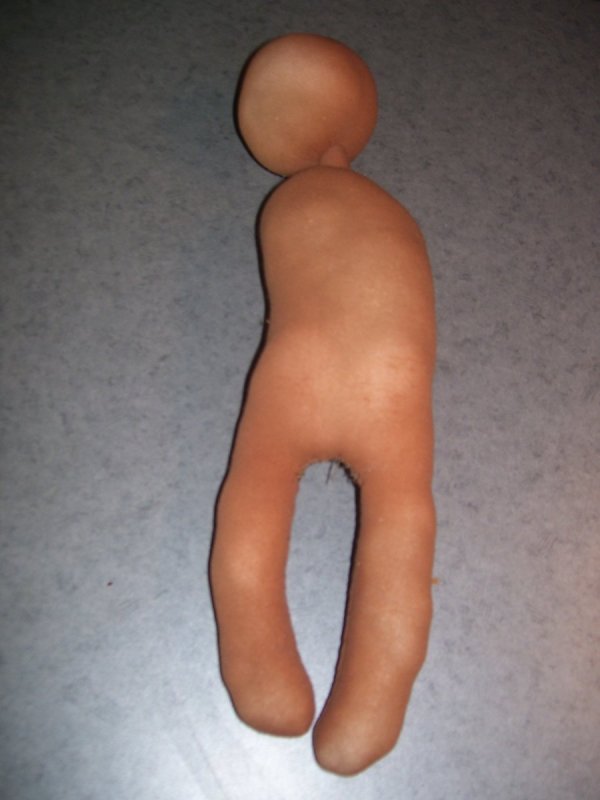
- Turn both legs inside out and slide one inside the other. Lay flat on table and cut up the center from the bottom, approximately 4 inches. This cut will form the legs.
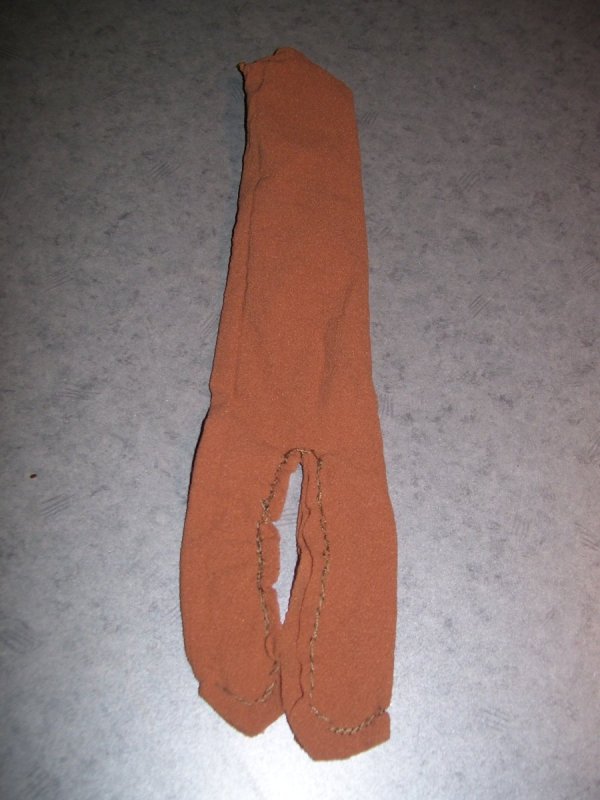
- Start with one leg and line up the edges of both layers so they are even. By sewing a double layer, it will make the hose more durable and less thin.
- Start at bottom and sew a rounded edge to form the foot. Continue to sew up the side until you get close to crotch area and stop. You will need to leave this area open in order to turn the hose right side out. Repeat for other leg. Trim off excess around tip of foot. Carefully turn right side out through the open crotch.
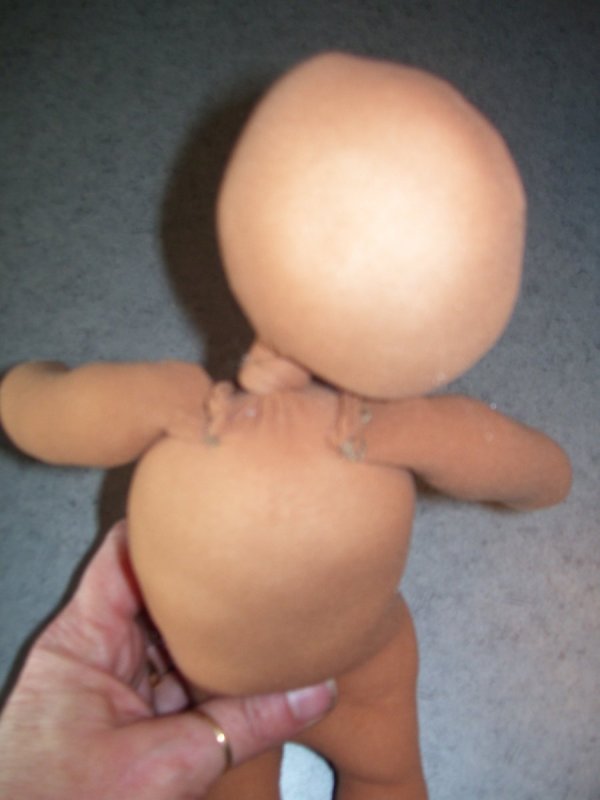
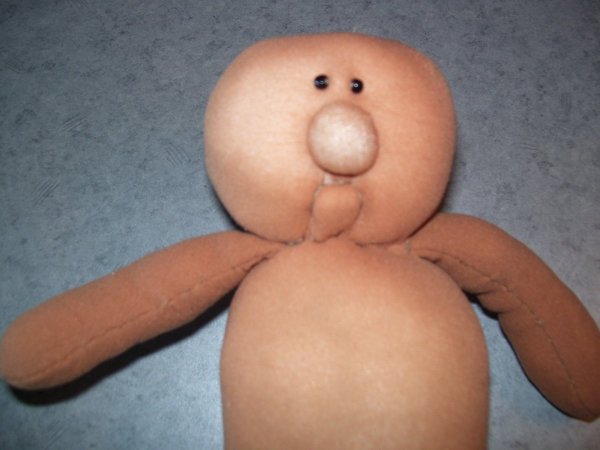
- Start inserting stuffing to form head. This will be approximately a little more than a handful size ball.
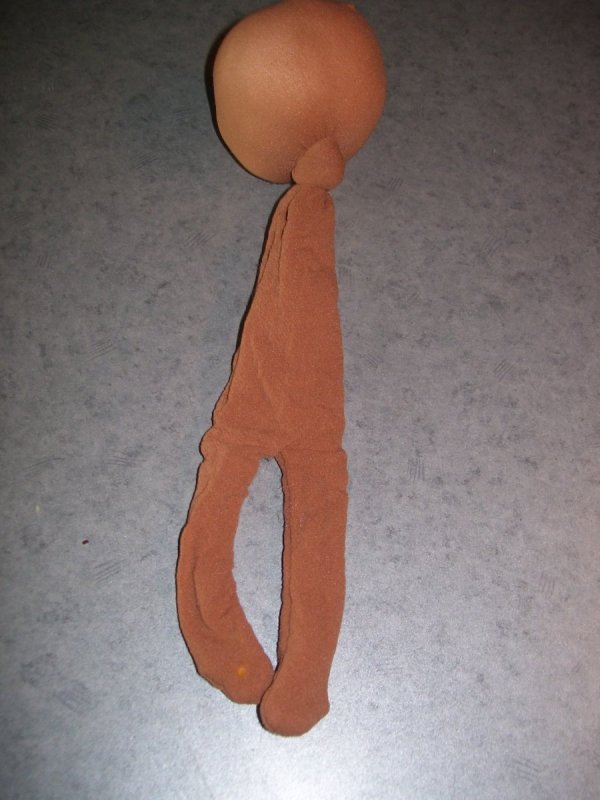
- Take the body and knot it under the head, pulling knot tight to form a good solid head. The head will be floppy at this point.
- Take more stuffing and fill the body well. Once full, start inserting stuffing into legs. Tuck a little extra where the butt will be on one side. Sew crotch opening closed with whip stitch. This area will not show.

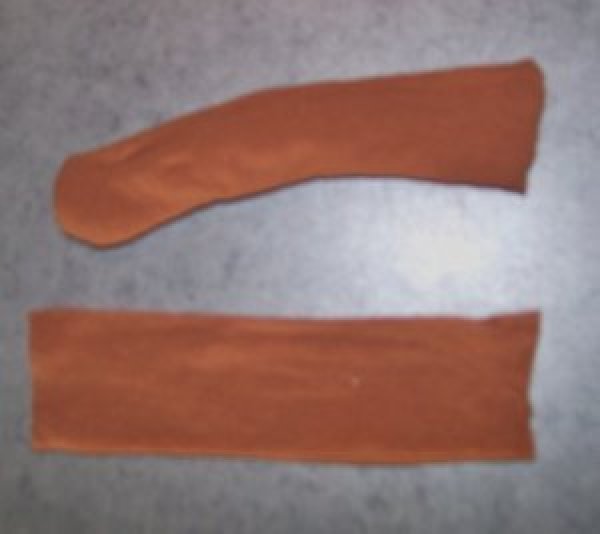
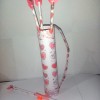
- To make arms cut strips from the left over pantyhose, fold in half. Stitch sides, rounding one end for hands and leave small end open to stuff. Turn right side out and stuff. Attach to shoulders by sewing with needle and thread. None of this shows because the shirt covers it all.
The size of strips cut for the arms depends on what size you make your cupid. All 3 of mine are different sizes.
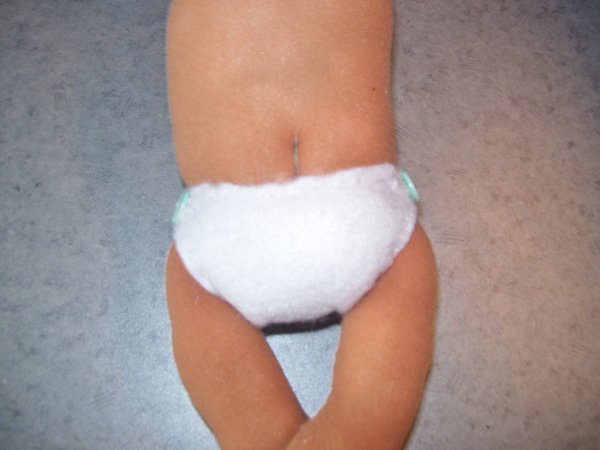
- To make the belly button, cut a thin strip of panty hose from the discarded top piece. Make a tight knot, then repeat. Cut ends close to knot. Insert needle at crotch area and bring it out where the belly button will be. Bring needle back out through the crotch, pulling thread some so it makes an indentation on the belly. Repeat one more time, ending with the needle coming out the belly button area. Slide the knotted piece onto your needle in the indented spot. Secure to belly with some stitches.
- Follow the diagram for sculpting the face. This is an easy process and you do not need to be a seamstress to do it.You will be tickled with the results! Each one you make will take on it's own personality.
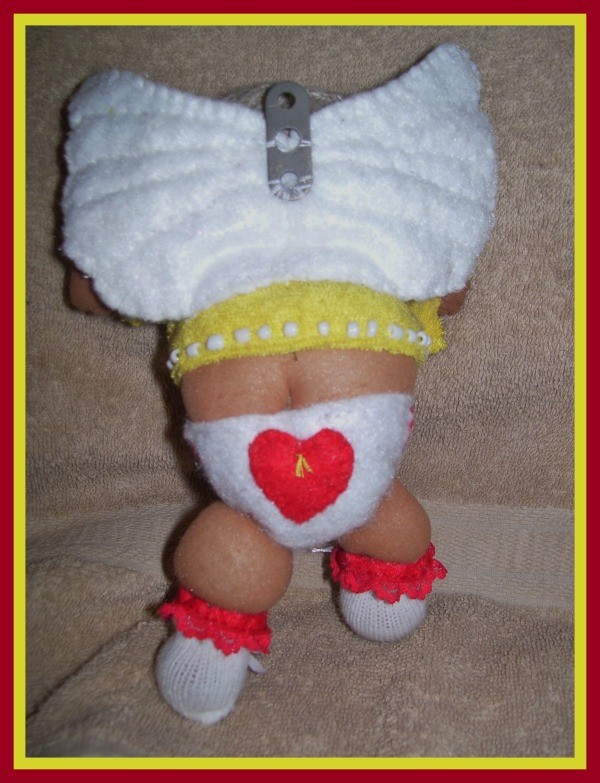
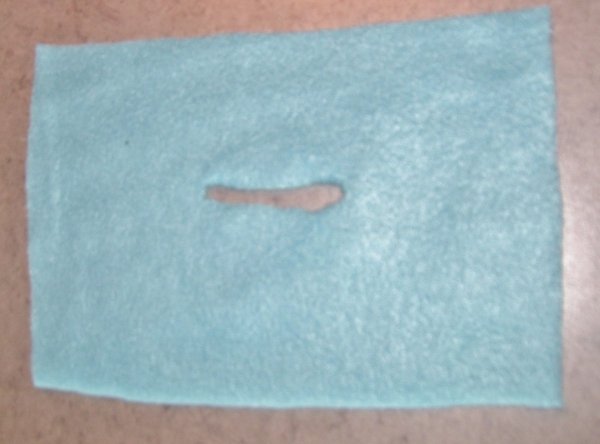
- Cut a square from white felt for diaper. See diagram for shape of diaper. First cut a square so it is wide enough for the sides to overlap some. This would be the area where you would pull the tabs on a real diaper. Fold the square in half and cut in an hour glass shape. Trim top for front so it will be right under the belly button and the back so it is under the buttocks. See photo. Pin diaper in place and stitch to secure, making sure you also go around the leg areas. Sew or glue buttons on each side.
- A piece of fleece works well for a shirt. Fleece does not fray and there is no need to turn edges under. Lay your cupid on the material. You will need to cut a rectangle the width from wrist to wrist. If using material, allow a little extra so you can turn the sleeve edges in. You will cut the shirt a length where the front will be right above the belly button and the back, right above it's little buttocks.
- Fold the rectangle in half and cut a slit in center. Make slit only a couple of inches. You can squish the head to get it through the slit. Slide the head through the slit. Sew neck opening closed, securing it right to the doll. Bring sleeves over arms and pin underneath each and down the sides, right along body. Sew along the pinned areas. Cut off excess material or cut this area into slits for fringe. Secure all around bottom edge by sewing it to doll.
- You can make the hat several different ways. If you have a sock, cut off toe approximately 3 inches below toe tip. Roll up the edge to form the hat brim and secure all around it by stitching. You can also cut a long rectangle from material, fleece, or even a piece of sweater. It has to be long enough to go around the head. Make it wide enough so you can roll up raw edge some to form brim. Roll edge and sew to secure. Fold rectangle in half and sew side seam closed. Gather top and sew closed. Turn right side out and place hat on head. Adjust to where you want it and stitch it in place to the head. Add any trims such as a button or ribbon bow to hat.
By Mary from FL
About The Author: Mary is half of a creative team on a craft oriented website. Here you will find pages of free projects and patterns in a wide variety of categories, with an entire section made especially for kids. There also is a gift shop where you can purchase unique handmade items such as collectible dolls, toys, and home decor. They offer free sayings, tips, ideas, and humor. Enter their contests for a chance to win great prizes. Visit them at: craftingtales.com
Add your voice! Click below to comment. ThriftyFun is powered by your wisdom!
February 13, 20120 found this helpful
He is so cute I just want to take him home and pinch his cheeks! You have outdone yourself this time. Absolutly adorable. Thanks for the wonderful instructions. PBP
January 18, 20200 found this helpful
This is AWESOME I love him you have a lot of talent. Can you send me instructions on how to make just the bottom and the legs? Or tell me where I can find the instructions I want to make it to add to a wreath for my new Grandbaby that will arrive in May Thank You IMC
Add your voice! Click below to comment. ThriftyFun is powered by your wisdom!