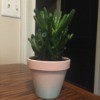
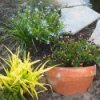
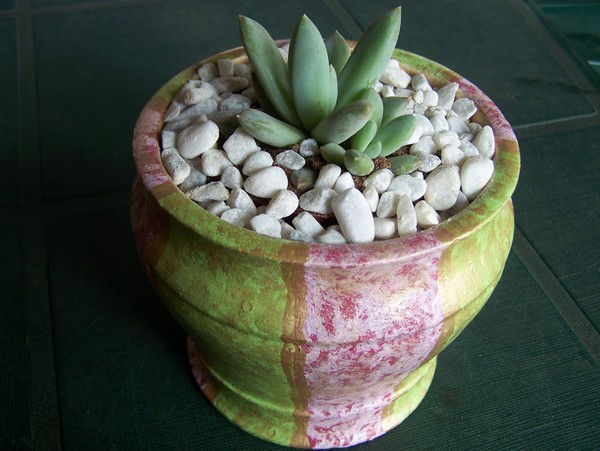
Christmas (or any occasion) is getting closer, and it is time to start making some homemade gifts. This hand-painted terra cotta flower pot can make a nice gift for a colleague or friend.
Approximate Time: 1 hour 30 minutes
Supplies:
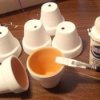
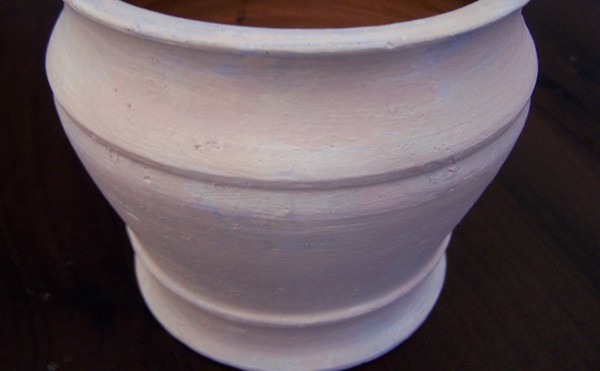
- one unglazed terracotta flower pot
- white water-based primer
- water-based varnish
- acrylic paint in the following five colors: old gold, lumiere, plum, flesh, and soft pink
- a 8/32 inch paint brush
- a fan-shaped paint brush
- a 2/32 inch paint brush
- a pencil to mark the lines on the pot before painting it
- one sheet of ordinary printer paper
- a standard pair of scissors
- a few sheets of old newspaper to protect the working area
- a suitable plant ~ I used a plant from the Sedum family
- potting soil
- fine sanding paper
Instructions:
- Lightly sand the pot before starting to paint.
- Clean the pot with warm soapy water and allow it to dry completely in the sun.
- With a slightly wet 8/32 inch brush, paint a thin layer of the white water-based primer over the whole pot. First paint the inside and allow it to dry. Then, paint the outside of the pot, and allow it to dry thoroughly.
- With the 8/32 inch brush, paint a thin layer of the flesh-colored acrylic paint over the whole pot, again first painting the inside and allowing it to dry, before painting the outside of the pot. Again, allow it to dry thoroughly.
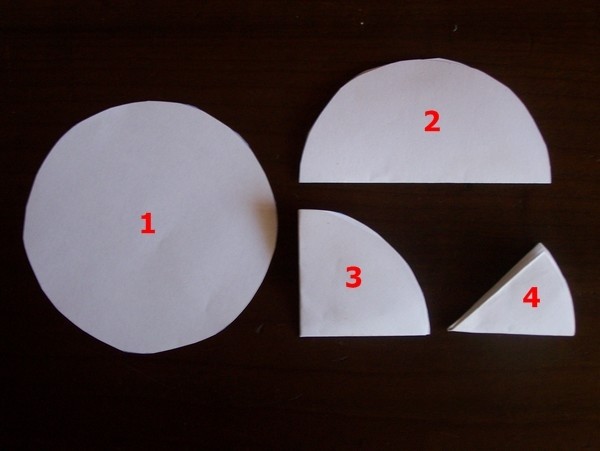
- Place the pot on the sheet of printer paper and trace around the edge of the base of the pot.
- Cut out the circle that you traced and fold the circle into 8 equal parts.

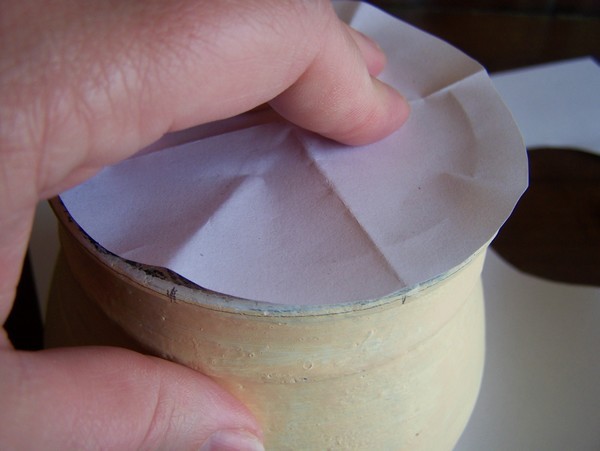
- Turn the pot upside down and put the circle that has been folded into 8 equal parts, on the bottom of the pot. Make small markings in line with each fold of the circle.
- Now put the pot upside down on the printer sheet and trace around the top edge of the pot. Cut out the circle that you have just traced and again, fold it into 8 equal parts.
- Put the circle that has been folded into 8 equal parts, on the top of the pot, and ensuring that the top markings will be in line with the bottom ones, make small markings in line with each fold of the circle.
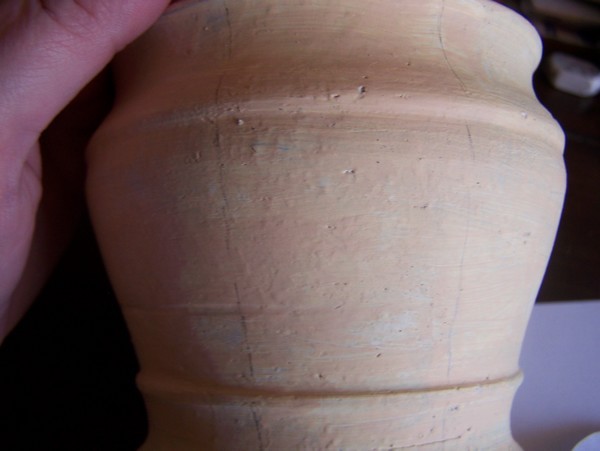
- With the pencil, lightly connect the top and bottom markings, so that you will have divided the pot into 8 sections.
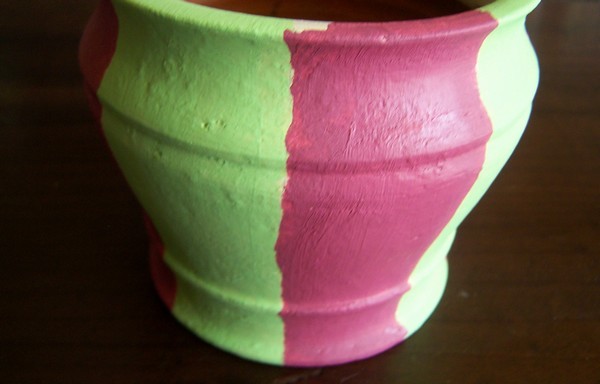
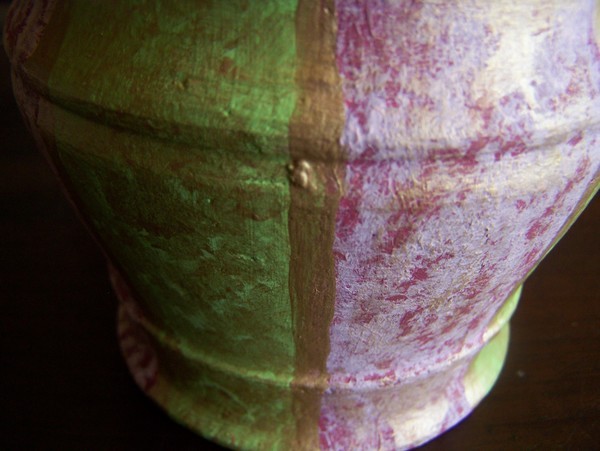
- With the 8/32 inch brush, paint 4 of the sections with the lumiere-colored acrylic paint. Do not paint sections that are right next to each other.
Allow it to dry thoroughly. Of course, you do not need to paint the inside of the pot. Only paint the edge of the pot, as well as approximately 1 inch of the inside of the pot. Apply a second coat of the paint, if necessary.
- With the 8/32 inch brush, paint the remaining 4 sections with the plum-colored acrylic paint and allow it to dry thoroughly. Apply a second coat of the paint, if necessary.
- With a 2/32 inch paint brush and the old gold acrylic paint, draw a line between the two different colored sections and allow to dry thoroughly.
- Using a fan-shaped paint brush, give the plum-colored sections a wash with the soft pink acrylic paint. Remember not to use too much paint when using a fan-shaped brush, as this will lose the fan-shaped effect. Remove excess paint by dabbing it onto a sheet of newspaper before starting to paint. Allow to dry thoroughly.
- Now use the fan-shaped paint brush and the old gold acrylic paint to give the lumiere-colored sections a wash. Allow to dry thoroughly.
- Dab the 2/32 inch brush into the old gold paint, and remove any excess paint by dabbing it onto a sheet of newspaper. Then, lightly brush over the plum-colored sections, to add a touch of gold to these sections as well.
- With the 8/32 inch brush, add a layer of water-based varnish to the inside and outside of the pot, and allow to dry thoroughly.
- Leave the pot for 2-3 days in a warm, dry place before adding the plant.
By Benetta from Pretoria, Gauteng,