social

Painting Faux or Cultured Marble?

April 27, 2017

How do I paint faux marble bathroom countertops?


Advertisement

Answers


Gold Post Medal for All Time! 677 Posts
April 27, 20170 found this helpful

From DIY Network: Step 1: Clean, Prep and Paint. Be sure to get grease off completely with a scouring pad and rinse well with water (specific instructions are available in the kit or on Giani's website). ...
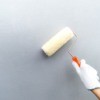
Step 2: Dab and Blot. After the primer dries for eight hours, you're ready to apply mineral colors with a sponge. ...
Step 3: Topcoat.


Diamond Post Medal for All Time! 1,246 Posts
April 27, 20170 found this helpful

I would clean it, lightly sand it, and use an epoxy paint


Silver Post Medal for All Time! 255 Posts
May 4, 20170 found this helpful

Use a product that has a guarantee. I know several people who have done this to their counters in the kitchen and bathroom and it peeled and they ended up having to replace the counters.

 
Answer this Question

3 More Questions

Here are the questions asked by community members. Read on to see the answers provided by the ThriftyFun community.

March 1, 2007

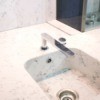
I would like to faux paint a granite-like top on my older cultured marble sink top, sink included. Can you tell me what materials that I can use so that the end result will be glassy smooth, like granite and yet waterproof.


Lynnette from Prescott, IA

Answers

September 29, 20080 found this helpful

I know this is an old post but I learned some of the stuff below on this site and wanted to share .....

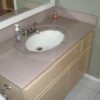
Before I start with what I did I want to say that I had my hubby remove the faucet because the one I had was icky.

Advertisement


I bought a new one at home depot that is beautiful for 16 bucks. They were on sale!
This made it a lot easier to get a solid coat of primer over everything.
Also I used a grey primer because I did not want a solid tan paint on the top .. the variation with the grey and the tan with black flecks is very nice.

Here is the materials list that I used.
Sand paper - I used a medium grit sand paper. The purpose is to get the sheen off and get the surface ready to accept the paint.
Primer - I used Glidden Gripper Grey Primer for Superior Deep color Result (per the label) For the counter and Kilz spray for the sink in white.
Spray stone - I used Rust-Oleum American Accents Stone in Sienna Stone. It looked a little pinkish on the cap but when you put it over grey its beautiful.

Advertisement


Envirotex - This is a name brand for a polymer resin. Which is like putting 50 coats of polyurethane on at once.. It give a great shine as you can see in gator girls work.
Paint roller - I have a small foam roller that I use for all my little projects that works great.
Paint brush - Any will do really. I used it to get the "nooks and crannys"
Tape - Painters tape or masking tape to tape edges of counter and to make the line in the sink.
Disposable cups - use to pour the envirotex down the backsplash.
Paint spreader - kinda like a big putty knife. I bought a wide one and a not so wide one. I smoothed the edges down on the smaller one to create a kinda rounded edge for getting in the curves of the shell sink.

Now most of these can be purchased at home depot or lowes even walmart.(where I got most of my stuff)
However the envirotex can usually be picked up at a craft store like Michaels, Joanns, and Hobby Lobby. Its realatively inexpensive ranging from 9-30 dollars depending on the amount you are getting.

Advertisement

Step 1.
Clean your surface of any debris and sand well. If you own a belt sander its what I used for the flat surfaces and did the rest by hand.
Step 2.
Wipe all the dust off from the sanding.
Step 3.
With trial and error I have found that painting the sink white first is easiest and gives the best results.
Don't worry about taping the sink yet.. just spray the Kilz white spray paint evenly over the entire sink area getting an even coat.
To avoid drips dont get to close to the surface. If you do get drips.. wipe the excess and let it dry and sand and reapply if necessary. Let it dry.
Step 4.
Tape the sink about a 1/4 the way down and tape paper to the bottom so the sink is completely covered with the exception of the "rim"
Step 5.
Prime the entire counter top using your foam roller and brush with the Glidden Gripper. Let it dry. Follow Basic instructions on the Glidden can.

Advertisement


Step 6.
Spray the Rust-Oleum over the entire counter to get the desired color/coverage. This is the point that you would add the glitter for the sparkle if you so desire. Let it dry
Step 7.
Follow the instructions on the envirotex. Stir very well. If you don't you can end up with soft spots that won't dry.
Step 8.
Start envirotexing your counter by working from the top down.. What I mean is start with the back splash and work your way down to the sink.
Pour some envirotex into one of the disposable cups and slowly start pouring down the back splash. Use your paint spreader to "scoop" the puddles back up.
Do this a few times to get the stuff to stick.
Then pour some on the counter and start working it around saving the sink for last.
Don't for get to clean up your edges under the counter with a foam brush.
Advertisement


To get the envirotex down the sink use the same method as with the backsplash.
Let it all cure per the manufacturers lable

 
Answer this Question

September 24, 2012

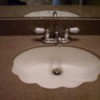
Can you paint faux marble bathroom countertops with the sink being all one piece? Will it be durable and how difficult is it to do?

By Vikki P

Answer this Question

October 10, 2011

Can a faux (fake) marble type bathroom counter and sink (one piece) be painted? And if not, what kind of product can I use for a new look/cover?

By MS

Answer this Question
Categories
Home and Garden Home Improvement PaintingMay 3, 2017
Pages
More
🐰
Easter Ideas!
🍀
St. Patrick's Ideas!
🌻
Gardening
Facebook
Pinterest
YouTube
Instagram
Categories
Better LivingBudget & FinanceBusiness and LegalComputersConsumer AdviceCoronavirusCraftsEducationEntertainmentFood and RecipesHealth & BeautyHolidays and PartiesHome and GardenMake Your OwnOrganizingParentingPetsPhotosTravel and RecreationWeddings
Published by ThriftyFun.
Desktop Page | View Mobile
Disclaimer | Privacy Policy | Contact Us
Generated 2024-03-01 02:47:17 in 6 secs. ⛅️️
© 1997-2024 by Cumuli, Inc. All Rights Reserved.
https://www.thriftyfun.com/tf56263084.tip.html