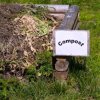
Composting recycles organic matter into a nutrient-rich soil amendment. Although the finished product is a complex mixture of organic matter, bacteria and enzymes, the process of making compost isn't complex at all. It's just a great way to improve your soil while doing something useful with your kitchen and yard waste.
Double or Triple Heap composting: The most popular way to compost is called Double (or Triple) Heap Composting. Also referred to as "cold" composting, it is a slow but practical method to produce compost and requires little effort on your part. Start by building one compost heap to which you gradually add kitchen scraps, weeds that haven't gone to seed, tree trimmings, and garden wastes until the heap stands 3 feet high. This may take several weeks. Each time you add new materials to the heap, turn it to mix and moisten the existing materials. When the first pile reaches 3 feet high, start a new one right next to it. Each time you add materials to this pile, cover it with a shovelful or two of almost-finished compost from the first heap. This way you are constantly adding your own custom-grown "activator" to your compost. If you want to, add a third pile into the mix so you have three piles in various stages of progress. When you need compost for your garden, take the finished product from your oldest heap.
Quick fixes for "cold" compost: If your cold pile seems too slow, try these remedies to jump start the decomposition process:
Hot Composting: Many avid composters argue that the very best way to make compost is through a process called "hot" composting. The advantages to hot composting are the speed at which the compost is finished (usually several weeks vs. several months), and the high temperature of the pile (above 130 F), which will kill most weeds, insects, and plants pathogens. The downside is that it requires slightly more work (turning the pile and monitoring the temperature), and you may need to "inoculate" the first pile with microorganisms to get it off and running.
"Cooking" the pile: Start by layering equal amounts of brown and green organic matter until you create a compost pile that is 3 feet tall and 3 feet wide (each layer should be 4 to 6 inches thick). Moisten the pile as you build it and allow it to sit for three days. Then use a pitchfork to turn and re-moisten the pile. As you turn it, try to move the material from the outside of the pile to the inside of the pile. Turn the pile again five days later. At this point you should feel heat radiating from the pile as you turn it. Wait one week and turn the pile again. After the third turning the temperature of the pile should be sufficient to create finished compost in another 4 to 6 weeks.
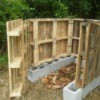
Directions for building simple compost bins
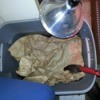
This composting method uses one or more specialized species of earthworms (not the big, burrowing types that live in garden soil) to turn organic wastes-especially kitchen scraps-into high quality compost. The worms are housed in specially designed boxes (usually kept indoors) and fed kitchen scraps, shredded newspaper and cardboard. The finished compost is made up entirely of worm castings and has been shown to be higher in nutrients than compost produced by other methods. Read more about vermicomposting here.
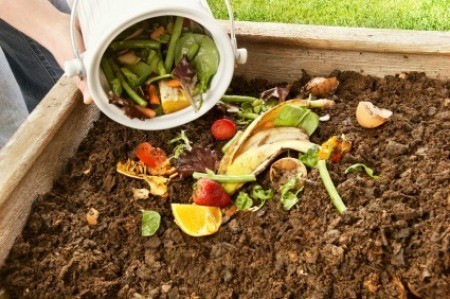
The secret to making good compost is getting the right ratio of materials and keeping them evenly moist. When adding materials to your pile, your goal should be to create a mix containing 50% brown materials (rich in carbon), 30% parts green materials (rich in nitrogen) and roughly 10% garden soil. Then add a little water to the mix to encourage activity by insects, earthworms, fungi and other microbes. Finally, add a little high-nitrogen fertilizer (e.g. a few scoops of dry dog food) to jump-start composting activity. If you are creating a "hot" pile adjust the brown/green ratios to 2:1, adding in water as needed. Instead of adding garden soil, you may want to add in a commercial supplement of microorganisms to get your pile started. After that, keep a small amount of finished compost on hand to use as an inoculant for subsequent piles.
50% Brown Matter (carbon-rich, dry)Including:
30% Green Matter (nitrogen-rich, moist)Including:
10% Garden soil
5% water
5%high nitrogen fertilizer
Your compost is ready to use in the garden when its temperature is cool to the touch, and it has an earthy smell and crumbly texture. To help prevent the enzymes and micronutrients in your compost from leeching out with rain water, cover the heap with a sheet of plastic.
Problem: The pile smells like sulfur.
Cause: A pile that smells like "rotten eggs" is either too wet, or lacks oxygen.
Problem: The pile smells like ammonia.
Cause: This is usually due to fermenting food scraps lying on top of the pile.
Solution: Turn the pile and add additional carbon-rich (brown) material such as leaves.
Problem: The pile smells like sewage and is attracting flies.
Causes: This is most likely the result of too much nitrogen.
Solution: Turn the scraps to the center of pile, and cover them with a layer of garden soil or brown matter.
About The Author: Ellen Brown is an environmental writer and photographer and the owner of Sustainable Media, an environmental media company that specializes in helping businesses and organizations promote eco-friendly products and services.
Add your voice! Click below to comment. ThriftyFun is powered by your wisdom!
Everytime I cover my compost pile I get snakes that lay on top and scare the wits out of me. what can I do to make sure the snakes stay away.
Add your voice! Click below to comment. ThriftyFun is powered by your wisdom!