Has anyone ever made a new awning for an RV? Any tips I should know about?
By Steci from Yuba City, CA

Add your voice! Click below to answer. ThriftyFun is powered by your wisdom!
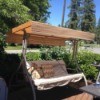
RV awnings can be made from a host of materials, but they must be durable and they must be water proof. Even if you are making your RV awning from scratch, you can make an awning that is just as good, if not better, than a custom one purchased from an RV supply store. You can make this awning cheaply and efficiently.
EasyInstructionsThings You'll Need:
Scissors
Needle and thread
Hook and latch (Velcro) self adhesive strips
Tape measure
Tube of silicone
Step 2Lay out your pattern. Lay your tarp flat on a table or on the floor. Measure up two inches at every corner using your tape measure, and draw a 2-inch line with your pencil.
Step 3Cut slits on the lines that you have measured with your scissors. Do not cut through to the edge of the tarp.
Step 4Pre-cut your latch strips. Measure out two inches on your hook and latch strips, and cut them with your scissors.
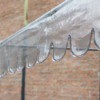
Step 5Install the latches. On the inside of the tarp edge, stick a hook strip on one side, and then stick a latch strip on the other side of the slit. Do this for all four corners.
Step 6Set the edges of the latch slits. At the top where your cut ended on the corners, take your needle and thread and make about four stitches right at that point. You are doing this to make sure that the material does not rip upwards at that place. Take a bit of silicone from the tube and put a drop on your finger. Smear it over the top of the stitch. This strengthens it even more and won't allow any ripping whatsoever.
Step 7Allow your new awning to dry over night. Keep it dry and leave it flat until the silicone has set completely.
Step 8Install your new awning. With the awning frame in place, merely loop the tarp around each end post and secure the awning ends together with the hook and latches. Do this for all for frame corners and your awning is ready for sun and other weather.
Add your voice! Click below to answer. ThriftyFun is powered by your wisdom!