attosa
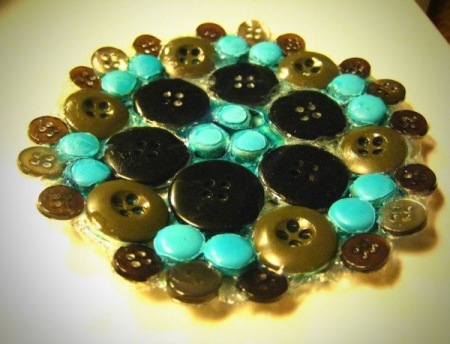
Diamond Post Medal for All Time! 1,246 Posts Here's a way to put your extra loose buttons to artistic use - a beautiful button dish! All it takes is some buttons and glue. I made this one to hold my jewelry in the bathroom.
Approximate Time: 1 day
Supplies:
- buttons
- glue
- clear gloss glaze (optional)
- dish or bowl
- foil
Instructions:
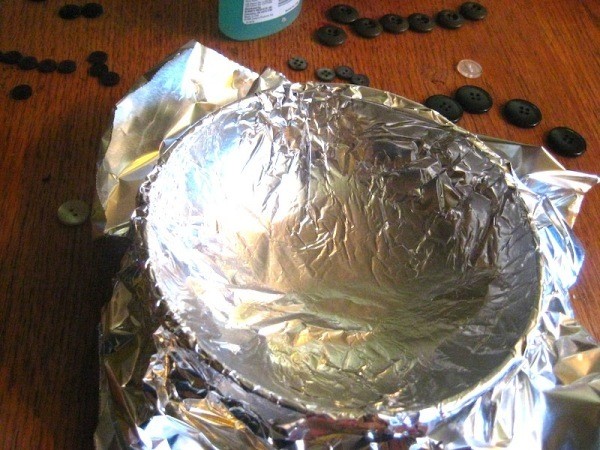
- Choose a dish or shallow bowl that has a shape you'd like your button dish to match.
- Arrange your buttons in different patterns on the dish until you figure out what pattern you like.
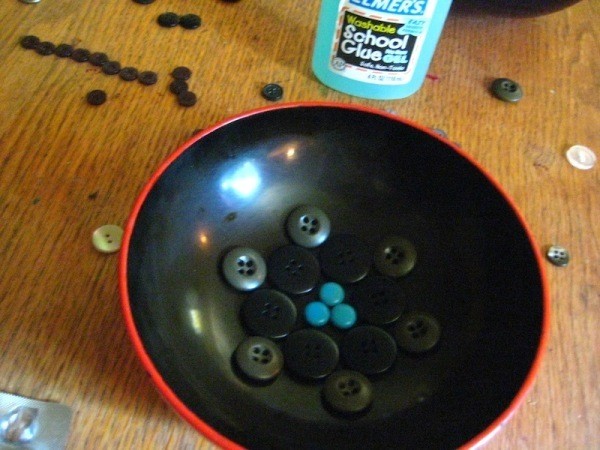
- Remove buttons and line the dish completely with aluminum foil.
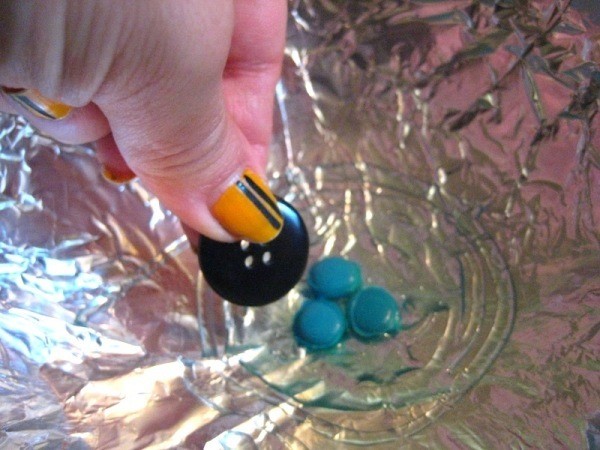
- Squeeze some glue onto the foil-lined dish and start placing your buttons, starting from the center, working outwards. Keep gluing and placing buttons until you're happy with your dish.
- Let dry overnight. Dish is done when the buttons don't move anymore when you touch gently with your finger (I gave mine about 16 hours).
- If you use big buttons in your design (like I did), add a light coating of clear gloss glaze for more stability.
- Remove button dish (will have foil stuck to it) and gently peel off foil.
Enjoy your beautiful and useful recycled art!
By attosa from Los Angeles, CA

Add your voice! Click below to comment. ThriftyFun is powered by your wisdom!
Marg
Bronze Feedback Medal for All Time! 107 Feedbacks August 23, 20120 found this helpful
This is very cute! Thanks for sharing :)
August 23, 20120 found this helpful
Very cute. I love anything made with buttons or is embellished with them. I put them on frames, photos, plaques, tins and glassware. The photos are clear and the instructions are great too. Thanks for sharing this really cute idea.
PBP
attosa
Diamond Post Medal for All Time! 1,246 Posts August 24, 20120 found this helpful
Aw, thanks so much to you both! I adore buttons too. I think they are so cute when used in untraditional forms. I'm collecting a bunch of smaller ones. Now to make something more intricate. Will post if it comes out right. :)
Maryeileen
Bronze Request Medal for All Time! 59 Requests April 5, 20150 found this helpful
This gives me something to make out of old buttons I have from my Mom and Grandmothers. Thanks!
Add your voice! Click below to comment. ThriftyFun is powered by your wisdom!