 The name ricotta comes from the Latin word 'recocta', meaning it has been cooked twice. That's because it isn't (usually) technically a cheese, but a cheese byproduct. When you've made cheese, there's leftover whey with little tiny bits of curd left in it, and ricotta is what happens when you drain that whey even further and turn it into ricotta cheese. This recipe, however, is for 'ricotta' that is actually cheese rather than a byproduct, because we'll be starting with full milk rather than the whey from previous batches of cheese.
Ricotta is what makes lasagna, ravioli, or stuffed shells so delicious. It also makes a great spread on a sandwich. My favorite breakfast is a plate of ricotta, drizzled with honey and sprinkled with garlic salt or za'atar (a Middle Eastern spice blend) and sometimes some chopped tomatoes and/or cucumbers; I dip pita into it, and it's wonderful.
You'll want plenty of time to make this. The work isn't involved or difficult, but there's a lot of "do a tiny thing, then wait an hour or two." Do this on a day when you're home pretty much all day. I like to start the cheese while I'm cooking other breakfast; do the next step and go fold some laundry; do the next step and do the dishes or dusting; and so on.
Total Time: Work: 15 minutes. Actual time: 8 hours.
Yield: Roughly 1 pound
Ingredients:
- 1 gal milk - raw or pasteurized, "not" ultra pastureized ($4)
- 1/2 cup lemon juice or white vinegar ($0.50)
- 1 Tbsp non-iodized salt ($0.10)
Equipment:
Microwave-safe bowl that will hold a gallon of milk, with room left over
Second mixing bowl that will hold at least 3/4 of a gallon of liquid
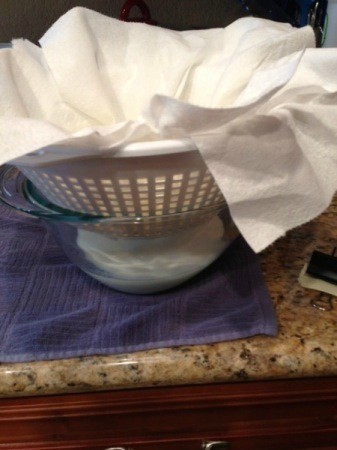
Colander that fits slightly inside the second bowl
Cloth napkin that will line the colander and drape over its sides by a couple of inches -- NOT CHEESECLOTH (the weave is too loose)
Fine skimmer
Spoon for stirring
Heavy-duty kitchen twine
Hanging hook, strong doorknob, or wall-mounted plant hanger
Steps:
- Assemble ingredients and equipment.
- Put your salt and lemon juice or vinegar into the larger mixing bowl. While this is partially dissolving, set the colander inside/atop the smaller of the two mixing bowls. Get the cloth napkin damp, then use it to line the colander.
- Give the salt and lemon juice or vinegar a little stir to finish dissolving the salt, then pour the gallon of milk into it. This will start the curdling process. After this is done, DO NOT stir the milk at all.
- Set the milk bowl in the microwave and turn it on LOW heat (level 3 out of ten, or so) for 15 minutes. When this is done, turn it to level 4 for another 20 minutes; then to level 5 for 20 minutes. When this is done, put a second cloth napkin (or kitchen towel or paper towel) over the top to protect it from dust, then walk away and leave it for 1 hour to rest and cool down. By now, the milk should look like a cloud (curd) inside a bowl of lemonade (whey).
- Use a butter knife to slice the curd into 1inch squares. This will help the curd release a bit of the whey, and the curd will usually sink to the bottom of the bowl.
- Use a ladle to very gently remove whey from the bowl, down to the level of the curd. (If your curd didn't sink to the bottom, skip this step.)
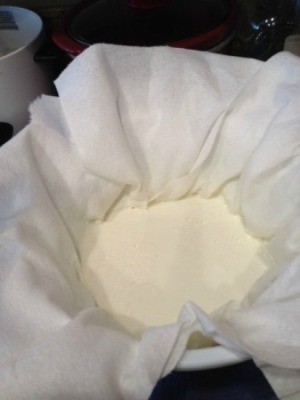
- Use a skimmer or thinly-slotted spoon to very gently lift the milk curd out of the gallon bowl and lay it in the cloth-lined colander. If it falls apart and won't lift easily, sprinkle on a little more lemon juice and microwave for 10 minutes on power level 4, then let rest for 20 minutes and try again.
- Use your skimmer to push the curd over to one side of the colander-bottom, then ladle the remaining whey into the cleared area. It should still be draining fairly rapidly. If you can tell it's losing enough liquid that your bowl will fill up and overflow, switch bowls partway through the fast draining process.
- Cover with a cloth and walk away for about 1 hour (more isn't harmful) for the slow draining.
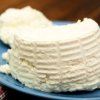
- Gather the four corners of your cloth. If they're really wet, wring them out a bit, then twist them into a sort of rope (very, very loosely - you don't want to squeeze the cheese, just to get the cloth into something you can tie your twine around). Use your kitchen twine to tie the cloth securely, then another bit of twine to tie the resulting bag onto a cabinet handle, plant hanger, or other place of suspension. Be sure to keep it hanging above your draining bowl! This is the dripping phase, and it lasts until the cheese has reached the texture you like best. I like mine moist and creamy; my mother likes hers much drier, sort of like a farmer cheese.
- Unwrap, put in a covered dish, and eat within 2-3 days.
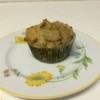
- Serving suggestions: Use as a filling for any pasta, a thickener for cream soups, a spread on homemade bread (in place of cream cheese), as a fine-grained substitute for cottage cheese, or as a wonderful filling for blintzes/crepes/blini.
Experiment with different types of milk. This doesn't work at all well with goat or sheep milk, but try 2%, whole milk, even buttermilk (my favorite) if you like a bit of a tart tang. Because the buttermilk has already clabbered (thickened thanks to the production of its own acid), you won't need lemon juice or vinegar for a buttermilk ricotta.
Add your voice! Click below to comment. ThriftyFun is powered by your wisdom!

Stella
Silver Post Medal for All Time! 254 Posts April 28, 20130 found this helpful
Thanks for sharing, how fun and interesting! I love knowing how to make things that I would usually buy at the store.

March 8, 20150 found this helpful
About that last comment. I don't get it. Yes, you might need to buy a big bowl if you don't have one, or a collander, cloth, etc... but those are one time costs. You don't buy the "gear" each time. Have you priced a pound of Ricotta at the store lately? It isn't 4 bucks I'll assure you of that.
How hard would it be for someone to post a recipie or a tip that only uses the ingredients that you have on hand, that doesn't add any packaging to your cupboards, and that is so easy as to be without effort at all, but still be unique, special and really good.
Thanks to the original poster for the great recipie for "Thrifty" and "Fun" Ricotta Cheese. This will help a lot of people, myself included. Thank You.
Add your voice! Click below to comment. ThriftyFun is powered by your wisdom!