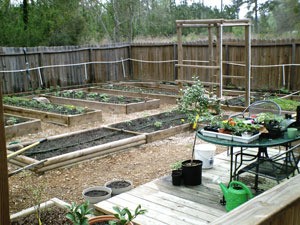
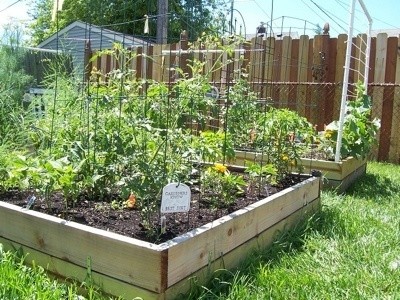
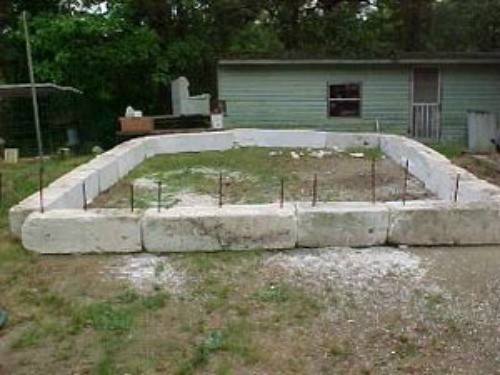
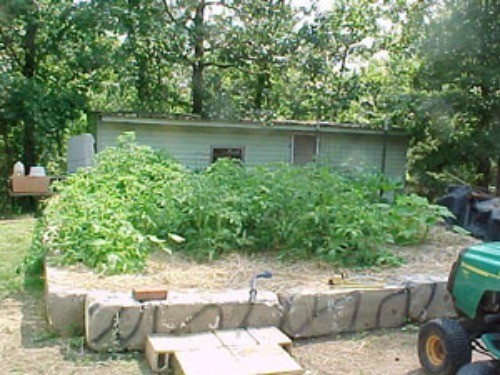
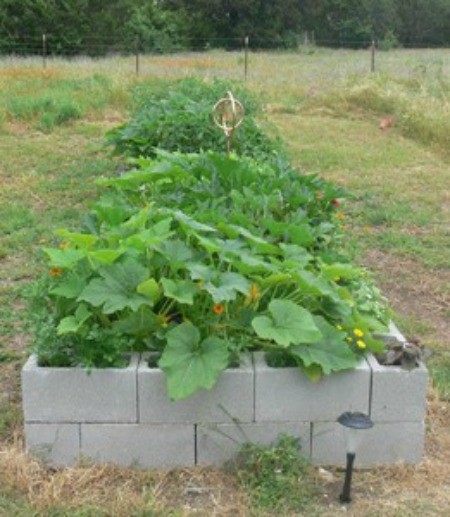
If your ground is solid rock, the best way to raise veggies is in a raised bed. My husband built a raised bed garden this year. The "blocks that hold the garden together are, believe it or not, Styrofoam. This was salvaged from boat docks a few years ago when they banned its use in the local lakes. Its insulating capacity, helps to keep the earth cool. The first picture was taken before the topsoil was added. The second picture, taken a few days ago, shows the results of our Mother's Day planting date.
We are about to start picking squash and tomatoes... at least for fried green tomatoes. :)
By Harlean from Arkansas
This page contains the following solutions.
We would love to have a garden in our backyard, but supposedly there are gophers. We decided on having a raised garden bed and after looking at the costs of already built raised garden beds and ready to purchase and install yourself garden beds, they were definitely out of our budget!
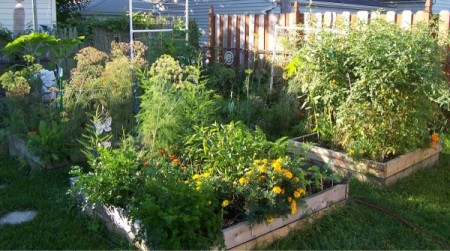
I love my raised beds. It helps keep different gardens separated and makes it easier to keep weeds out. They can be watered separately, depending on what you are growing in them.
We made a 30x20 foot garden in our back yard with plastic and cement blocks. You do not have to remove grass. Put down plastic or a thick layer of news papers, and place cement blocks on top around the edge of the space.
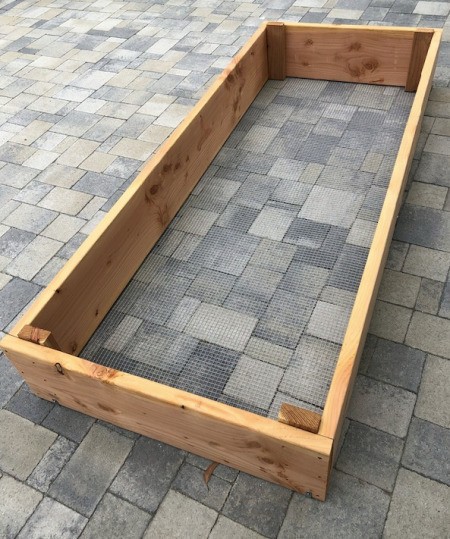
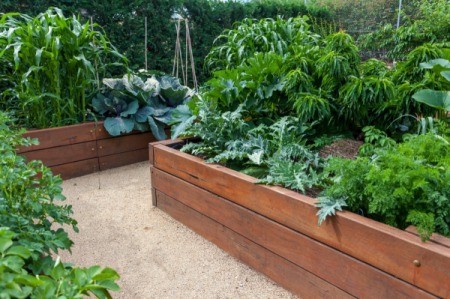
If you're short on space or the soil in your area is riddled by sand or clay, building raised beds may be the best solution to your gardening woes. You'll trade the time, money and effort required amending poor quality soil for maximum yields in a minimum amount of space.
This idea is very old, my grandmother used to have straw bale gardens. It was great for her not to have to stoop over to pick and weed her garden.
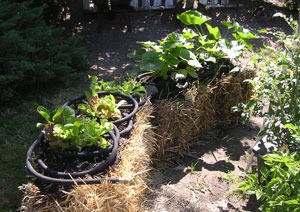
In the summer of 2011, I had raised beds made to accommodate a wheelchair and my short arm width necessary to reach across to weed. They have landscape fabric to control weeds on the bottom, a layer of sod face down, then layers of newspaper and leaves that will decompose and on top, regular soil.
Here are the questions asked by community members. Read on to see the answers provided by the ThriftyFun community.
My husband and I are looking for a platform bed. Does anyone has a good suggestion? Where can we find a good deal on a good quality platform bed? Thanks.
I have seen some cute ones on walmart.com. There are reviews so you can judge for yourself. I don't know if there is an ikea where you live but they also have them or ikea.com.
Sometimes people just plain want to get RID of a frame for a water bed. They get tired of it, or the mattress leaks, or whatever....Free for just hauling it off.
You'd be surprised what people want to give away!!
And what people are asking for too.
Do you have "Free Cycle" in your town ?
(You can check the list and see if yours is there, then your state, Subscribe) Free Cycle is full of things that people don't want anymore. Just as it says, it's Free.And they are yours if you tell'em you want it, and agree to pick it up when they tell you to.
A VERY INEXPENSIVE PLATFORM BED
When I was still in grade school, my parents put their mattress on plywood that was laid on travel trunks. This may sound cheap, but they slept on it for years.
Mom like it because she was able to store things underneath the slipcovers. We used to play hide and go seek.
Dad did drill some holes in the board for air circulation. We lived in Japan, and the moisture gets so bad, you end up having to clean clothes that are in the closet. THINGS GROW MOLD.
IKEA has some really nice ones for less than $300.
We bought our bed from llbean.com, it comes in several flat pack boxes that are shipped FedEx. I put it together myself and have slept on it for over 3 years.
Fake one like we did. I wanted one too but couldn't afford it. So we took 2x12's sanded, stained to match bedroom furniture, put the box spring on the floor and boxed it in. Mattress on top no headboard. Looks like the pretties you see in the magazines. I also wanted Asian furniture like the Mino collection which cost about 2500.00 for livingroom set.
babbles5,
We'd love to see photos of the furniture you've crafted. :)
Marz
I am looking for an economical way to edge my raised beds. I have a large garden and lumber is just way too expensive to do all of the beds. Any ideas?
Hardiness Zone: 6a
By Heidi from PA
Heidi, you could use old wooden pallets. I know at work, we gets lots of spare ones. We give them away to people for putting firewood on, temporary flooring, broken ones are ideal for firewood etc. Most businesses are pleased to get rid of them. They make good compost heap frames. Most are made of untreated wood, which is ideal.
I have used 8x8x16 cinder blocks as the edging for my raised beds. I do "nail" them down with rebar so they don't shift. If you get a sale, they aren't too expensive, or check around colleges when school gets out and pick 'em up for free when the students leave them behind.
I have read how straw bales are used to build a raised garden. I was wondering if straw could be used to line the bottom of a wood build raised garden? I was thinking that the straw would decompose and provide nutrients for the soil as well as help to maintain moisture. Please help out.
By Faye B.
That would depend on what kind of straw you're using and what kind of plants you're going to put in. Pine straw (needles) are acidic.
Can you turn an old fridge into a raised veggie bed? I would need to put drainage holes in the back and lay it back on ground. What are potential hazards?
By Bec B
Refrigerators are an environmental hazard that need to be specially disposed of, so turning one into a veggie bed isn't a good idea I'm afraid. Depending on the age of the fridge it might contain CFC's, mercury, and other baddies. Even newer ones have things you wouldn't want leaking into the soil. Better to see your fridge properly recycled. There are plenty of ways to make raised beds from reclaimed materials that would be a safer bet. Good luck with your garden!
I would like to construct a raised bed garden on a hilly area. The best plan would look like 3 beds of 3 feet by 10 feet. Any suggestions? The is soil is poor and possibly rocky so I think just placing the boxes on top and filling with good soil is best. To avoid tons of soil I am thinking of raising the bottoms up on the lower box. I need advice on drainage too.
By Nancy
Check out these photos.
There are many advantages to gardening in raised beds. Making your own can not only save you money, but allow you to tailor their size to suit your needs and available space.
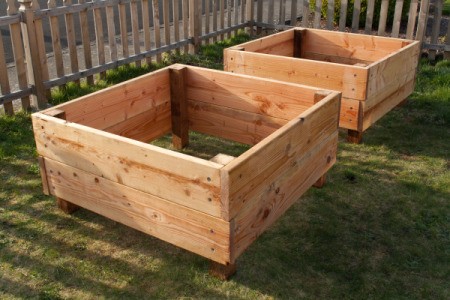
Raised garden beds do not have to be a complex job. There are many good ideas for building simple raised beds for your garden. This is a page about directions for building simple raised beds.
There are good reasons to create a raised garden bed, and concrete blocks can make it easy to build. This page is about making raised beds with concrete blocks.
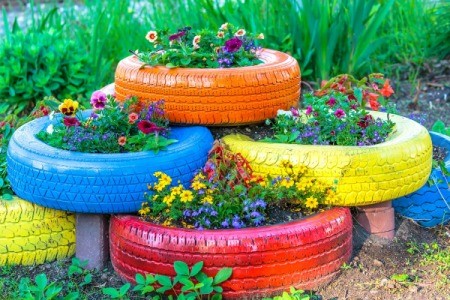
Old tires have long been used for planting both vegetables and flowers. There is more recent controversy about using them to create raised beds for food, but they can safely be used for flowers. This is a page about using tires for raised beds.
There are many thrifty, creative ways to use natural or recycled materials to make raised garden beds. This is a page about inexpensive raised beds.

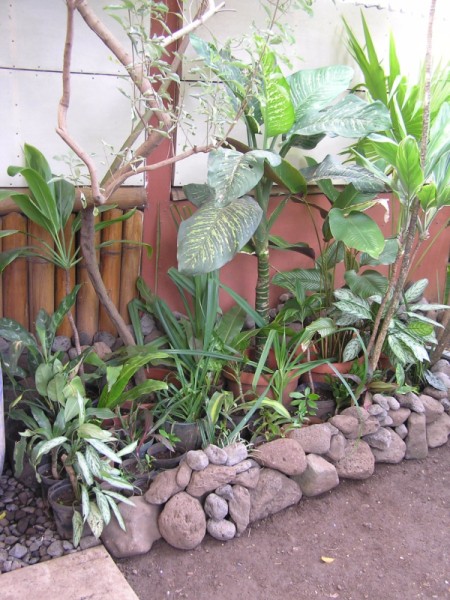
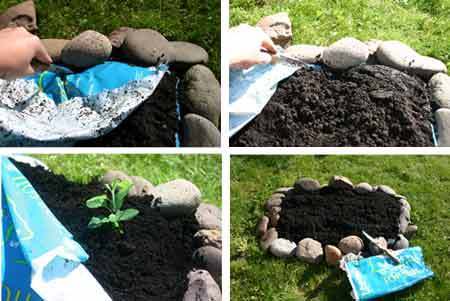
Raised beds can be constructed in a number of ways. Making a stacked stone bed or even one that is mortared together can be attractive as well as functional. This is a page about raised beds made with rocks.
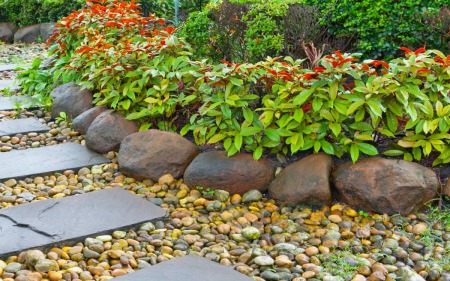
Making a raised bed edge from various sized stones that you collect can be a thrifty, decorative, and functional garden feature. This is a page about raised rock flower beds.