Grocery brown bags or other brown bags accumulating? Don't thrown them away. You can use them to make nice and dainty Stationery to write your grocery list or your recipe for next week's party or your shopping list or your to do list. That beats having to write on torn pieces of the same paper, or worse bringing the whole bag as your list.
Preparing the Stationery Holder
Cut the cardboard into the desired size. In this example, we cut it to a 4.5x14 inch rectangle. Fold the cut cardboard into 3 so that it's profile is shaped like a "J". In this example, we folded at 8 inches, then at 2 inches, then at 4 (total length is 14 inches). If your cardboard is not good-looking, you can paste nice paper remnants to "J" cardboard's inside of the 8 inch face.
Cut a rectangular piece of the brown bag 1 inch longer than the "J" cardboard (5.5x15 inches). Shear the edges so that it has a design. Wrap the prepared rectangular brown paper on the "J" cardboard's outside. Fold and paste in the extra length so that the designed edges shows up on the "J" cardboard's inside.
Cut another rectangular piece of the brown bag - this time it will be 0.5 inches longer than lower dimensions of the "J" cardboard (9.5x2.5 inch). Shear the edges so that it has a design.
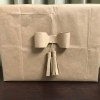
Wrap and paste the prepared rectangular brown paper on the bends of the "J" cardboard so that its "J" shape can now stand on its own. This is now the Stationery holder. Glue the magnet on the upper back.
Preparing the Stationery Sheets
Cut many rectangular pieces of the brown bag. Quantity depending on your requirement or the number of brown bags you have available to cut. Dimension depends on your requirement or at most, should fit into the inside of the Stationery holder above. In this example, 2 sizes were cut : 3.5x5 inches and 3x6 inches).
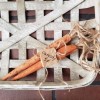
Make the pieces look nicer by shearing the edges or rounding the corners or punching the corners with design. Place the Stationery sheets in to the Stationery holder pockets.
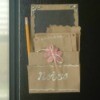
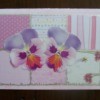
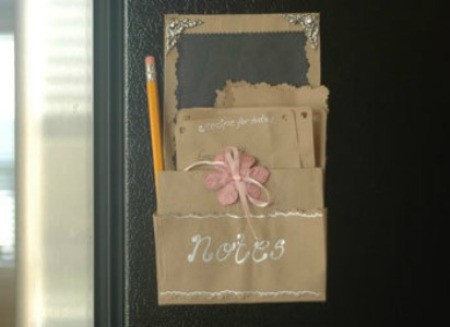
Add in the desired decors to make it match your refrigerator or kitchen theme. In this example, the upper corners were decorated with some metal edging removed from a shirt long time ago. A pink flower from a ruined ponytail holder was added in front together with a lighter pink ribbon. Silver pen was used to place "Notes" and some lines in the front.
Place a pen or pencil on the Stationery pocket. Place on the side of the refrigerator or some other place needing a memo pad ready for writing.
Add your voice! Click below to comment. ThriftyFun is powered by your wisdom!
What a cute and clever idea, this is one that I will definitely try!
that's nice :) thanks for sharing ! I'm passing this on !
Add your voice! Click below to comment. ThriftyFun is powered by your wisdom!