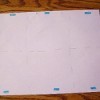
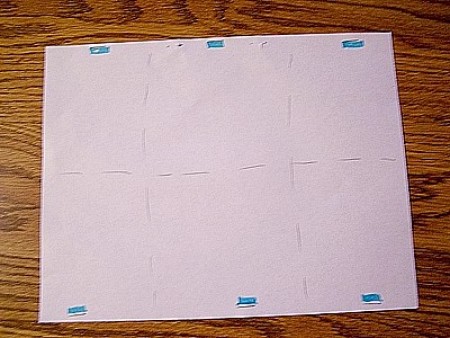
ThriftyFun Logo
Home   Find   Ask   Share   Answer   Join   Index   Login  
 
 User Login:  Username:    Password:      Forgot It?  | Join ThriftyFun!

 - Beauty
 - Budget and Finance
 - Cleaning
 - Consumer Advice
 - Craft Projects
 - Craft Tips
 - Food Tips
 - Garage Sales
 - Gardening
 - Gifts
 - Green Living
 - Home Improvement
 - Organizing
 - Parenting
 - Parties
 - Pest Control
 - Pets
 - Product Reviews
 - Recipes
 - Repair
 - Weddings for Less

RSS Feed
About Us
Media
Advertising
Contact Us
Privacy Statement
Disclaimer

Homemade Notepads

1x1
Date: 08/18/2008 Topics: Make Your Own > Miscellaneous | Readers Request > Make Your Own  
1x1
Post Feedback | Get Responses | Bookmark | Link | Print | Print (With Feedback) | Rate: Thumbs Up Thumbs Down | Bookmark and Share

You will need:

  • Paper
  • white glue
  • paintbrush
  • cardboard
  • heavy weight objects
  • a straight edged knife

Directions:

  • Take 8 1/2x11 inch pieces of paper and cut them into fourths. I use paper that has been used once, but blank on the backside, to recycle it.

  • Create stacks of the paper. Only one side needs to be even.

  • Pack the stack of paper firmly against a hard surface and lay it down on a hard surface.

  • Put a piece of cardboard that is bigger than the stack on the top and bottom of the stack.

  • Take whatever you have that is heavy and put it on top of the stack. I have used a case of water, which is heavy enough.

  • The side that you packed is the side you will use to put the glue on. Take your brush (a sponge brush works well) and pour the white glue on it a little at a time and brush it on the flat edge of the paper. Make sure to get the edges, too. Let it dry and then put another coat on. Do this twice.

  • After it is completely dry, take the knife and run it through between the sheets for the thickness of the pads you want. The knife will separate them cleanly.
By Lora from Milwaukie, OR
(1x1 graphic )
Previous: Trick to Placing Lids on Mayo Jar ThriftyFun Next: Jina's Antipasto and Pasta Salad
(1x1 graphic )
1x1
1x1
 Feedback
1x1
1x1
1x1

By Kay888 (1) Contact
You can buy small bottles of padding compound at a very affordable price here: http://www.chicaandjo.com/2008/10/22/make-your-own-custom-notepads/

Posted on 03/26/2009 | Report Spam or Abuse

By Heavy D (Guest Post)
Hi everyone. I am a printer. If you want to do this at home economically, go to Google look up padding compound. It will come by the gallon so I hope you plan on doing a lot, also Elmer's works the exact same - just make sure you are very liberal with the amount you use. Everyone I know that does it by hand uses a 2 inch brush. Make sure if you intend to do it over and over to wash the brush with hot water and let it dry or it is wasted! Also make sure to use some kind of weight on the top of the paper and keep it about an eighth of an inch from the edge. Note: Do not get the glue on the sides of the paper or it will rip when you take it apart.

Posted on 09/23/2008 | Report Spam or Abuse

By chris (Guest Post)
I have been making my own tablets for years, only I use a paper cutter to make stacks of paper for the tablets out of what ever I have at hand to recycle, just as you said. I don't use cardboard. I make the pad to be glued about 1/3 of an inch thick. The clip the outside of the top of the pads on the 2 sides; leaving the top clear. Clipping with those clips, that come in many sizes, that have those movable flip wire finger pad things. They are usually black, but you can flip the wire things, up or down, up for opening the clip, & down for storing. These clips keep the paper very packed.

After clipping both sides, I use the glue bottle & put a fair amount of glue all over the top. Then I put it in a place, with the top glued side up, & let it dry. No cutting, no doing 2 or more, very fast. I have a gas stove with pilot lights, & usually I put the wire finger pad things to the outside, in between up & down, & hang it with the glued side up, between the wire racks in the oven. It dries very fast this way.

Posted on 08/18/2008 | Report Spam or Abuse

By Noella (249) Profile Contact
Sounds like you worked for a printing company. I remember once, the press came loose from where it screwed down on the paper and paper flew all over the place! I also worked for a printing company and one of my favorite jobs when I had to work out in bindery was padding. It was always kinda calming! I hated collating though.

Posted on 08/18/2008 | Report Spam or Abuse

1x1
1x1
 View Archives:
1x1
1x1

This pages has been archived 2 times. You can view older posts and feedback below.

1x1
1x1
 Post Feedback:
1x1
1x1
1x1

Login using the form on the top of the page to post feedback (if you are a registered user). If you have not yet registered, click here to do so. It's FREE!.

1x1
(1x1 graphic )

1x1
 Archives:
1x1
1x1

Request: Homemade Notepads

Archived on 08/14/2008

I would like to make some small notepads for my daughters and wonder if anyone knows if there is a product to use to hold the sheets together at the top. If you have a "homemade" suggestion, that would be better. Thanks so much.

Sandy from Oneonta, NY

Answers:

RE: Homemade Notepads

I used to work at Kinko's and we would "pad' things all the time. We had a device that would put a lot of pressure on a stack of paper, compressing it down slightly. We would do a whole stack at a time, separating every 50 or so with brown chipboard. Then we would paint "padding compound" onto the edge. This compound was white and felt and smelled suspiciously like regular white Elmer's glue. The device had fans that would dry the glue for about 15 minutes. Then we would separate the pads with a dull knife, leaving a chipboard back.

I have never tried it myself but I believe that if you weighted down the stack of paper with bricks or something heavy and then painted it with Elmer's, it would work just as good. I might do a first light coat, let it dry for an hour or so and then add a second coat. Use a butter knife to separate the pads. Make sure the papers on the padding edge is lined up as straight and smooth as possible. Also, don't try to do more than about 100 sheets at time or it will break apart, it's just too tall.

Good luck,

Jess (07/20/2007)

By jess_admin

RE: Homemade Notepads

I stitch the top together with a nice thread. No glues and no chemicals are needed this way and it looks very nice. (07/20/2007)

By Enci

RE: Homemade Notepads

It's kinda pricey but the Bind-it-All works great. Check it out online.

By Bonnie (07/23/2007)

RE: Homemade Notepads

Like the others, I've used rubber cement, though I've found that it can sometimes be messy or not hold together perfectly.

I don't know if this will work for you, but at work, I take 8 1/2 x 11 inch sheets that have printing on one side, cut them into quarters, turn them over, and just keep them in a small box (with the lid removed). When I need a piece of scratch paper, I just grab one off the top. (07/23/2007)

By Chief Family Officer

RE: Homemade Notepads

SCHOOL GLUE! When my kids were little and would bring home all sorts of papers, I would take a stack, blank side-up, cut into 4's, and use plain ole' school glue on one end, liberally. Just weight down the pad right up to the glued side with a few heavy books and wait half a day, and you have a note pad! You can always clean up the ends, and make it as pretty as you need. (07/24/2007)

By KLJohn

RE: Homemade Notepads

I use a hot glue gun. It works great! I wouldn't recommend for smaller children. (07/24/2007)

By Jill

RE: Homemade Notepads

I get the spiral notebooks when they are 10 cents a piece ( at Walmart before school starts). I then cut the spiral in the middle and hand cut the pages with scissors. I end up with two notepads at 5 cents a piece. (07/26/2007)

RE: Homemade Notepads

Simply use a hole puncher to punch holes into the paper. Then use either yarn or thread to keep the paper together. It works great!! And you can use different colors of thread or yarn to make it a little different. (07/31/2007)

By

RE: Homemade Notepads

Rubber band your paper together or clothespin tight...then paint rubber cement on edge........for a watercolor painting pad I paint all four edges and leave one small spot to stick a knife into to separate the page....good luck (08/17/2007)

By Carol

RE: Homemade Notepads

http://www.thecraftypc.com/not.html It is actually notepad adhesive, and it is awesome! (09/30/2007)

By Melanie.

RE: Homemade Notepads

Can you tell me if compression is used right at the edge where the paper is to be bound or should the paper be compressed further down allowing the glue or rubber cement to enter a little on the paper? (05/18/2008)

By gerri

Report Spam or Abuse

Request: Homemade Notepads - Gummy Adhesive Material for Notepads

Archived on 07/20/2007

I am curious on how to make the gummy stuff that connects the notepad paper. I am interested in recycling my one sided printer paper. Thank you for replying. Enjoy your day. Lydia

Answers:

RE: Homemade Notepads - Gummy Adhesive Material for Notepads

I use rubber cement after I've cut the sheets in half. It works for my office. (02/22/2005)

By Mari

RE: Homemade Notepads - Gummy Adhesive Material for Notepads

I made some with our children for Christmas. We used rubber cement on the edges. I put it on the edge, not over-doing it, but also making sure that there was plenty, then used a big clip to hold it until it was dried. Worked Great!

We recycle all our paper, and sometimes it seems as though we have more than we need, but when the girls are working on their math assignments, we end up going through it. Plus, the pads are great for shopping lists, to-do lists, etc. Enjoy! (02/22/2005)

By Laura - in NH

RE: Homemade Notepads - Gummy Adhesive Material for Notepads

At work, I just cut the sheets in half, then use a binder clip on the corner. Instant note pad of scratch paper! (02/22/2005)

By Mary

RE: Homemade Notepads - Gummy Adhesive Material for Notepads

I use rubber cement after I've cut the sheets in half. It works for my office. (02/22/2005)

By Mari

RE: Homemade Notepads - Gummy Adhesive Material for Notepads

I have been researching for the same thing and came up with the following:

You can use padding compound, rubber cement or tacky glue. Elmers makes a good rubber cement. I like to brush this on twice. I wait for the first coat to dry then add a second coat for durability. After the glue is completely dry then you can take the notepad out of the clamp and it's done. Have fun! (11/16/2006)

By Anna

Report Spam or Abuse

© 1997-2010 ThriftyFun.com - Design by Cumuli Design
Disclaimer: ThriftyFun.com cannot accept any responsibility for any injury or damage that you may cause to yourself, others, or property when following any advice given on this site. Read the full disclaimer. If you find any information on ThriftyFun.com or in our newsletters that is either erroneous and/or potentially harmful to others, please Contact Us, immediately.