Home |  Index |  Submit Request |  Share Photos |  Share Tips |  Active Topics |  New Feedback  |  Contact Us  |  Search
 User Login:  Username:    Password:      Forgot It?  | Join ThriftyFun!

 Popular Topics
 - Beauty
 - Budget and Finance
 - Christmas *
 - Cleaning
 - Consumer Advice
 - Craft Projects
 - Craft Tips
 - Food Tips
 - Garage Sales
 - Gardening
 - Gifts
 - Green Living
 - Home Improvement
 - Organizing
 - Parenting
 - Parties
 - Pest Control
 - Pets
 - Product Reviews
 - Recipes
 - Repair
 - Thanksgiving
 - Weddings for Less

More Topics

Google Search:

Web thriftyfun.com

About:
RSS Feed
About Us
Media
Advertising
Contact Us
Privacy Statement
Disclaimer

Jelly Jar Candles

By Christine Weber
1x1
Date: 12/23/2005 Topics: Christmas > Gifts > Homemade | Craft Projects > Candlemaking > Recipes | Photos > Crafts  
1x1
1x1
Post Feedback! | Email Friend | Print | Get Responses | Bookmark | del.icio.us | Link | Rate: Thumbs Up Thumbs Down
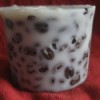
Candlelight dances and flickers in these old fashioned candles, reminding you of the Christmases of yesteryear. A bow of raffia or string of bead wired around the rim add a finishing touch if you like. A wonderful way to reuse jelly jars from all that summer canning!

Jelly Jar Candles

Materials and Equipment:

  • left over wax from candle stubs or beeswax sheets, or new wax purchased at a craft store
  • a foot or more of candle wick
  • a penny or wick clip
  • an old pot
  • a tin can (12 or 14 oz works well)
  • tongs or silicon oven mitts
  • scissors
  • a used jelly jar
  • a pencil
  • tin foil
  • an old spoon as a stirrer
  • raffia or beads and wire (optional)

Instructions:

1. These instructions make one candle, but feel free to make as many as you like by using more wax, wick and jars.

2. Cut a piece of wick that is a few inches longer than the jelly jar. Tie one end around the penny or press it into the wick clip. Place it into the jar. Tie the other end around the pencil so that when the pencil is laid across the top of the jar, the wick is straight. Set next to the stove on a counter on top of a piece of tin foil (to protect the counter from wax spills).

3. Pour a few inches of water into the pot and boil. Once boiling, turn the heat to simmer and place the tin can in the water. Add your wax to the tin can. You will need enough wax to fill the jelly jar, but this can be added in increments as you go. Stir the wax with an old spoon to help it melt. Hold the can with the tongs if it tries to tip.

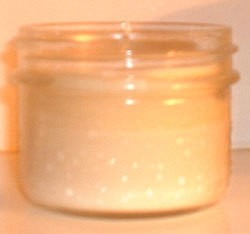
4. Pour the melted wax into the jelly jar.

5. Repeat steps three and four until the jar is full of wax, leaving a 1/2 inch to the rim unfilled. Allow to cool.

6. Tie raffia or a string of beads around the top if you like, or leave the candle unadorned.

7. Make several of these candles and mass them together for a lovely effect!

Jump to Feedback | Post feedback
Related Links:
Previous: Daily Thrifty Tips - December 23, 2005 ThriftyFun Next: Sponge-Painted Mugs
1x1
 Feedback
1x1
1x1
1x1
1x1
 Sponsors
1x1
1x1

Post By Sharon (Guest Post) (01/20/2006)
The penny is a great idea- also- to get the remaining candle wax you wish to use out of the glass jar it is in- put the jar in the freezer overnight- the was pops out easily!


Post By (Guest Post) (12/26/2005)
Thanks for the great tip! I have a bag of lovely candle "shells" - the ones where the wick burns down through the centre and I was wondering how to reuse them as it seemed such a waste to discard all that lovely scent.


1x1

Post Feedback:
Login using the form on the top of the page to post feedback if you have registered with ThriftyFun. If you have not yet registered, click here. It's FREE!. If you are not registered you can post feedback as a guest below. Please don't use your email address for your name because spam robots can dredge it from our site. Please do not post your feedback more than ONCE. We need to approve all guest feedback and it may take from minutes to hours for that to happen.
(1x1 graphic )
Your Name

Subject

Feedback

text tool text tool text tool text tool

Image Upload: Add an image to your post! Click the "Browse" button below and select an image from your hard drive. Please only select gifs or jpegs. If you have any problems, just email the image to images@thriftyfun.com


If you want to post your email address for responses from readers, obscure it in some way like put spaces between the name and @ sign and service address with (remove spaces) behind it or name (at) server (dot) com . This is for your protection from those creepy Robots.

(1x1 graphic )

© 1997-2008 ThriftyFun.com - Design by Cumuli Design
Disclaimer: ThriftyFun.com cannot accept any responsibility for any injury or damage that you may cause to yourself, others, or property when following any advice given on this site. Read the full disclaimer. If you find any information on ThriftyFun.com or in our newsletters that is either erroneous and/or potentially harmful to others, please Contact Us, immediately.