Home |  Index |  Submit Request |  Share Photos |  Share Tips |  Active Topics |  New Feedback  |  Contact Us  |  Search
 User Login:  Username:    Password:      Forgot It?  | Join ThriftyFun!

 Popular Topics
 - Beauty
 - Budget and Finance
 - Christmas *
 - Cleaning
 - Consumer Advice
 - Craft Projects
 - Craft Tips
 - Food Tips
 - Garage Sales
 - Gardening
 - Gifts
 - Green Living
 - Home Improvement
 - Organizing
 - Parenting
 - Parties
 - Pest Control
 - Pets
 - Product Reviews
 - Recipes
 - Repair
 - Thanksgiving
 - Weddings for Less

More Topics

Google Search:

Web thriftyfun.com

About:
RSS Feed
About Us
Media
Advertising
Contact Us
Privacy Statement
Disclaimer

New Way to Use Solar Lights

1x1
Date: 08/02/2006 Topics: Home Improvement > Lighting and Electric | Contest Winners > Photo Contest  
1x1
1x1
Post Feedback! | Email Friend | Print | Get Responses | Bookmark | del.icio.us | Link | Rate: Thumbs Up Thumbs Down
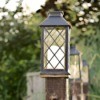
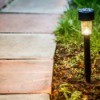
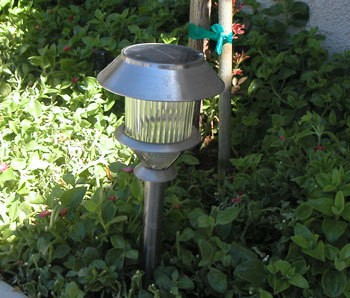
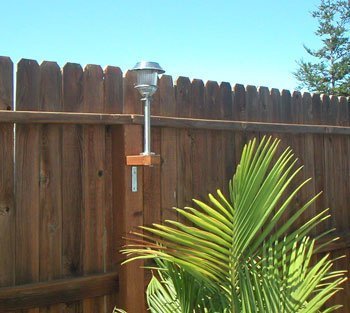
Here's a unique way to use your solar lights. They aren't just for the ground!

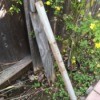
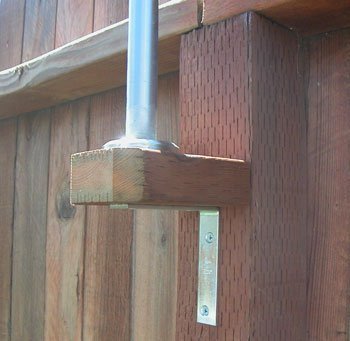
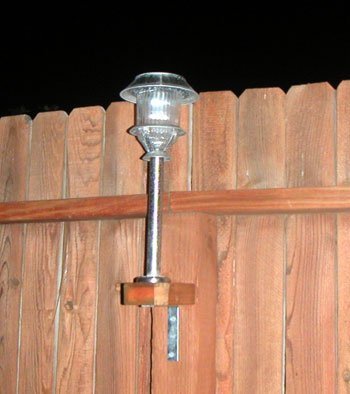
We took 2x4 and cut them into squares to fit the original existing posts. Using galvanized screws - Not nails - Screw a "L" bracket to the underneath base. Then on top, screw on the stake. Screw the whole block to the existing post. I then stained the block with Superdeck Redwood to match the fence.

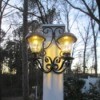
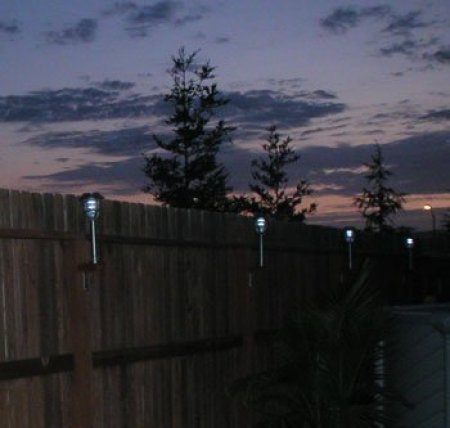
It's really nice at night. It's nice to have lights up high, it really gives a romantic glow to our yard.

Solar Lights on Fence

Solar Lights on Fence

Solar Lights on Fence

Solar Lights on Fence

Solar Lights on Fence

Solar Lights on Fence

Solar Lights on Fence

By Jennifer In CA

Jump to Feedback | Post feedback
Related Links:
Previous: ThriftyFun Crafts - August 2, 2006 ThriftyFun Next: Alvie (Labrador Retriever)
1x1
 Feedback
1x1
1x1
1x1
1x1
 Sponsors
1x1
1x1

Post by Trisch (6) | (09/07/2007)
Contact
Along a similar theme, our deck rail has 4x4 posts, but the railing top covers them. My husband took 2" slices of 4x4 and screwed them down directly above the posts -- giving the effect that it comes through the rail top. Then we bought solar post cap lights and screwed them on top. Now we have great solar accent lighting and it looks like it was meant to be there all along! Our deck builder really liked the look of it and took photos to show options for futures deck clients.


Post By Jennifer,CA (Guest Post) (08/07/2006)
Thanks everyone for your comments! We sure had fun with this project. Evenings are spent outdoors since our lights are up! Happy Summer!

Jennifer CA


Post By Betty (Guest Post) (08/05/2006)
Like your idea. We have an above-the-ground pool with an attached deck (aluminum) and railing. We found that the solar light stakes will slide into the upright posts around the outside of the deck if the end caps are removed. It is a great look and a good way to light up your pool at night.


Post By Lee (Guest Post) (08/04/2006)
Clever idea, looks great!


Post By macawmadam (Guest Post) (08/03/2006)
LOVE THEM! So clever.Thanks for sharing.


Post by smcarney (104) | (08/03/2006)
Profile |Contact
Great look! We did this kind of thing on our deck once. Hubby took them out later to remodel and I'm still waiting for them to be put back up!! ;-)


Post By Sue (Guest Post) (08/03/2006)
What a great idea. You did a really professional looking job on these. The night time pictures are very inviting. Enjoy these, all year long.


Post By Jean (Guest Post) (08/02/2006)
That's beautiful!! The lights that I have are the kind that hang on hooks that are driven into the ground. All I need is to install some hooks (maybe decorative plant hangers) and hang the lights on those. Thanks for the great idea!!


1x1

Post Feedback:
Login using the form on the top of the page to post feedback if you have registered with ThriftyFun. If you have not yet registered, click here. It's FREE!. If you are not registered you can post feedback as a guest below. Please don't use your email address for your name because spam robots can dredge it from our site. Please do not post your feedback more than ONCE. We need to approve all guest feedback and it may take from minutes to hours for that to happen.
(1x1 graphic )
Your Name

Subject

Feedback

text tool text tool text tool text tool

Image Upload: Add an image to your post! Click the "Browse" button below and select an image from your hard drive. Please only select gifs or jpegs. If you have any problems, just email the image to images@thriftyfun.com


If you want to post your email address for responses from readers, obscure it in some way like put spaces between the name and @ sign and service address with (remove spaces) behind it or name (at) server (dot) com . This is for your protection from those creepy Robots.

(1x1 graphic )

© 1997-2008ThriftyFun.com - Design by Cumuli Design
Disclaimer: ThriftyFun.com cannot accept any responsibility for any injury or damage that you may cause to yourself, others, or property when following any advice given on this site. Read the full disclaimer. If you find any information on ThriftyFun.com or in our newsletters that is either erroneous and/or potentially harmful to others, please Contact Us, immediately.