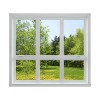
Home |  Index |  Submit Request |  Share Photos |  Share Tips |  Active Topics |  New Feedback  |  Contact Us  |  Search
 User Login:  Username:    Password:      Forgot It?  | Join ThriftyFun!

 Popular Topics
 - Beauty
 - Budget and Finance
 - Christmas *
 - Cleaning
 - Consumer Advice
 - Craft Projects
 - Craft Tips
 - Food Tips
 - Garage Sales
 - Gardening
 - Gifts
 - Green Living
 - Home Improvement
 - Organizing
 - Parenting
 - Parties
 - Pest Control
 - Pets
 - Product Reviews
 - Recipes
 - Repair
 - Thanksgiving
 - Weddings for Less

More Topics

Google Search:

Web thriftyfun.com

About:
RSS Feed
About Us
Media
Advertising
Contact Us
Privacy Statement
Disclaimer

Make Your Own Storm Windows

1x1
Date: 11/04/2005 Topic: Home Improvement > Heating  
1x1
1x1
Post Feedback! | Email a Friend | Print | Get Responses | Bookmark | Link | Rate: Thumbs Up Thumbs Down
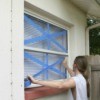
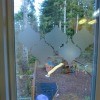
I know that a lot of people with older homes have resorted to using plastic on their windows to eliminate drafts. I used to do this every year too. I checked into replacing the windows but the cost was a small fortune. So here is what I came up with.

Supplies:

  • 1x2 pieces of wood
  • Pieces of plexi glass
  • 4 L brackets per window
  • primer
  • Small amount of your trim paint
  • Window clips, two per window (These are made by Stanley and look like big wing nuts with screws.)

Instructions:

I started out by measuring the inside of the window casing. I then ordered the plexi glass and had it cut to my dimensions. My husband then made frames that fit right inside the window casings and screwed the plexi glass to the wooden frames. He used metal screws with a rubber washer and then a metal washer on top. He then put the window clips on the outside edge of the casing.

Prime and paint your windows. The advantage to these windows is that you can still see out them, So you don't feel shut in for the winter. They give you a dead air space between your window and the new storm window. They can be used every year and can be cleaned and stored. They lay flat and can be bungeed together for storage in the eaves of a garage or in a shed.

They go up very easy, you could even get your kids to do :). Total cost of materials was about $ 250.00 dollars but when you think of the replacement cost of a new window that is pretty cheap. Oh by the way that was 8 windows for 250.00. Hope this saves someone some money out there. With heating costs going up these can be life savers.

By Debra in Colorado


I just saw this on another site: Go to Home Depot (or other like store) and buy Plexi glass. Have the store cut to exact size of each window you have.

When you get home, set plexi glass into each window and use clear tape to secure.

Saves money on heating costs and they are easy to store. I wanted to share with all of you as this is my favorite site with all the nice people sharing tips and cute photos.

By Annie from Missouri

Related Links:
Previous: Creative Easter Bonnets or Hats ThriftyFun Next: Abigail in Her Sunday Best
1x1
 Feedback
1x1
1x1
1x1
1x1
 Sponsors
1x1
1x1

Post By Dot (Guest Post) (09/13/2008)
I am making 74 storm windows for a 100+ year old home in Texas. However, I am using all the original window screens which eliminates makeing frames.

Report Spam or Abuse


Post By Nancy Bergum (Guest Post) (11/15/2007)
For those of us with full-sized screens mounted on the outside of the windows, one extremely cheap alternative would be to wrap plastic over the screen, folding it over the edges and securing it on the inside with double-sided tape. This shouldn't add to the bulk of the screen too much, so fit won't be a problem. The screens can be reinstalled when wrapped from the inside of the home, making it easier to deal with on two-story homes like mine. One big advantage would be that the wind should blow the plastic against the screen, so bulging won't be an issue, as it is for me when I have installed it on the inside of the windows. The plastic can be removed and maybe reused (perhaps cut for smaller windows) for the next year. I plan to store some of the screens, plastic and all, as I don't leave them on all my windows, only the ones I use regularly (they tend to pull dirt from the air and dirty the windows faster). This should give most of the advantages of the homemade storms without the greater investment of time or money. Let me know what you think; I'm going to do mine next week when the temps are supposed to go back into the 50's.

Report Spam or Abuse


Post by imaqt1962 (840) | (10/28/2007)
Profile |Blog! |Contact
I too would love to see pic's of the finished product

Report Spam or Abuse


Post By Justin (Guest Post) (10/28/2007)
Great idea. Thanks!

Report Spam or Abuse


Post By Sue C (Guest Post) (10/07/2007)
Can anyone send in a picture of what the final storm window looks like? I definitely would like to make these for the upcoming winter season.

Report Spam or Abuse


Post by eggamuffin (8) | (06/14/2006)
Profile |Contact
That sounds like a great idea. I was wondering though, how would you secure the plexi on vinyl-covered trim/frames? I would like to have that done to my bay window, cause that one is really expensive to replace. But it looks like it was made as one unit, meaning the frame/trim is connected to the glass? Sorry, I can't explain it.

Report Spam or Abuse


Post By sandy (Guest Post) (11/04/2005)
sounds good. do you have a man that come to my house and make these windows for me.
yes i use the plastic covering. i would not be able to make these 2nd windows.

Report Spam or Abuse


Post By Deron and Cindy Kosloski (Guest Post) (11/19/2004)
Thank You!!!!!!!!!!!!

Deron and Cindy Kosloski
Indiana

Report Spam or Abuse


1x1

Post Feedback:
Login using the form on the top of the page to post feedback if you have registered with ThriftyFun. If you have not yet registered, click here. It's FREE!. If you are not registered you can post feedback as a guest below. Please don't use your email address for your name because spam robots can dredge it from our site. Please do not post your feedback more than ONCE. We need to approve all guest feedback and it may take from minutes to hours for that to happen.
(1x1 graphic )
Your Name

Subject

Feedback

text tool text tool text tool text tool

Image Upload: Add an image to your post! Click the "Browse" button below and select an image from your hard drive. Please only select gifs or jpegs. If you have any problems, just email the image to images@thriftyfun.com


If you want to post your email address for responses from readers, obscure it in some way like put spaces between the name and @ sign and service address with (remove spaces) behind it or name (at) server (dot) com . This is for your protection from those creepy Robots.

(1x1 graphic )

© 1997-2008 ThriftyFun.com - Design by Cumuli Design
Disclaimer: ThriftyFun.com cannot accept any responsibility for any injury or damage that you may cause to yourself, others, or property when following any advice given on this site. Read the full disclaimer. If you find any information on ThriftyFun.com or in our newsletters that is either erroneous and/or potentially harmful to others, please Contact Us, immediately.