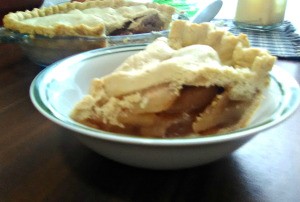
 Making a pie from scratch might seem daunting, but trust me, it is so worth the effort! I remember I used to work at a bakery in an upscale grocery store that would feature pies in their holiday display. They looked like the real deal, yet they came straight out of the freezer! Take the time and love to make a fresh, homemade pie and I swear, the flavor just cannot compare. You can also save over $10.00 once you factor in the cost of ingredients.
It's also not as hard as you think. In this recipe I'm going to share my mother's recipe and a few of her pie-baking hacks.
Total Time: about 2 hours
Yield: 1 pie
Source: Mom
Ingredients:
- 1/2 cup shortening
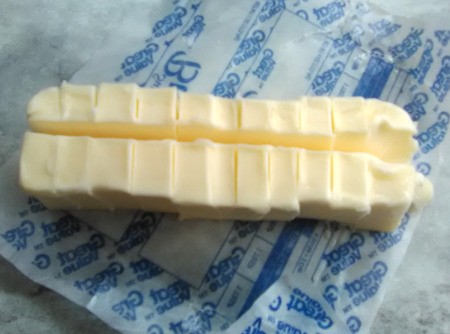
- 1/2 cup butter
- 1/2 tsp salt
- 3 cups flour
- 1/2 cup cold water
- 3/4 cup sugar
- 2 Tbsp flour
- 1 Tbsp cinnamon
- 1 tsp nutmeg
- tiny dash of salt
- 2 tsp lemon juice
- 1 Tbsp butter
- 8-9 small/medium apples, peeled, cored, and sliced evenly
Steps:
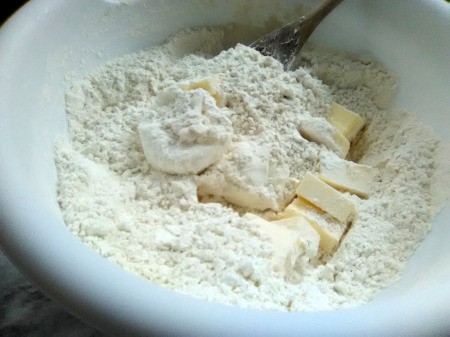
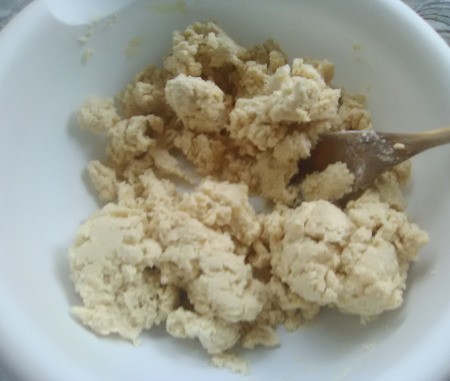
- Slice the cold butter into small cubes. Mix the flour and salt together, then cut in the butter and shortening until crumbly, with some small flecks of butter still visible.
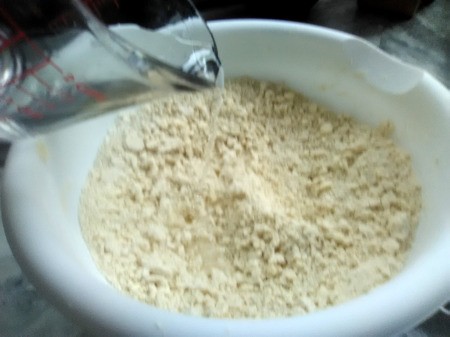
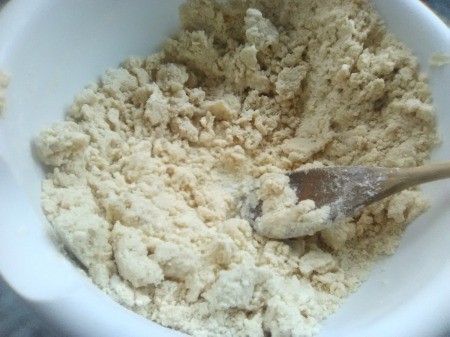
- Add the cold water a little at a time until the dough comes together in a ball. Try to avoid using your hands.
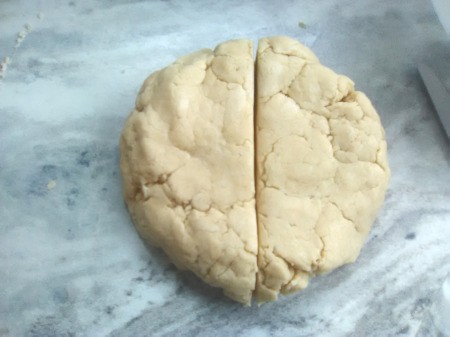
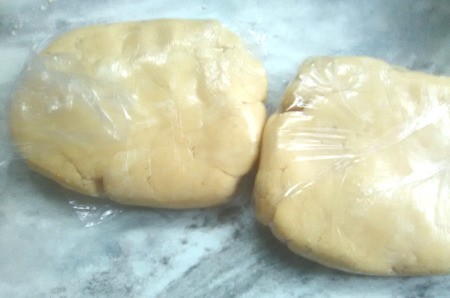
- Cut the pastry in half and flatten each half into a thick disk. Wrap and refrigerate 30 minutes before rolling out the crust.
- Preheat the oven to 425 degrees F. Do not grease the pie plate.
- While the pastry chills, work on the filling. In a large bowl, mix the sugar, flour, and spices together. Peel, core, and slice the apples, coating slices in the sugar mixture as you go to prevent browning. Stir in the lemon juice.
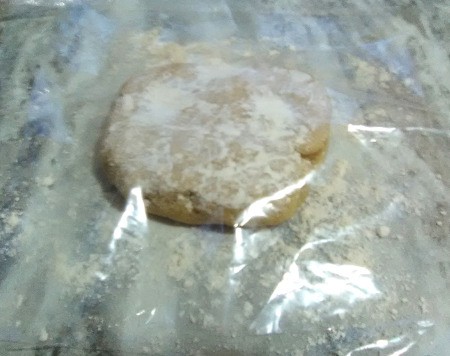
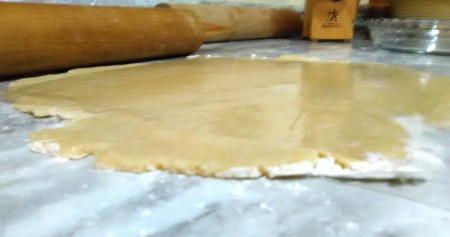
- Cover the filling and get ready to work on the pie crust. If you have to, you can keep the pastry in the refrigerator longer than 30 minutes. Just make sure to let it soften up on the counter without letting it get warm. Cut a gallon storage bag into two sheets to use to help roll out the pie crust. This will help prevent it from cracking. When you're ready, moisten the counter top with a damp cloth so the bottom sheet will stay in place. Sprinkle some flour on the sheet and place one of the pastry disks on top. Add a little more flour on top of the pastry and place the second sheet over the top. Roll the dough out thinly until it looks like it will fit nicely into the pie plate and fold over the edges, about 10 or 11 inches wide.
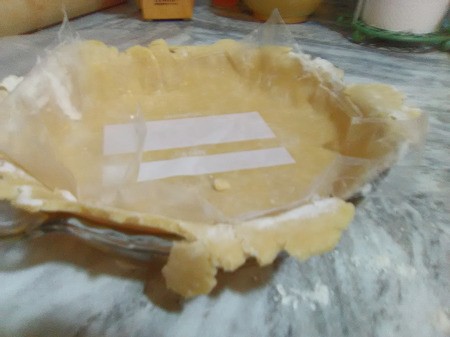
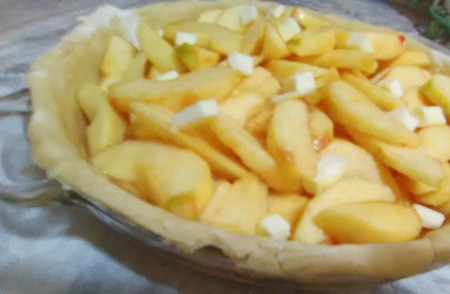
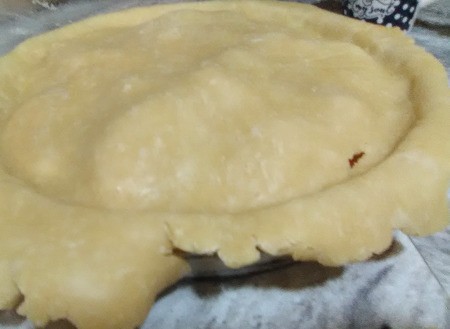
- Gently place the bottom crust over the ungreased pie plate, one half at a time, and peel away the plastic sheet. Trim off excess pastry, making sure to leave some around the edges of the pie plate. You can also patch any little tears in the crust with bits of pastry and water to make it stick. Pour all of the apple mixture in, with the liquid. Dice up a tablespoon or two of butter and sprinkle over the apples. This rounds out the taste and prevents the liquid from bubbling over too much while baking.
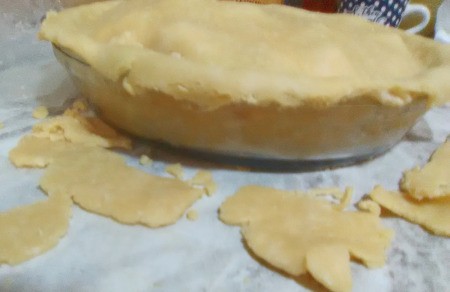
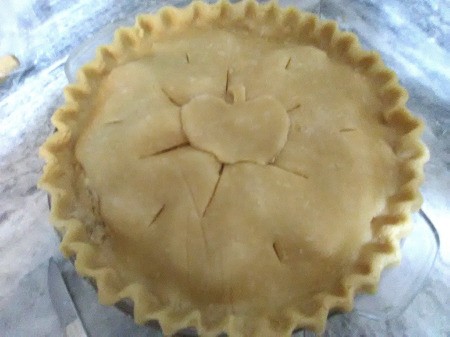
- Roll out the top crust. Before you place it over the apples, brush cold water around the edges of the bottom crust. This will help it stick without coming apart in the oven. Place the top crust over, trim off excess, and pinch the edges to seal. Cut a few air vents into the pie before you bake. You can also decorate it with leftover pastry.
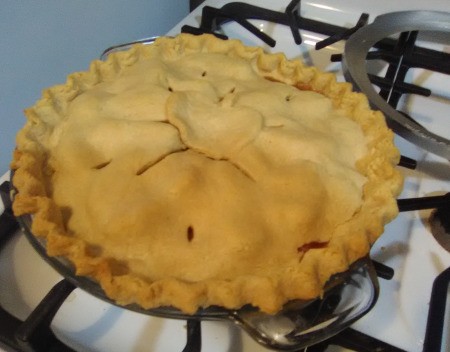
- Place your pie on a cookie sheet and bake at 425 for 15 minutes. Turn down the heat to 375 and bake for another 45 minutes. This is a good time to put a pie crust shield over the crimped edges. You can buy one for under $10.00 that you can use over and over again, or make one quickly with foil.
- Let the pie cool completely before serving. It can keep on the counter, uncut, overnight. After you cut into it you need to wrap and refrigerate the leftovers. Enjoy!

Add your voice! Click below to comment. ThriftyFun is powered by your wisdom!
May 17, 20190 found this helpful
Warm apple pie is one of my favorites, especially with a little scoop of ice cream on top. When I have a lot of apples, I make the filling for several pies and freeze it in pie portions. It absorbs the flavors and tastes really good. When I want to make an apple pie, all I have to do it make the crust.
Your recipe is a keeper for sure.

May 19, 20190 found this helpful
Thanks for the great tip! I agree, pie with ice cream is divine!
likekinds
Gold Post Medal for All Time! 523 Posts May 21, 20190 found this helpful
There are a few pie making tips here I've never seen before.
Thanks to you and your mom.
Add your voice! Click below to comment. ThriftyFun is powered by your wisdom!