 I will never forget the joy I got when I received my first Betty Crocker Kid's Cookbook when I was a kid. It was wrapped in a pastel pink paper with a big pink bow. It was the only present under the Christmas tree I had not figured out. I spent days reading that cookbook and planning all the big events I would hold. But this was the seventies and my mom would rather I would be out in the great outdoors than in HER kitchen messing it up.
I decided I wanted to make my grandson's and also some of my friends' children a personalized cookbook. Alas I am not a prize winning cook or cookbook author so I decided to take some help from the internet wonderful resource that it is. You can also use these instructions to make cookbooks for your school or charity or a family cookbook. To truly make this a personalized gift you could also use all of the digital pictures that you have stored on your computer and you can certainly mix it up with theme images and your own personal pictures.
Depending on your surfing the Web time this could take you a couple of hours to a couple of days. The hardest part is collecting the recipes.
This is going to be step-by-step instructions on how to make your own cookbook. You can make it as many pages as you want. I will show you how to cut and paste images and recipes into a Word document and how to and where to get it bound. This is a quick and easy craft if you have a computer and a color printer. Of course you could grey scale all of the images and print in black and white. I know these instructions will seem hard at first but I tried to make them as easy as I know how, you may want to print these out and keep them handy.
First I decided on a theme which just happened to be Winnie the Pooh but you can choose any character or theme you would like. Some ideas would be chocolate recipes, Native American Recipes or maybe Christmas Cookies or Easy Meal Ideas. After deciding what theme I would use which was Winnie the Pooh and then just general recipes; I made mental notes of what sections I wanted for my cookbook I decided to follow the basic layout of my old faithful favorite. So I made sections for Finger Foods (appetizers) Main dishes, Salads and Vegetables, Baked Goods and then a section for Craft Recipes which was not in my cookbook but I thought would be a great addition.
Following my Theme idea I named each section with a Winnie the Pooh Name. Piglet's Little Food Appetizers, Owl's Gourmet Main Dishes not that Mac and Cheese is a Gourmet dish but you get the idea. Next decide how many recipes you want for each section. Now I always believe bigger is better so I usually go with about 10 recipes per section but this decision is entirely up to you. You will find I am sure that what ever you decide you will find more than you could ever use and making the decision on which to use will be the toughest part of this whole project. Remember to try and select recipes that are easy enough for all the children you are making the cookbook for.
First things first go to My Documents on your computer and make two new folders. One for your images and one for your recipe file. Name them appropriately for each. (i.e. Your theme) and Kid's Cookbook recipes. Now you have a place to save things. Now connect to the Internet and go to the Google Web search Page. I have this saved to my favorites. Next hit Google Image search... This is on top of the search bar and looks like the tab on a file folder... Type in your search word (i.e.: Winnie the Pooh) Then hit search this gave me many images to choose from. I went to each site and right clicked and then hit the Save This Picture As: button for each image. When you do this a save box will come down, In the box type a name for your picture and make sure that you click on the drop down menu and click My Documents and then the "image" file folder so you can save it to your "image" file. Do this for each image. You will need one image for each section and maybe four more to decorate recipe pages with. Try to have at least 10 different images so that you don't have to repeat them very often.
Then I did a Google search for Children's Recipes and Kid's recipes. I opened a WordPad document (Word pad is found under Accessories on most computers. Hit start, All Programs, Accessories, and then WordPad) and as I found interesting recipes I just copied them and pasted them into it. If you want you could just search for each section. I, being always in a rush just copied all the recipes to one file to be sorted later. When you are done finding the recipes, Save your work, you should get a pop down screen it will ask you to name your WordPad document and be sure you save it to your "recipe" file in my documents. Now you should have enough images and recipes to get started putting together your cookbook. You are now about 1/2 way there.
Now here is where your own creativity comes in, I always rename my recipes to go along with my theme. Ants on a log are one thing but when it is named Rabbit's Rescue Boat it just gives something to it.
Open any Word processing program such as Microsoft Word or Works. Any Word processing program should accept Images so here we go.
First open your word processing program and name your document. (i.e.: Jane's Cookbook or whatever) Then go to File and hit Page Setup. I set all of my margins at .05 which still gives me enough room to bind the page and lets me use my space more efficiently.
Now start with your first section. On the blank page insert one image. Go to the File that you have your images in which is in My Documents and double click on the picture and make a copy of the picture. After you double click it should either go to a Microsoft program for opening pictures or Paint. Go to the editing section. Go to Edit and select Select all and then hit copy. Note: if you are going to be printing this is black and white you will need to grey scale your images which is easy, don't panic. Go to view and hit grey scale. Now go back to your Document Go to Edit and hit paste. Now you have your image in your document. Yeah! If your picture is too small double click on it and grab one of the little black dots at the corner and holding down your mouse button pull on it to enlarge the picture. Now click on the right hand side of the bottom of your image and it would take you back to the line cursor. Go back up to the toolbar at the top and hit the center align button and then it Enter. You should now have the line cursor in the middle of the bottom of your picture.
Name your Front page (i.e.: Pooh and Jane's Wonderful Cookbook) and then hit the enter button till you have reached the end of the page and are on Page number 2. This is were you might want to add your charts but you can just make two extra pages at the end for your charts it is up to you.
Repeat your image instruction on Page two and name the section (i.e.: Owl's Gourmet Dishes) and hit enter until you are at the top of Page 3. Now you need to go to my documents and open the WordPad file with your recipes in it. Now there are two different ways to do this. You can copy your recipes out of your file or you can cut them out of your file. I suggest you only copy as this leaves your WordPad file intact. In case of any problems you then can just go back and recopy that recipe. If you have cut the recipe from the WordPad file and your computer clipboard ate it you might find yourself searching for another recipe to replace it. But you can for clarities sake cut each recipe out.
Pick your first recipe and highlight and copy it. You can now drop it in your document. Do this with each recipe. You might want to type a line under each for a spacer or if you have a lot of recipes you can go to the top tool bar and make columns. If you do use columns please use your enter bar often so that your recipes are not chopped in half by the columns. Is half a page empty? Go to your image file as you did before and drop in an image to fill the page. When you are done with one section go onto the next. For printing and assembling it is always easier to have your sections as the first page of each that way when you print it is in the order it should be for assembly.
Now you are ready to print. Print each page. To save paper and to make your cookbook look more professional Set up your printer to print on both sides of the paper. To do this go to Printer Setup and Click on the box that says Two sided printing. If your printer has an instruction page like my does for two sided printing print it out also.![]()
On my computer the instruction page is just a big arrow to remind you how to reinsert the paper so that half the printing is not upside down on your page. Now you have a choice if you are making this for more than one family you might decide to make all the copies on your own computer especially if you have used colored images. This is the cheapest way since most color copies cost a dollar or more at a copy center. Or you can take it to the copy center and have as many copies as you need made.
Now to binding your cookbook together, The cheapest way is to buy a three ring hole punch and mount your pages into a report folder if you are not like me with 30 pages of cookbook. If you are like me and could not resist all the cute recipes you can also mount your pages into a three ring binder. Going along with the Three Ring Binder idea you could put each page in a page protector and that way each page would be cleanable. My favorite way to bind my cookbooks together is to take my pages to the copy center and have them bind them with a clear sheet in the front and a comb binding attached. This makes my cookbooks wipe able at least the front anyway and with the comb binding the cookbook will lay flat. It also only costs me about a dollar per book to have them bound if I already have the pages printed out myself. You can also add Page tabs to make finding the chapters easier also.
By Debra from Colorado Springs Co
Awesome, Debra! What a great idea for people to share their love of cooking with kids of all ages!
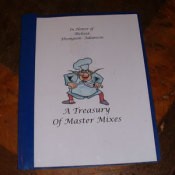
I really like this idea. My Mom handwrote a lot of her recipes, then copied them, giving all of us a book. I will treasure it forever. Your idea takes things a bit further. I love the cover, 'In Memory of Melissa'. Bet that alone makes the book more special.
Fantastic! I created a 3-ring (updatable!) family recipe book a couple of years ago so my grown kids could fix their childhood favorites, but it never occurred to me to make a custom cookbook for my granddaughter - great idea!