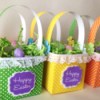
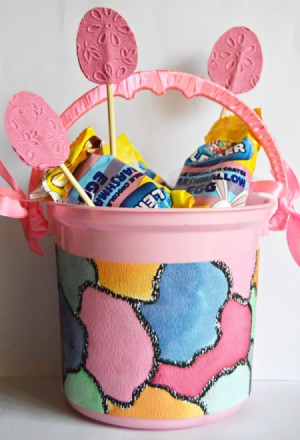
Here is a fun way to turn a simple plastic bucket into a cute Easter basket. Filled with chocolate covered marshmallow eggs, this basket is sure to make the kids jump for joy.
Advertisement
Supplies:
4.5 in high pink plastic bucket with a handle
A4 sized 140GSM watercolor paper
A5 sized pink textured cardstock
three wooden kebab skewers
0.3 in wide pink satin ribbon
white cotton filling
leftover pieces of soft white glitter stardust net fabric
chocolate covered marshmallow eggs
black oil pastel
food coloring: red; blue, yellow and green
quick-drying craft glue (such as Bostik Clear)
paintbrush
standard scissors
pencil
several small plastic bowls for food colorings
Steps:
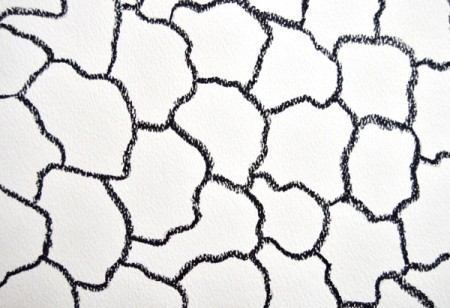
Use the pencil to draw abstract shapes on the watercolor paper. Then, use the oil pastel to draw over the pencil lines.
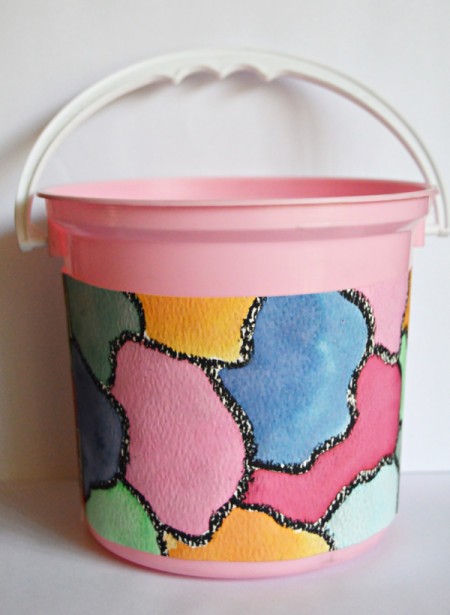
Dilute the food coloring with water ~ the amount of water used will have an effect on the depth of color you will see when painting. Paint the shapes with different colors, making sure not to use the same color on two adjacent shapes. Allow to dry thoroughly.
Advertisement
Cut strips from the watercolor paper that would fit around the bucket. To allow a neat fit, you might need to cut the top and bottom sides of each strip at a slight curve to accommodate the bucket's slant. Glue the strips around the bucket.
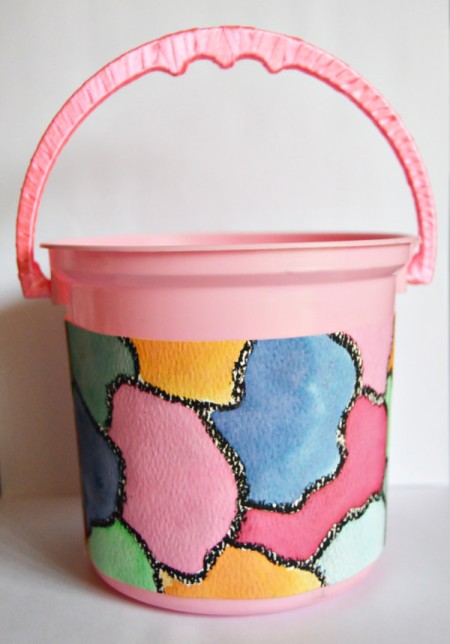
If possible, remove the bucket's handle. Tightly wrap ribbon around the handle. Add a drop of glue at the ends to keep the ribbon in place and cut off any remaining ribbon. Fit the handle back to its position on the bucket again.
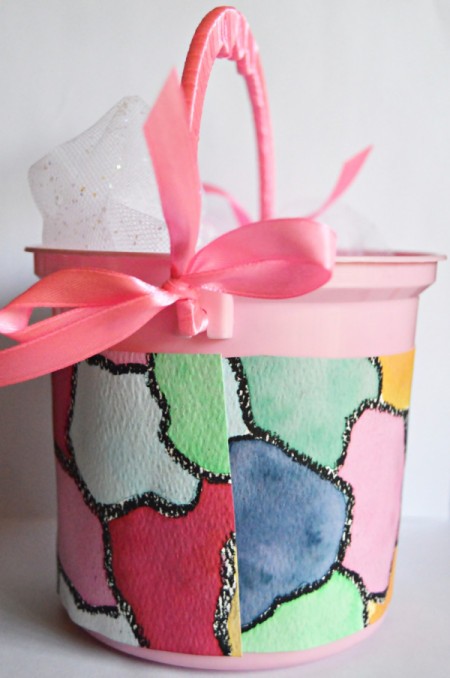
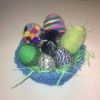
Optional: Depending on how many marshmallow eggs you want to add to the bucket, fill the bottom of the bucket with cotton filling and pieces of net fabric.
Advertisement
Use the ribbon to add a bow on each side of the handle where the handle and the bucket meet.
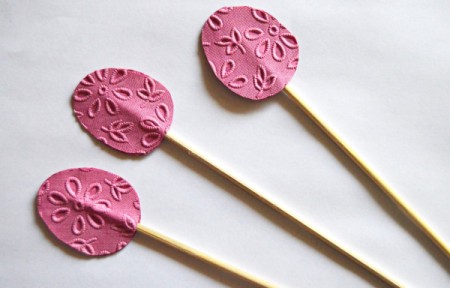
Make the floating eggs: Trace and cut six egg shapes from the pink cardstock. Add glue to the back of the first egg and glue a skewer to the egg. Glue a second egg to the back to keep the skewer in place. Make the other two floating eggs in the same way, cutting the ends of the skewers to different lengths.
Add the marshmallow eggs and the floating eggs to the bucket.
 Here is a fun way to turn a simple plastic bucket into a cute Easter basket. Filled with chocolate covered marshmallow eggs, this basket is sure to make the kids jump for joy.