social

Crochet Hook Holder


Bronze Post Medal for All Time! 216 Posts

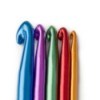
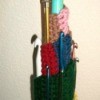
I saw a beautiful pattern to crochet a crochet hook holder. The pattern was costly and I could think of ways to personalize it, so I set to making my own. Photo of hand made crochet hook holder


Materials:

Advertisement

  • 1 sheet plastic canvas cut to the size you want; mine was 7 1/2x12 1/2 inches
  • 1 piece of fabric cut to cover both sides (inside and outside) of your canvas, mine was about 16x26 inches.
  • fabric cut to the size of the pockets you want
  • thread
  • scissors
  • thimble
  • a sturdy rubber band, or piece of elastic sewn in a loop

Directions:

  1. Make sure the edges of your canvas are smooth. Place it on your fabric with the prettiest side of the fabric up toward you.
  2. Fold the fabric over evenly and pin the long side and one short side.
  3. Remove the plastic canvas and sew these two sides up, making sure you don't make it too small for the canvas to go back in.
  4. Turn your "pocket" inside out so that the pretty side is facing outward.
  5. Slide the plastic canvas back in then pin up the last side, making sure the cut edges of the cloth are tucked inside your cover. Sew it up securely.
  6. Advertisement

  7. Gently fold this piece in half like a book and keep gently squeezing the folded side so that it wants to stay folded, but try to not break the canvas, or it will slide around in your cover and not stiffen it. You could cut the canvas in half and add a seam between the two parts to insure this doesn't happen, but mine has seen plenty of use and hasn't broken.
  8. On the inside of the left half of your piece, tack a piece of hemmed fabric into place making a "pleated" surface. You will be storing your crochet hooks inside the pleats. Pin between each pleat, making it the size of the hook/s it will hold. This piece should come about half way up the hooks. Sew it into place on the two sides and the bottom then between each pleat. Photo of close up of crochet hooks in holder
     

    Advertisement

  9. Put your hooks in, then pin a hemmed piece of cloth over the tops to come down just far enough to expose about an inch of the hooks. Pin it in over the actual hooks so you know it has room for them.
  10. Remove the hooks and sew the two sides and the top in place. I left the space over the middle of the hooks to see the pretty colors and to be able to pick my hook out without lifting the flap up.
  11. The top piece has to be just loose enough that you can reach up under it and remove the crochet hook. For this I used a roll of clear, ribbony material I got at a garage sale; I can see through it, and it had another plus of not needing hems (no-ravel), but I have no idea what it is.
  12. For the right half, take a piece of fabric the size you want to make a little pocket and its cover. Sew it up, turn it right side out, then sew it into place. I used the same clear material as for the hook holder. I sewed the two sides and the bottom in place, but left the top un-sewn. I tuck folded patterns in here. I close it by tucking the top into the pocket. In here I keep accessories such as a small magnifier, a stitch counter, and place markers. Photo of Close up of poket in the crochet hook holder
     
    Photo of Inside of the Crochet Hook Holder
     

    Advertisement

  13. I close my hook holder with a rubber band, though I will get around to making an elastic loop sooner or later.
  14. I decorated my holder with some flowers I crocheted, though I didn't include the instructions for these, since they are optional, and the instructions are too long.

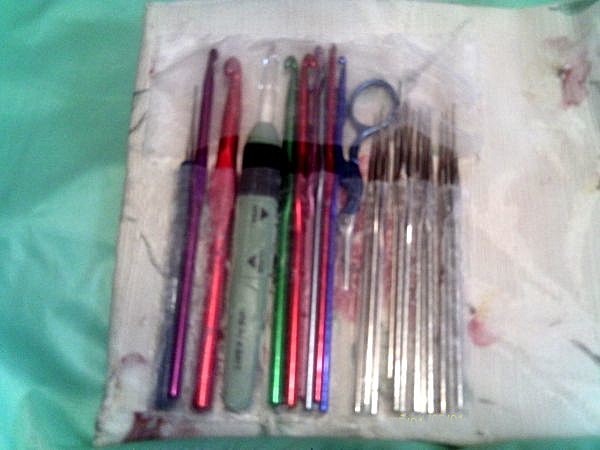
I made this with all scrap materials, so it was very thrifty, and it is more useful to me than anything I've seen in stores.

By Free2B from North Royalton, OH

Add your voice! Click below to comment. ThriftyFun is powered by your wisdom!


Bronze Post Medal for All Time! 146 Posts
May 16, 20110 found this helpful

What a nice and crafty idea. I love the floral additions as well.

I'm betting you could sell these should you ever want to, and I'm very sure anyone who crochets would consider it the finest gift ever... It's beautiful. Your directions are great too.

Advertisement

Also, the individual flowers would make fantastic "pins" for sweaters etc. There is quite a good market for these quality items. Just add a pin back to one or more and pop them on a matching or contrasting sweater.


Thank you for sharing.

Pookarina / Julia


Bronze Feedback Medal for All Time! 249 Feedbacks
May 16, 20110 found this helpful

Love it! Thank you for the really good instructions too. I gotta make one of these. :-)

MisMachado


Bronze Post Medal for All Time! 216 Posts
May 16, 20110 found this helpful

Thank you for the suggestions, Julia! I hadn't thought of using pin backs for the flowers, but I'll be heading to Michaels to get some. I hadn't thought about selling the holders, either, but I do have a lot of fabric remnants...hmm. You have so many good ideas, Julia!


Bronze Feedback Medal for All Time! 151 Feedbacks
May 17, 20110 found this helpful

I really like your craft idea and I'm going to make something like it for my embroidery projects. I love doing ribbon embroidery in combination with regular embroidery and the addition of crystal beads. I never seem to have everything I need in one handy place. With a few alterations, this would work just great.

Advertisement

Thank you for sharing your nice craft idea.

ww


Gold Feedback Medal for All Time! 690 Feedbacks
May 17, 20110 found this helpful

I'm "hooked"! I agree with Julia, you should sell them and I'd gladly be your first customer seeing my sewing machine is still down.

Besides putting pins on your crocheted flowers (I put mine on hats too) I've glued magnets to them for the fridge.

You could make some good "seed" money! : )

Great photos and easy instructions.Thanks for sharing and good luck with winning on this one.

Keeper/Sandie

 
May 17, 20110 found this helpful

You all make me want to learn to crochet. I always thought it'd be a nice thing to know, but my Granny did all the crocheting in our family, and she made every sort of thing. I was too busy playing. Now, I wish I'd spent more time learning to do these kinds of things.

Those flowers especially are nice, and would be so nice at the neck of a simple sweater. I definitely think you could sell those. You could set up a nice little mail-order business.

Thumbs Up.

StarWarsCollector


Add your voice! Click below to comment. ThriftyFun is powered by your wisdom!

 
In This Page
< Previous
Categories
Crafts CrochetMay 16, 2011
Pages
More
🍀
St. Patrick's Ideas!
💘
Valentine's Ideas!
🎂
Birthday Ideas!
Facebook
Pinterest
YouTube
Instagram
Categories
Better LivingBudget & FinanceBusiness and LegalComputersConsumer AdviceCoronavirusCraftsEducationEntertainmentFood and RecipesHealth & BeautyHolidays and PartiesHome and GardenMake Your OwnOrganizingParentingPetsPhotosTravel and RecreationWeddings
Published by ThriftyFun.
Desktop Page | View Mobile
Disclaimer | Privacy Policy | Contact Us
Generated 2024-02-13 23:17:08 in 3 secs. ⛅️️
© 1997-2024 by Cumuli, Inc. All Rights Reserved.
https://www.thriftyfun.com/tf47047303.tip.html