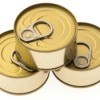
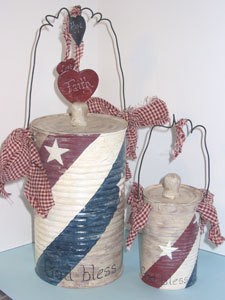
This is what I do with old cans. They make great gift "buckets".
By Artlady from Edmond, OK
Add your voice! Click below to comment. ThriftyFun is powered by your wisdom!
That is so neat. What do you use for the knob to lift the lid up? Zig
Those are very pretty. Could you post the instructions on how to make them?
How cute how did you make these?? I would love to learn how!
This looks like a great way to recycle cans! Could be used and decorated for any occasion. How do you make the lids?
My brother-in-law made fun of me for keeping all my cans. I'm making him a "fishing" bucket. I'm putting in things like floats, bandaids, handi-wipes, suncreen, etc.
This is my fourth try at giving directions for these cans. I am from Oklahoma and the wind has been playing havoc with the power lines.
Supplies:
Can w/lid (Remove lid with a can opener that separates the seal - no sharp edges)
Heavy gauge black wire
Glass Etching Cream (optional)
Wooden Candle Cup
Acrylic Paints
Crackle Medium
Antiquing Gel
Kilz Clear Satin Spray Paint
Craft Glue
Small Piece of Felt
Small Block of Wood
Large Nail
Hammer
Pliers
Fabric Strips and Embellishments
Brush etching cream on can and lid, let sit overnight. Be sure to put a thick rag under the can to protect your work surface. You can sand the can instead of the etching cream. Wash all etching cream off and let dry. There may be some rust, but I think this makes it look more "aged."
Paint can/lid/candle cup with a dark brown acrylic paint. Let dry.
Brush on crackle medium. Let sit 5 minutes.
Brush on off white acrylic paint. It will start to crackle as you brush. Let dry.
Mark off stripes and paint red, white and blue.
Brush on antiquing gel and rub off excess. Let dry.
Write sayings on with paint pen. Let dry 24 hours.
Spray with clear spray paint. Let dry. Repeat.
For handles:
Cut wire about 18" long, depending on size of can.
Wrap the center around a pencil to curl. Remove pencil.
Lay can on the block of wood - at the side seam. (You'll be hammering from inside the can.) Use nail to make a hole near the edge and one below about a 1/4" down. Repeat on opposite side.
Feed the wire in the top hole from the outside and through the bottom hole back to the outside. Close up with pliers. This keeps it from hindering the lid.
Glue the candle cup upside down on the lid.
Cut a piece of felt the size of the bottom of the can. Glue on. This will protect surfaces.
Tie on fabric strips and embellishments.
I know this seems time consuming, but it's really not. If you do about 5 at a time, it goes more quickly.
Any questions?
Add your voice! Click below to comment. ThriftyFun is powered by your wisdom!