Benetta
Silver Post Medal for All Time! 408 Posts Using simple materials, one can make a mural decoration that will be suitable for Thanksgiving.
Approximate Time: 90 minutes
Supplies:
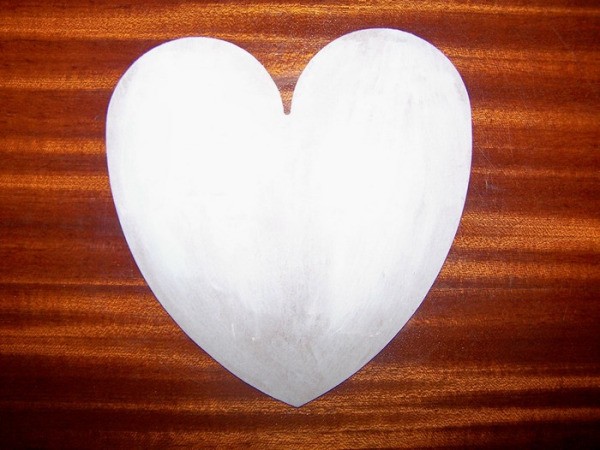
- a wooden heart, cut from 1/8 inch masonite
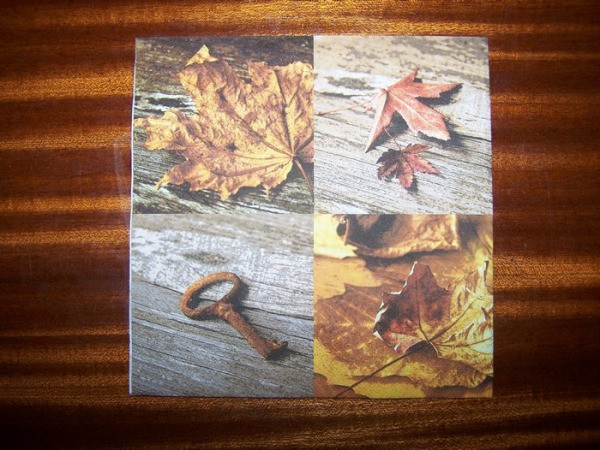
- napkins with suitable pictures printed on them
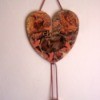
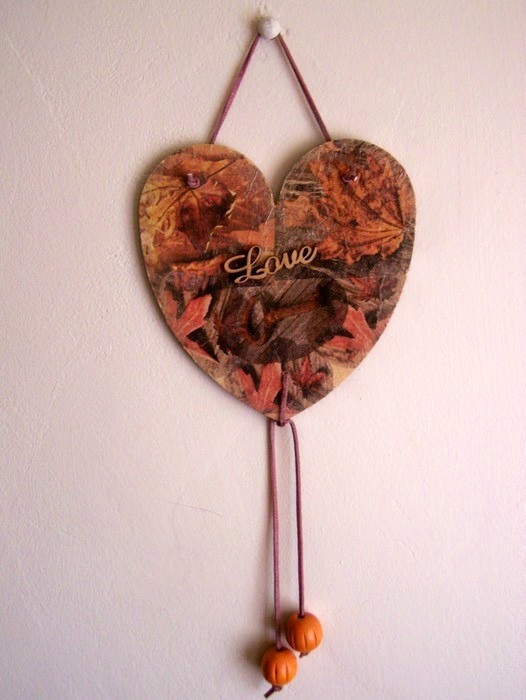
I used napkins with fall colors, and with pictures of fall leaves and rusty keys.
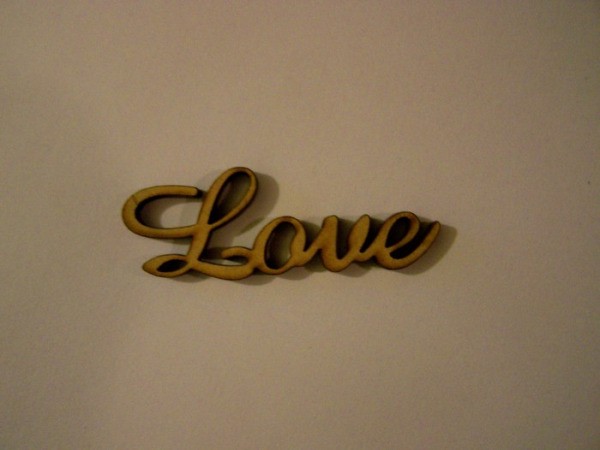
- a small wooden word, available from scrapbook stockists
I used the words Love, Faith, and Hope, each one on a separate heart.
- acrylic paint in the following two colors: flesh and pale gold
- white water-based primer
- Modge Podge
- water-based varnish
- 40 inches of brown leather thong
- two wooden orange beads to be strung onto the thong
- a 10/32 inch paint brush
- a thin paintbrush
- hairdryer
- a pair of standard scissors
- a few sheets of old newspapers to protect the working area
- fine sanding paper
- a dry cloth to dust the heart
- strong bonding glue
- HB pencil
- electrical hand drill
Instructions:
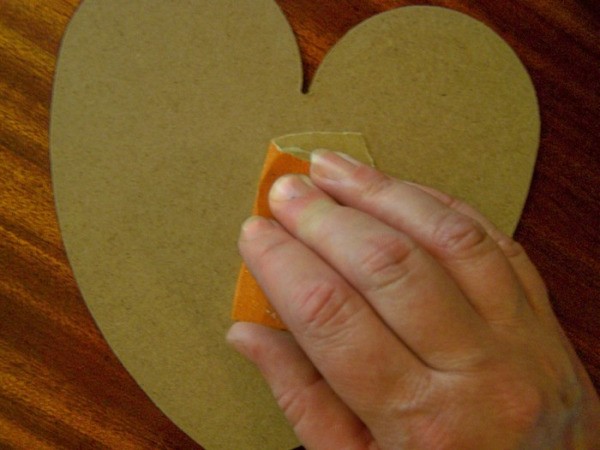
- Sandpaper the heart, back and front, thoroughly and dust well with a dry cloth.
- With a slightly wet 10/32 inch brush, paint a thin layer of the white water-based primer over the front of the heart. Keep the edges and the back of the heart clean. Dry the heart thoroughly with the hairdryer, but do not use the highest heat setting on the hairdryer.
- Next, using the same brush, paint a thin layer of flesh-colored acrylics over the front of the heart, again keeping the edges and back clean.
- Dry the heart thoroughly with the hairdryer.
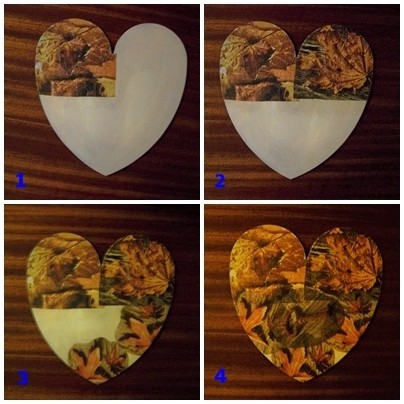
- Cut out the different sections from the napkins and decide how they will be arranged on the heart.

- Remove the bottom layers from all the napkin cutouts.
- Put the first cutout in place and with the 10/32 inch brush, paint a substantial amount of Modge Podge over the top of the cutout, so that it will stick to the heart. As the napkin can stretch or tear easily, it is best to start painting from the middle of the cutout towards the sides, working in small triangles. The Modge Podge must only be applied to the top, and must not run underneath the cutout.
- Turn the heart around and cut off any pieces of napkin that may protrude beyond the edges of the heart. Turn it around again and check that the napkin cutout is glued thoroughly to the heart, before using the hairdryer to dry the cutout.
- Repeat steps 7-8 with all the other cutouts, until the design has been completed.
- With the 10/32 inch brush, paint a thin layer of Modge Podge over the whole front of the heart, again keeping the edges and back clean. The Modge Podge will protect the napkin cutouts and give the product a smoother finish. When applying the first layer of Modge Podge, be careful not to lift the cutouts at the edges when brushing over them with the paint brush.
- Dry the heart with the hairdryer.
- Repeat steps 10-11, you need to apply at least 4 coats of Modge Podge, but remember that with every layer, the direction in which the Modge Podge is applied, must be changed from horizontal to vertical to horizontal, etc. Also, remember that after every layer of Modge Podge, the heart must first be dried thoroughly with the hairdryer.
- Using the thin paint brush, highlight the edges with the pale gold acrylic paint.
- Dry the heart with the hairdryer.
- Use the drill to make three small holes in the heart, two at the top and one at the bottom. When drilling, start drilling from the front to the back, i.e. from the side that has been covered with the napkin cutouts, through to the back.
- Wet a piece of fine sanding paper and lightly sand away any rough edges around the holes on the front of the heart.
- Turn the heart around, and with a dry piece of fine sanding paper, lightly sand away any rough edges around the holes.
- Dust the heart again with a dry cloth.
- With the 10/32 inch brush, add a layer of water-based varnish to the front and edges of the heart. Dry thoroughly with the hairdryer.
- Turn the heart around, and add a layer of water-based varnish to the back of the heart. Dry thoroughly with the hairdryer again.
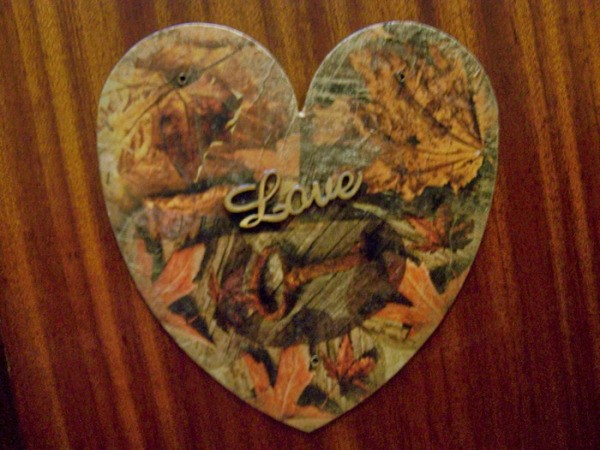
- With the fine paint brush, add a touch of pale gold to the wooden word and dry it thoroughly with the hairdryer.
- Use the strong bonding glue to affix the word to the wooden heart.
- Thread a piece of the leather thong through the holes at the top and make a knot at each end.
- Thread a second piece of the leather thong through the hole at the bottom, and make half-a-knot to keep the thong in place. Add a drop of the strong bonding glue to the half-a-knot so that it won't come undone. Add a bead to each end of the thong and make a knot at each end to keep the beads in place (see numbers 5-8 in combined photo).
Tips:
- When doing napkin decoupage, do not use dark acrylic paint as the base color, as this will show through the napkin.
- To clean, wipe off gently with a damp cloth and do not use strong detergents.
- When doing decoupage, never use the highest heat setting on the hairdryer.
- It may be easier to use your finger instead of a brush when applying Modge Podge.
By Benetta from Pretoria, Gauteng
Add your voice! Click below to comment. ThriftyFun is powered by your wisdom!
November 17, 20110 found this helpful
I use the same napkin and Modge Podge process to make wooden bangle bracelets, that look handpainted. Thanks for this.
November 17, 20110 found this helpful
Very nice looking craft. Thanks for sharing your expertise!
Add your voice! Click below to comment. ThriftyFun is powered by your wisdom!