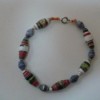
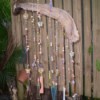
Making paper beads is an easy, fun, and timeless craft activity. You can use the beads for jewelry, decoration, or anything else you usually use beads for. This is a great way to recycle paper, especially all that useless junk mail that piles up. It's also fun for kids to learn, and easy enough that most catch on to the technique quickly.
Approximate Time: 3 minutes to 3 hours!
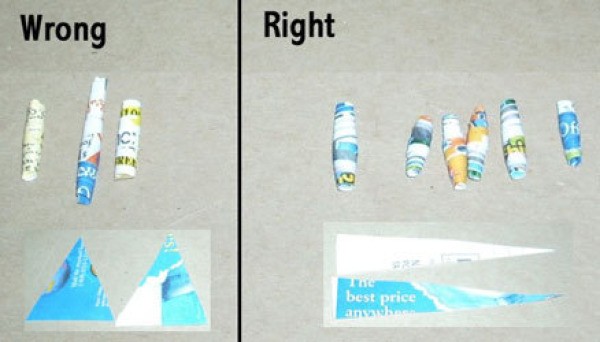
The "wrong" picture also shows beads made from a single piece of paper. The bead design doesn't come out very pretty. The "right" picture shows beads made from two, different colored, pieces of paper (or junk mail). This gives the cool "spiral" effect. You just line the pieces of paper up and carefully roll them into a bead, just like you would with a single piece of paper. But make sure to put glue on *both* pieces of paper when gluing the bead at the end.
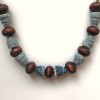
Having paper with photos, or many different colors also makes a prettier bead. A piece of white paper with black writing will make for a rather boring looking bead. Of course, pairing that white paper with a piece of red construction paper will give a great spiral effect.
Add your voice! Click below to comment. ThriftyFun is powered by your wisdom!
Thanks so much for posting this! We made these when my daughter and I did Girl Scouting together. The girls got really good at it. I had forgotten about these. I am in need of some beads to pair with "potato" beads someone else posted on this site. I loved making these beads. I could sit and make these forever and never tire of it. They are so much fun. We always used toothpicks to wrap ours around and finished them off with a clear water-based sealer. Thanks so much!
Wow, very neat and creative and I will make some out of the next circular I get my hands on. Thanks
I use the pages from National Geographic magazine as they are thick and colorful. I also found that if you put a little glue all around the bead and let it dry the bead stays together better.
I just got back from a weekend at my granddaughter's. She and her mommy went to visit some of mommy's cousins and her daddy had to work so i was dog sitting. She was telling me about the necklace she made in vacation bible school. It was paper beads but they had rolled the paper on soda straws and left the straw in place.
Hi, I'm new to this site, but just had to respond to this beads post. About a week ago I began making paper beads & am completely hooked. I've been using magazine pages, as I subscribe to several, & cut very slender triangles from top to bottom of each page. I've been using a straightened metal coat hanger to roll them on. You can pick similarly colored magazine pages, but most have several colors, so one long triangle will suffice. After gluing the bead with Elmer's glue, I coat it using a kids paint brush & a product I found at Walmart called "ModPodge".
I made these as a teenager! Just yesterday, I found some of these in some craft items that I had kept. I just may start making them again!
I love these beads and have put them on my to-do list. When Barbara mentioned using a straighten coat hanger, reminded me about painting some candle tapers a few years ago. In the directions it mentioned to lay them on pencils so they could be turned while painting circles around them.
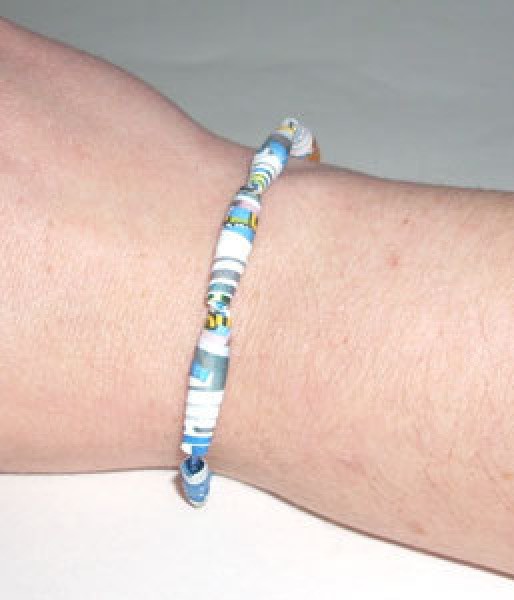
I love making these. I made over 40 bracelets for my family to give to them during our fourth of July get together. They all loved them. They look really good mixed with regular little round beads. My fav look is made from brown paper bags and then mix in with brown or amber colored beads. I also like using comics to make straight beads, no taper. Or Old sheet music. The type of paper is endless. I use elastic to string my beads on for the bracelets. That way you don't need a fastner and one size more or less, fits all.
You can make a rolling tool by taping two flat toothpicks back to back. Leave about 3/4 inch of the toothpicks free of tape at one end to slide the wide part of the paper triangle. I insert this part into a cocktail (or pouch drink) straw to get a handle.
I've made a lot of paper beads out of brown paper bags. If you do random scribbling on them with various colored permanent markers you can get really great unique patterns. Easy enough for little kids to help with. Silver and copper markers can look great! I roll them with small cheap screwdrivers ( they come in sets) from the dollar store. I've used toothpicks but they usually broke after the glue was dried. I finished them with Mod Podge from the dollar store.
I really like the idea of using metallic markers on the plain brown paper. Thanks for sharing. :)
Add your voice! Click below to comment. ThriftyFun is powered by your wisdom!