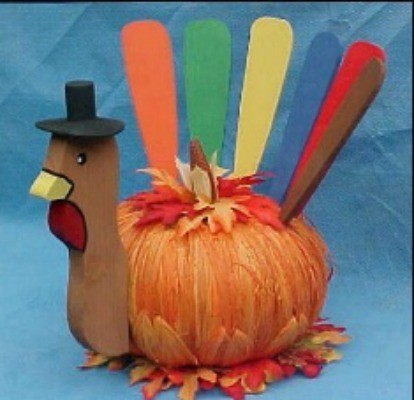
Create the beautiful centerpiece for your Thanksgiving and autumn table.
Tools needed:
- scroll saw and/or band saw (see notes)
- drill and drill bits (1/4 inch and 5/64 inch)
- hammer paint brushes
- black paint pen scissors black Sharpie
List of Materials:
- 1x4x8 inch piece of pine board 1/4 inch dowel
- 6 pieces 1/4 inch plywood cut into 2X7 inch pieces
- 1 1/4 inch 3d finish nails for tail feathers
- coat hanger wire cut 4 inches long for turkey head
- brown acrylic paint for staining head
- red, yellow, black, and white acrylic paint
- spray paint for tail feathers 6 colors of your choice
- 1 inch dowel or broomstick for crown of hat
- wood glue
- masking tape
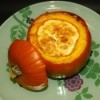
- pumpkin (real one or artificial one)
Preparing Wood:
- Draw around the pattern for the head with a sharp pencil.
-
Cut with scroll saw or band saw.
-
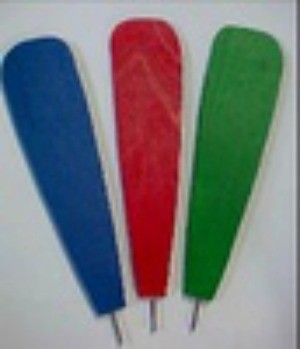
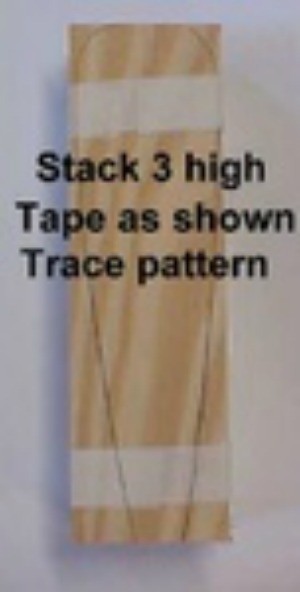
Stack tail feather pieces 3 high and tape them as shown, draw around the pattern, and cut with band saw, or if you are using a scroll saw, cut each piece separately. Sand if needed.
- Cut 1 inch off the broomstick or dowel for hat crown.
-
Cut the 1/4-inch dowel into 1 and 1/4-inch pieces.
-
Using the 1/4-inch drill bit, drill a hole in the broomstick 1/2-inch and a corresponding hole 3/4- in the turkey head. Glue the dowel into the hat, and set aside to dry. Then spray paint it black.
-
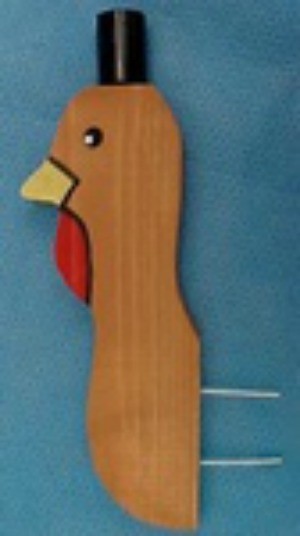
Mix 1 part brown acrylic paint with 4 parts water, and dip the head, making sure to get complete coverage. Set it on edge on a paper towel to drain, then gently wipe dry with a soft cloth. Drill holes to correspond with photo for the wires in the head using the 5/64 inch drill bit. See notes at the end of this article for an alternate method of drilling.
- Using the same bit, carefully drill each tail feather. Make sure that your drill bit is perpendicular to the feather as there is little tolerance.
- Glue the dowel, with the hat attached, into the head of the turkey.
- Mark the eyes, beak, and wattle of the turkey on each side, and paint the appropriate color. Outline with black paint pen. See notes for methods that I find helpful when doing the eyes.
-
Spray paint each feather a different color of your choice.

- Make sure to cover edges as well as both sides.
-
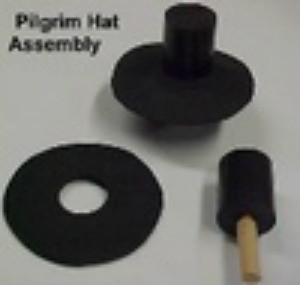
Trace the pattern for the brim of the pilgrim hat onto the black foam. A black Sharpie will show up on the black foam.
-
When you get ready to assemble your turkey, slide this piece down over the broomstick crown.
Notes:
- If you do not have both a scroll saw AND a band saw, you can use the band saw for both the head and the feathers. You can also use the scroll saw for both, but you will have to cut the feathers one at a time instead of stacks of 3.
-
If you do not have a 5/64 drill bit, you can cut the head off one of the finishing nails and use it for a drill bit.
-
Copy your patterns on cardboard, such as a cereal box for ease of drawing around.
-
Dip an unused pencil eraser into black paint to make the eye, then use a toothpick in white paint for the dot in the eye.
-
Hat brim is 2 3/4 inches in diameter. Cut out center. Slide over hat for brim tail feathers, make 6. Size is approximately 6 1/2 inches long and 2 inches across.
-
Turkey Head is 8 inches from top to base.
The instructions are also in a PDF file for which you may need Acrobat Reader to view. Download Acrobat Reader
Click Here to download the instructions as
a PDF.
By Harlean from Hot Springs, Arkansas
About The Author: Harlean Greathouse is a mother of three who has been married for 45 years. Long time readers of ThriftyFun will probably recognize her as Harlean from Arkansas, the name she has posted under as a valuable member of the ThriftyFun community.
Add your voice! Click below to comment. ThriftyFun is powered by your wisdom!