These are instructions on how to make and package a soup and bread mix for giving as Christmas gifts.
Approximate Time: 4 hours
Supplies:
- white paper bags (lunch size)
- brown paper bags (lunch size)
- ribbon of various colors
- hole punch
- scissors
- plastic bags (gallon size)
- twisty ties
- card stock
- office paper
- construction paper (optional)
- bowls
- whisk or spoon for mixing
- computer and printer
- Microsoft Publisher or similar program
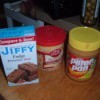
- recipe ingredients (varies depending on recipes chosen)
Instructions:
Each Christmas I have between 10 and 15 people I like to make gift mixes for. I've done many different things over the years, including chili and cornbread, gingersnaps, cocoa mix, etc. They've always been a big hit. It does take some planning and experimenting, but it can be a lot of fun. This year I decided to do Instant Potato Soup Mix and Quick Rye Bread.
A lot of the mixes call for containers such as jars to layer the mixes in. I find this to be too hard (to find enough) and too expensive (especially when they have to be mailed). I have used plastic bags and paper bags to put my mixes in for the last several years. It may sound like the gifts would turn out looking cheap, but if some time and care are taken, they can turn out very nice.
- The first thing I do is search for an interesting combination of recipes. When I find some I like, I make them for my family. If they don't pass the family test, I throw them out and try some different ones.
- When we agree on the recipes to use, I buy the ingredients. If I plan enough ahead, I can get most of the ingredients from my food coop or from Azure Standard. They have high-quality ingredients for a low price. If I wait too long, I always end up spending more than I would have otherwise.
- After my ingredients are gathered, I set up a "manufacturing line" on my kitchen table.
- My three girls and I each take an ingredient and add it to the bowls until we are out of bowls. (I try to have as many bowls as the number of mixes I need. A lot of times I don't though and we have to go through the process two or more times.)
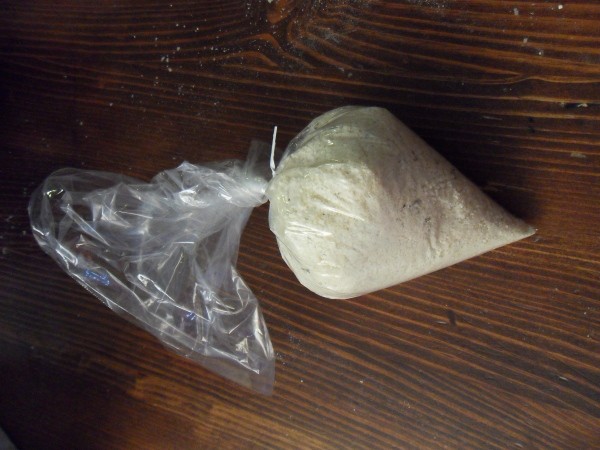
- We then move on to the next ingredient and keep adding until we are finished with the recipe. Depending on the recipe, we may just dump the ingredients right into the plastic bag.
- If we use bowls, we mix, then dump the ingredients into the plastic bags and then use a twisty tie to close the bags.

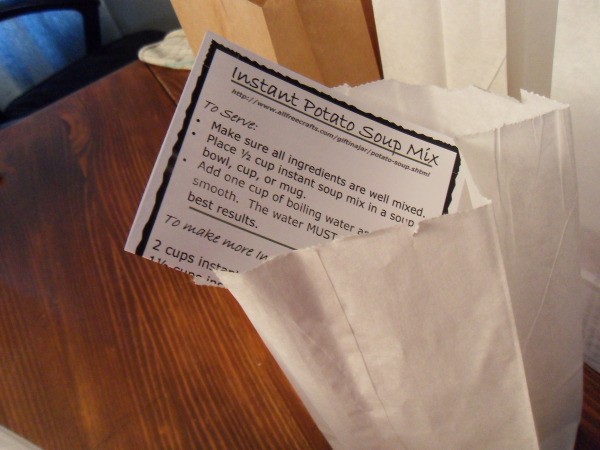
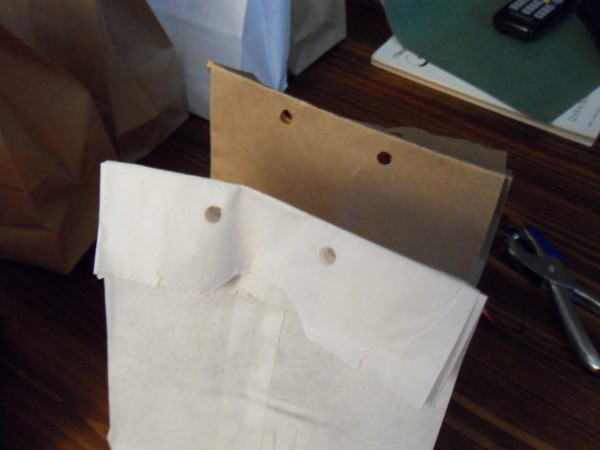
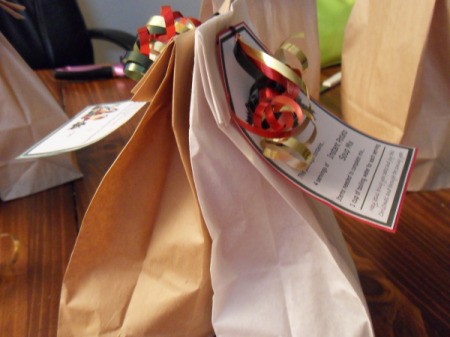
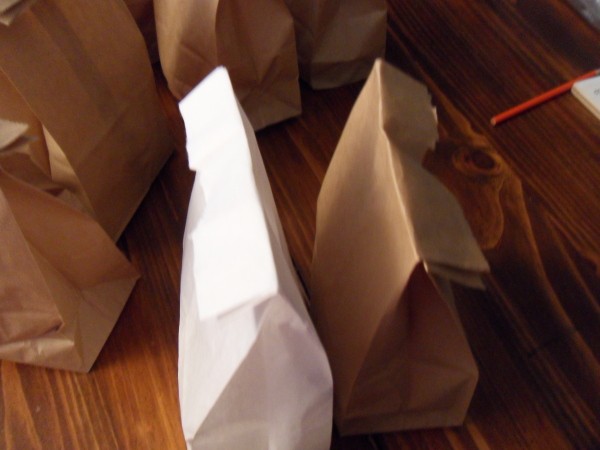
- Next we put the soup into the white paper bags and the bread into the brown paper bags.
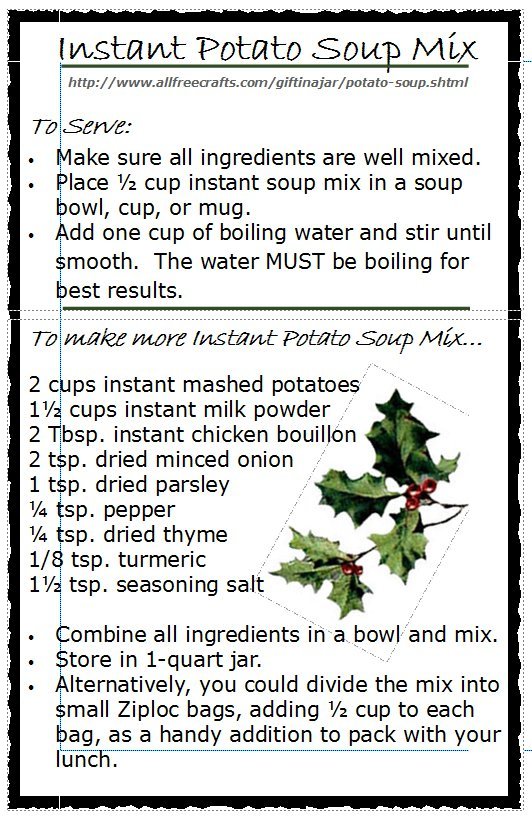
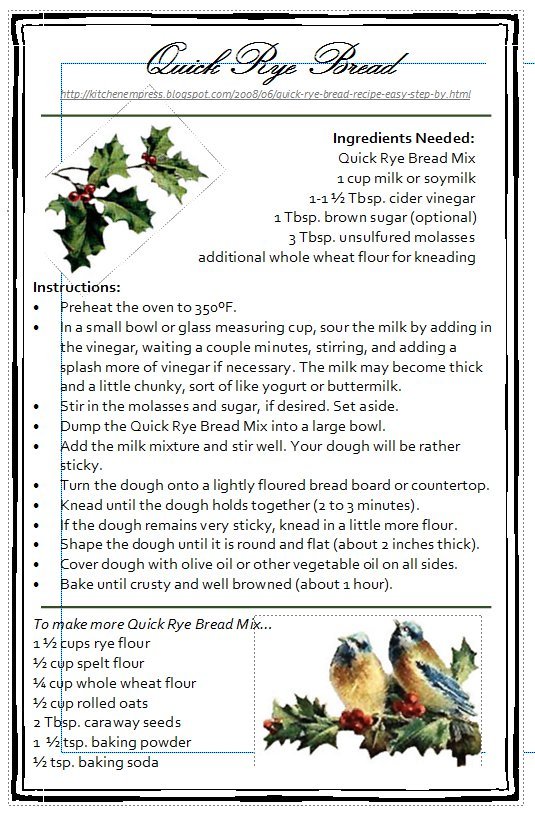
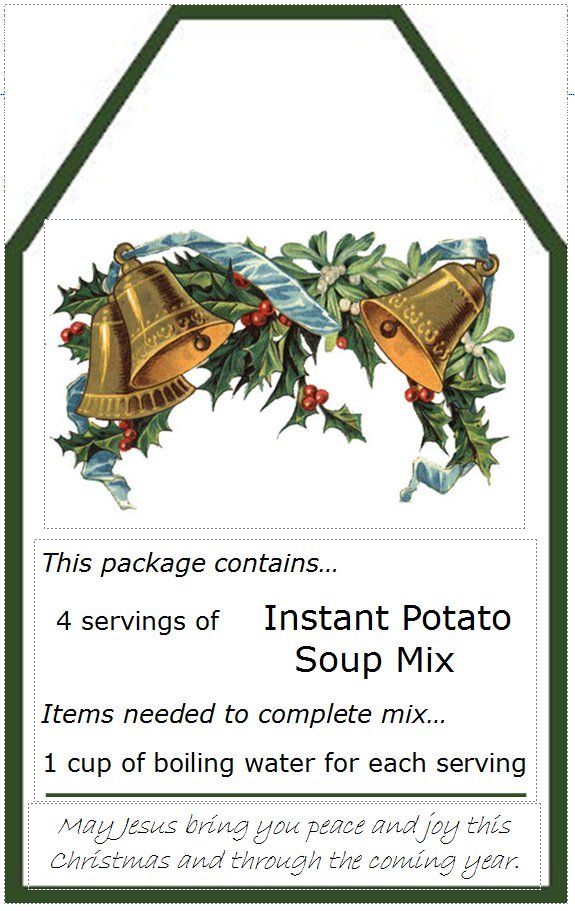
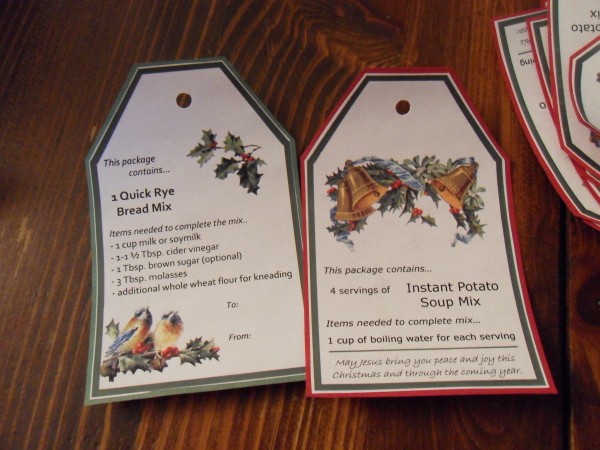
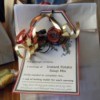
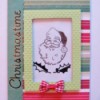
- The tags and instructions come next, and they can be quite time-consuming. Please take extra time and care with these, because they are what adds class to your gift. I use Microsoft Publisher to make mine. I cut and paste the ingredients, instructions, and type whatever else I want on them into Publisher. I also find some royalty-free clip art (and of course, free price-wise) to paste on the tags and instructions. I've included some screen shots of my instructions and tags as they appear in Publisher.
- The instructions and tags get printed and cut out, and the instructions get placed into the bags. I like to use card stock to print the tag on or glue the tags onto matching construction paper to make them heavier.

- Place the recipe card in each bag.
- Next we fold the tops of the bags down, then punch holes into the tops. We make sure to match up the holes on each set of brown and white bags, so we can tie them together later.
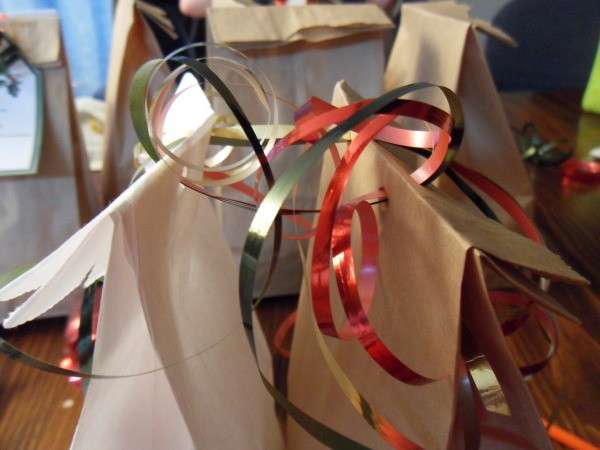
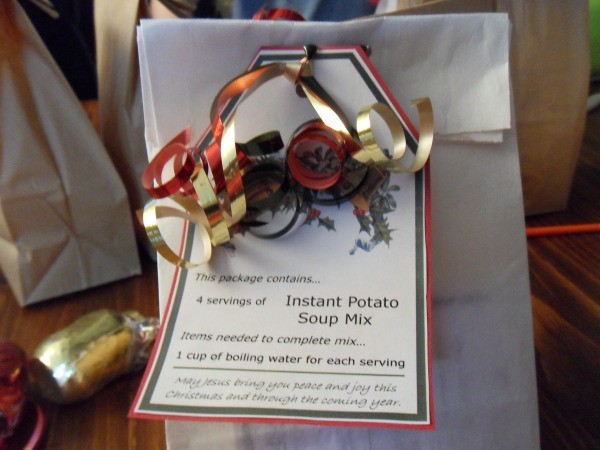
- Next, we pick ribbon that matches the tags we made then tie the bags together.
- Lastly, we punch holes in each tag, tie the tags onto each bag, and curl the ribbon.
We end up with a nice looking and great tasting gift that doesn't cost a fortune to make. This year I spent about $40 for all the supplies and ingredients, and I came away with eleven gifts.
By Mary Nelson from Montrose, SD