I save and collect broken glass and other little findings. Then I put 2 inches of cement in the bottom of a 5 or 3 gallon bucket then I press the pieces of glass and things on top. I will be making these for Christmas gifts this year.
I am going to New Orleans next month to help rebuild. I plan to bring home or mail myself as many shards as I can. I will make memory stepping stones out of them and maybe even a wall plaque.
My tip is, if you break something, don't throw it out! Recycle it!
By April from Buffalo, NY
This page contains the following solutions.
I save the plastic tops to store bought cakes; both the round ones and rectangular ones. They make great reusable molds for making paving stones.
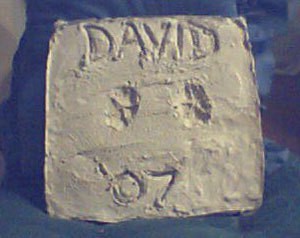
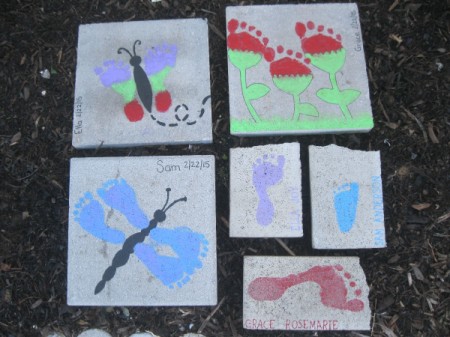
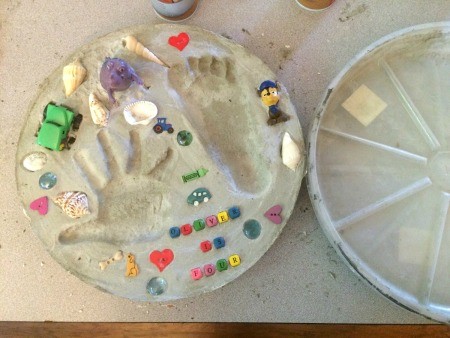
I am making stepping stones with each family member's hand (or paw) prints and name! We are including all friends and family who visit and will be making one of my bf's mother who is 70!
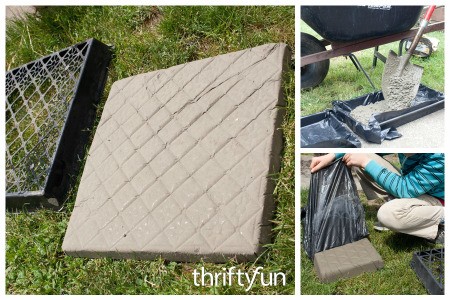
I didn't want to worry about my lawnmower hitting the stones, so I came up with a plan that worked perfectly! And all you need is cement or concrete, water and a shovel.
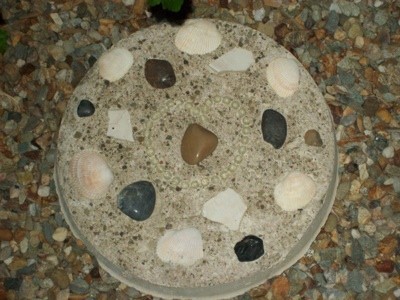
Here is a stepping stone I designed and made last spring. Seems that stepping stones are perennial favorites on craft sites so thought this would be helpful.
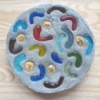
I got some stepping stones the other day for a little over a dollar a piece. I wanted to "jazz" them up a bit.
No need to buy a 'stepping stone form' to create your garden stones; just dig a hole 4 inches deep in the desired shape wherever you want the stone and fill with quick mix concrete. Be careful not to breathe in any concrete dust!
This project is easier than it sounds. Do it outside, because it gets messy! Mix cement with water according to directions on bag.
Here are the questions asked by community members. Read on to see the answers provided by the ThriftyFun community.
I have a Texas shaped mold. I can't seem to keep the panhandle and south Texas from breaking off. I was told to put chicken wire in my mold for stability.
By Marilyn
I used chicken wire in mine. They definitely hold together better..
I use wire hangers. Theyre free.
I use Window screen.
the idea to use wire hangers e good but how. Could you explain a bit? Thank you.
I would cut the wire hangers a little short of the length and width and make a grid pattern. Place some cement in the containers add the grid wires and then add the rest of the cement. You could use a bread twisty tie to tie the wires together.
I have 40 years worth of chipped and cracked mugs (you know the ones you save from kids, grandkids, sisters, and husband's parents and so on). I was thinking of breaking them up for stepping stones and was wondering if anyone has tried this?
By Wendy A
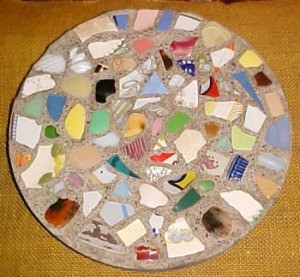
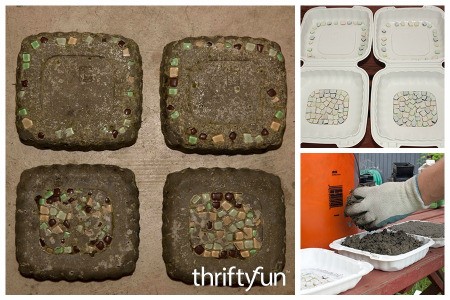
I like to use broken colored ceramic dishes. I place my design on top as soon it's like pudding so they wont sink. Just be sure to take care of any sharp corners. Push 'em in flush. Oh, I used a plastic tray my hamburg game in.
no,its not clear how these stepping stones are made.explanations too brief
We were not able to embellish with our lettering, marbles, etc. I have 2 sad little girls and one frustrated grandma. I followed the concrete quick set directions and worked fast, but not fast enough.
By Evelyn
Check out these photos.
Making your own stepping stones is a fun project and a way to create unique stones for your garden. This is a page about making concrete stepping stones.
This is a page about making hypertufa stepping stones. Hypertufa can be prepared and molded into a variety of garden enhancements, including stepping stones.
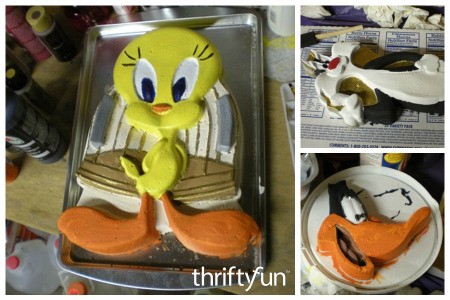
This is a page about making cake pan stepping stones. There are so many cute cake pans shaped like cartoon characters and other designs that can be used as the mold for homemade stepping stones.
This is a page about making inexpensive stepping stones. Making stepping stones doesn't have to be expensive. Stepping stones are a fun activity to do with your kids and are a great way to decorate your garden.
The clear plastic flower pot saucers are perfect to use as a mold for making stepping stones. Their flexibility makes it easy to remove your finished stone. This is a page about using flower pot saucers for stepping stones.
Stepping stones do not have to be made from molded concrete. Consider using flat stones, bricks, and other suitable materials. This is a page about making stepping stones without concrete.

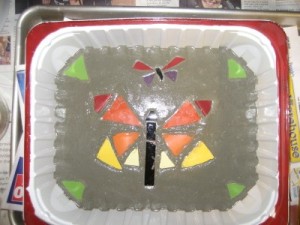
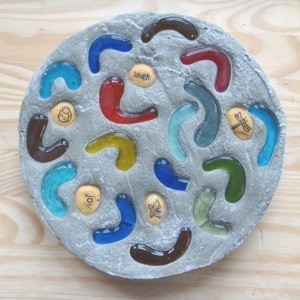
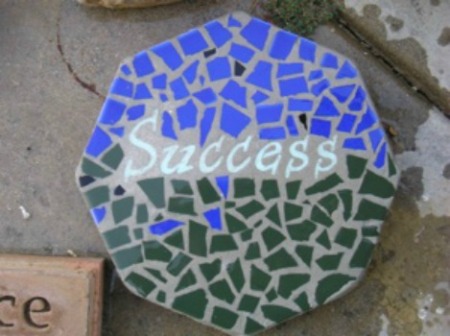
This is a page about making a mosaic stepping stone. A mosaic stepping stone is a fun easy craft that will look great in your garden and makes a perfect gift, too.
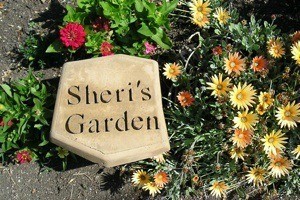
If you have decided to make your own personalized stepping stones for your garden or to give as a gift there may be issues that you need help with. This page addresses concerns about mix consistency, product choice, and even a name misspelling.
This is a page about sealing plaster stepping stones. If you made some plaster stepping stones and you want them to last it is best to seal them.
ThriftyFun is one of the longest running frugal living communities on the Internet. These are archives of older discussions.
I can buy stepping stones from my local garden store but not only are they expensive, but they are either boring or don't have the designs that I want.
What can I make stepping stones for my yard out of besides concrete? I have been thinking about using roofing shingles.