 Here are some ideas for old vinyl records.
By Diane
By Beulah
By Deb in Canada
By Jan
Share on ThriftyFunThis page contains the following solutions. Have something to add? Please share your solution!
Ask a QuestionHere are the questions asked by community members. Read on to see the answers provided by the ThriftyFun community or ask a new question.
I desperately want the instructions for the vinyl album purses, can anyone help?
Evonne from Smithville, TX
Try here:
www.craftster.org/
They have purses made of everything! LOL
Here's the search for "record album purse":
Just to inform people, the original maker of the record purse holds a utility patent on them that covers several different styles. If you are making one for yourself, there is not a problem; but if you are producing them for sale, you are violating the patent rights and may find yourself with legal problems. The original may be found at recordpurse.com
Ken's information is incorrect. The patent holder to the original record album purse is bandinmyhand.com. You can find BandInMyHand's patent number's right on their site.
You are incorrect, although band in my hand currently has a "design" patent for the record purse, there patent was filed three weeks after broken record designs "utility" patent was filed which includes this design, info is available at us patent office. Ken
First of all, if both companies claim to have a patent, then one is infringing on the other. Why then, are they letting each other continue? Isn't the original holder of the patent responsible for policing those in violation? Doesn't the original holder also have to file any legal complaints in the state & county where the violation is taking place? And then the original holder is only eligible for a percentage of the profits from the other.
There are more than 1 patent on the"recordpurse" Each one is different enough from the others that patents were issued. Three that I know of. The patent states that if the item has a,b,c and d parts and you make one that's a,c and d (skipping the d part)or abc and e parts (again skipping a part plus adding one of your own)you are not infringing on the patents.
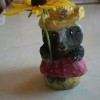
Does anyone have any ideas on what to do with old record albums? These are classic albums some warped and some in pretty good condition. I was thinking about maybe framing some for interior decor or selling them online, but I have never even been on eBay or anything. Any suggestions would be greatly appreciated!
By Joanne A.
Record albums don't bring alot unless it's a really unique album. The warped ones you could make bowls out of. I did this with a couple, t hey make very unique pieces and you can polyurethene them to make them food safe. Can do a google search or search on this side for record bowls,etc.
You could frame some of them. If you have several by one artist, or if some have a similiar theme (like flowers, landmarks, etc), you can put four to six in a frame and hang them up. I am guessing you still have the covers, right? If not, you could also spray paint them gold and make your own 'gold records'. You could use shellack or something to make them shiny. Frame them just like the 'real' gold records. At the bottom, you could make an information card telling the album, artist and maybe a few interesting facts that would fit on a 3x5 or 4x6 card. Just an idea.
You can buy a kit to make a clock out of the record. The sets are not expensive, and can be found at craft stores and sometimes even in Wal-Mart. Directions are with the kit. Then just hang the neat looking clock on your wall. Or you can sell them at flea markets, etc. They really are neat looking.
Google "how to make record album bowls. You can make chip/snack bowls out of old record albums by getting them hot an folding them up into a bowl shape. I've seen them and they look very cool.
I've also seen alot of record albums lately in antigue shops organized according to genre. We get a kick out of going thru them and finding cool albums.. make sure they play well first before ttying to sell them. We get them for a few bucks a piece in antique shops.
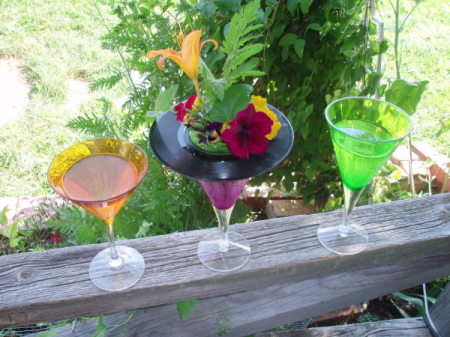
Anyone have cool ideas for repurposing old vinyl records?
By Donna
I have some old albums. I have seen them made into bowls by melting them in a regular oven, over oven proof bowls and bent into shape.
I would like someone to tell me how to do this, as I would love to make some bowls from these old albums to put homemade cookies in for gifts. I love to give unusual gifts.
I know these bowls can only be used for cookies and snacks because of the hole in the middle, but I would rather recycle the albums instead of throwing them out. I like to recycle as much of things as I can. Can anyone help me with this project? You can contact me through this site. Thanks in advance.
By Peggy F.
www.ehow.com/
Gives good directions for just how to do that. Good luck with your project, sounds like it will be great!
We used to make them by laying them on top of an oven proof bowl covered with aluminum foil. Heat your oven to 300 degrees and watch them soften. Using gloves take them out and shape them as you want but leave them on the bowl to cool. They can be painted or decorated as you wish. There are numerous sites to show you how to do this.
There is also this link from the ThriftyFun archives with lots of how to information:
www.thriftyfun.com/
Please be sure to line the vinyl bowl with a cloth if placing food in it because the type of plastic the vinyl contains can leach it's chemicals into the food otherwise.
Does anyone have an idea for recycling old vinyl records, other than send to Op Shop?
By Bevyanne
ThriftyFun is one of the longest running frugal living communities on the Internet. These are archives of older discussions.