My husband has been bugging me to have a sprinkler system installed since we bought our house four years ago. He finally gave up on having the system installed, went to Home Depot and figured out how to do it on his own. This is what we did.
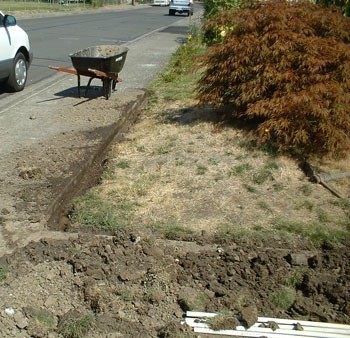
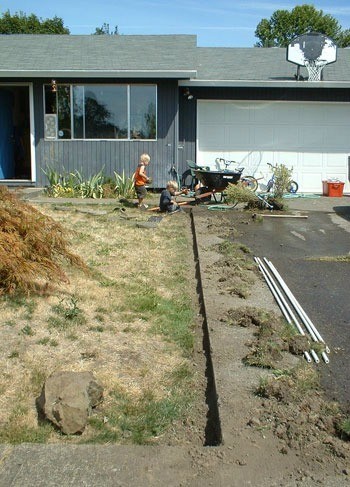
We measured our yard, figuring we would need a sprinkler head every 15 feet. We decided to start slow and only did our front flower bed and next to the driveway. When we got going, we decided to do a portion next to the front sidewalk as well. Next spring (when the ground is nice and soft), we are going to do the rest of the yard and maybe the back yard too.
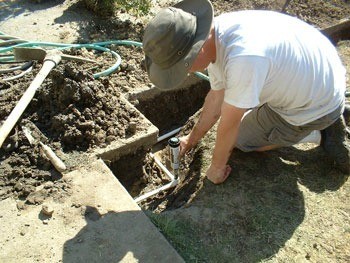
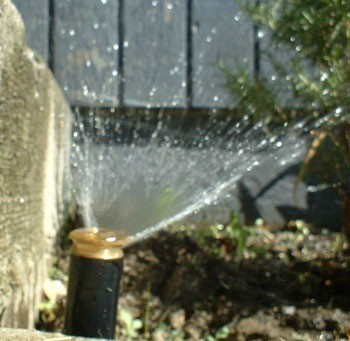
Instead of a timer, we attached the system directly to our front hose spigot, using a splitter so we can use the regular hose as well. We then attached this to 1/2 PVC pipe using an adaptor. Nearly all of these parts were found in the plumbing/sprinkler section of Home Depot. We bought two 90 degree sprinkler heads and two 180 degree heads (for the middle parts) that were rated for 15 feet. They rotate, covering over half our yard, and are adjustable to avoid water waste. We also bought one 180 degree and two 90 degree small pop up heads for the flower bed in the front. These ones just spray out water a short distance.
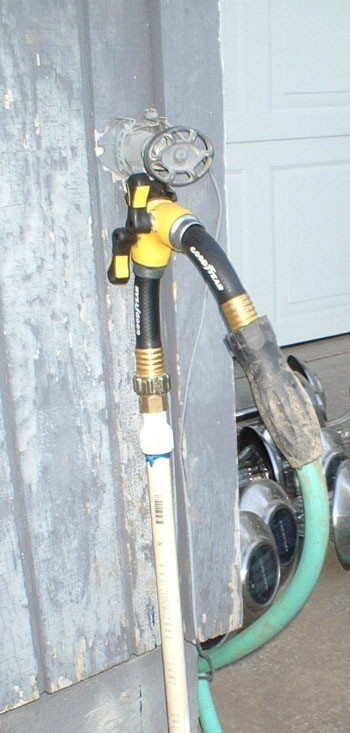
We also needed PVC T-connectors, splitters and extenders, flexible risers, PVC glue and plumbers tape for the threaded parts. I would measure everything twice and make sure you have a list of everything you need. I know we went to Home Depot at least 6 times on the two weekends we did this, always for some part that we didn't think about or a piece grabbed out of the wrong box.
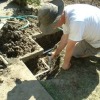
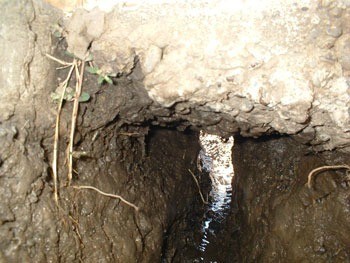
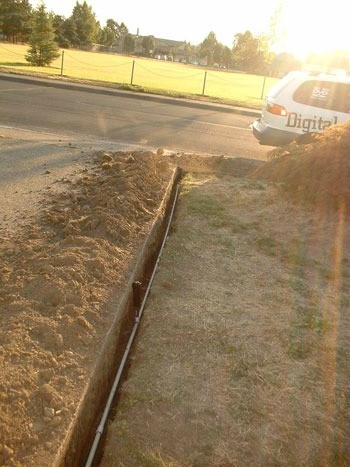
In order to install this, we needed to dig a narrow trench of approximately 12 inches deep. We used a pickaxe, shovels and trowels to do this. The most difficult part was the walkway between the hose and the front yard that leads up to our front door. We needed to dig a trench underneath the concrete. A bit of research online told us that the best way to do this is to blast it out with water. This had the added bonus of softening the rest of the soil, making it easier to dig but it was very messy.
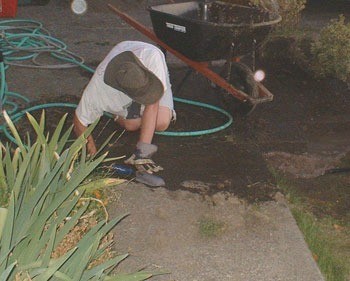
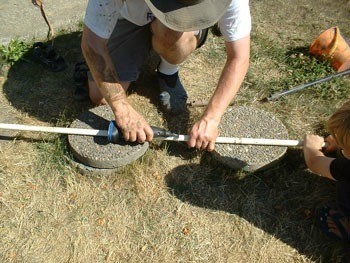
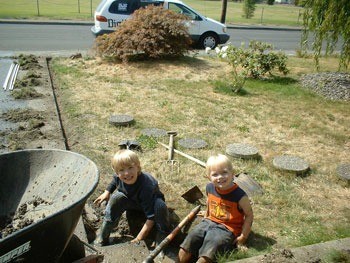
Once (about a day and a half's worth of work) we had the trench ready and relatively dried out, we remeasured everything then cut and fit the PVC together. It was the biggest toy my boys have ever seen. We used our handy Dremel to cut the PVC pipe to the correct lengths. Luckily, this is not precision work as a 1/4 inch either way is usually fine. Once we had the whole thing set up, we took it all apart and then cleaned and glued the PVC together.
After you have everything attached and the glue has set up for the appropriate time, it's time to test out the system. Don't put the dirt back in until you know everything is in perfect working order. The sprinkler heads should be a little higher than level with the ground as they will sink down a bit as they settle. You will probably need to pack dirt around and below the head to keep it in place. Try to make sure that you have the head pointed the correct direction as it is a hassle to fix later when it is spraying all over the driveway instead of the lawn.
Fill it in and tamp it down. You will probably have more dirt left over but that is ok, pile it up and wait about a week. The dirt will settle and you will need to fill it again.
Now you have the fun of adjusting the water pressure and radius. I would recommend always turning your water on full and making sure that the adjustments are set at each sprinkler head. It is much easier to turn it on full than to try to remember the exact right setting. Adjust each head so that all the water goes on the ground, not on pavement. It took a couple of weeks of tweaking them before my husband was satisfied.
That's it. With a little time, care and patience, you can do this project with some help. Here are some hints that we learned in the process:
Call Dig Safe before you start. You can look at your water utility or gas utility webpage for your local number. You don't want to break a water main or worse.
Don't try to do this in the hot summer. Spring or Fall would be best because the ground is soft. This is a lot of physical work and you don't want to collapse of heat exhaustion halfway through. If you are doing a lot of digging, there are machines you can rent. Check with a local company who installs systems or your local hardware store.
Make sure that you have straight, not threaded, PVC pipes and connectors when you are connecting the main pipes. You will need to have threaded ones to attach to the sprinkler heads but straight ones connect well with the glue
Use flexible risers so they can withstand being walked on or, even worse, driven over.
Be frugal but not cheap. Buy the best sprinkler heads you can afford but do some research first. Rainbird are the most expensive but we found that the Orbit brand seemed very comparable and much less expensive. But buy metal instead of plastic heads so they last longer. You really don't want to have to do this again in a few years.
Install a drain at the endpoint or plan to use an air compressor to blow out your pipes before the ground freezes. We live in Portland, OR so it doesn't get very cold during the winter but I really don't want to have to replace any pipes because they burst. Our neighbor (who it turns out, has experience with his own system) came over to check out our work (complete with a lawn chair). He gave us this tip and offered his air compressor when the time comes. It's nice to have neighbors.
Salvage any sod pieces when digging up lawn. We just plugged in big pieces of sod back on top of the loose dirt. It usually does pretty well, especially because you now have assured a water supply. You can also put down grass seed or even flowers, if around the edge.
Don't forget to turn it off. Although a timer would be nice, you need to have electricity for the timer part. We didn't feel up to the added wiring or expense. We usually leave it on for about 15 minutes at dusk.
Good Luck! I'll keep you all posted if we run into any problems over the winter.

About The Author: Jess Stewartmaize is on the staff of ThriftyFun and is a freelance writer. She lived west of Portland, OR with her husband and two sons. They love having a yard!
Add your voice! Click below to comment. ThriftyFun is powered by your wisdom!
WOW! Your husband can stop by my house any time. HA HA!
This was truly helpful. Thanks!
One thing to keep in mind when deciding how many sprinkler heads to use is how much water pressure you have. VERY important! Gallons per minute is used to decide how much water pressue you will need to drive those sprinkler heads. You might get water through them but they won't throw the water very far.
My hubby did sprinkler systems in florida where they are famous for low water pressure and that was always a problem. Our sprinkler system is driven buy a water pump with a horse and a half which will usually drive many zones with 4 or 5 sprinkler heads at one time in those zones.
IF I had extra money, I'd do this. I opted for soaker hoses, instead, that I found curbside. Some had holes which I repaired with duct tape, others worked great except at the end which was too weak in some cases, which means it might be plugged. However, my hat's off to you for dropping your system at least 12" to prevent freezing, should that happen. My neighbor followed some DIY instructions which suggested less depth and later had to REDO the hole system when it froze up.
My ex-husband planned to do this when we had money, and seemed to have done all of the homework, BUT got to sweating the labor and hidden costs possible. Good thing he did because later he developed a slipped disc from the work he did for his income. God bless your hard work, pictures, journaling steps, and helpful tips.
I did mine in similar way but I installed timer. You can buy it from HomeDepot for about $40.00 using battery. It comes with two valve and splitter and it can controll four valves. You can buy extra valve for $15.00 each. The only problem is water pressure is not good enough. I am plan to drill a hole in my concrete wall right at where water main coming and put 3/4" pipe back to outside from basement.
Thank you for your help, i knew somebody had to have some information on this, i heard it was possible. So now i have the information lets see how long it takes to get done. hehe
Hello, I am thinking of doing the same thing. I just purchased a home myself and my yard is approximately 75 feet long and 15 feet wide on each end. With the assistance from your site, I think we will be able to do it that way instead of using the electricity as well. Wiring can be very painful. How much did all of the parts costs? Can you list the equipment parts that you purchased at Home Depot? I think the two of you could earn money if you were to go into business locally. Right now, lots of homeowner's are finding ways to save money and that is a great way to do it. I installed my own motion lighting as well and am getting ready to install 5 ceiling fans. Lowe's wanted to charge me 760.00 to install the 5 fans. The installation cost more than the fan. But, since Lowe's outsource their installations, the contractors charge an excessive amount to get the job done.
Thanks for the tips and happy winter.
Add your voice! Click below to comment. ThriftyFun is powered by your wisdom!