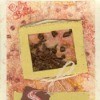
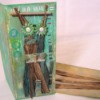
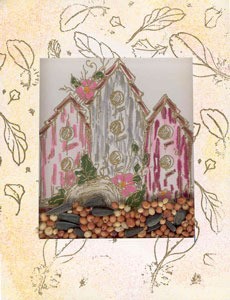
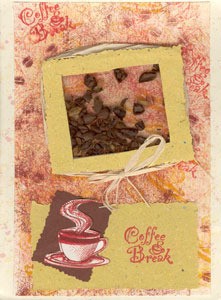
Ever wonder how to mail a snow-globe in an envelope? With this easy technique of making "Shaker Cards", turn your hand-stamped cards into dimensional windows that you can fill with confetti, potpourri or anything you like.
If you plan on doing an inside greeting, it is recommended that you do that "before" assembling the cover.
Photographs can be used for the inside in place of rubber stamps, just give yourself 1/8 inch smaller than the size of the photo for the frame so you don't see the card around the edges.
Besides traditional confetti and glitter, fun combinations or materials include:
Add your voice! Click below to comment. ThriftyFun is powered by your wisdom!
Those are really nice, anyone would be delighted!
What a great idea! I would be thrilled to get a card like that! Wish i could think up one with mini M & M's for my hubby! =) Thanks for sharing! HUGS, Judy
Thank You for taking the time to submit these lovely cards... I'm going to make a scaled down version with my 5 year old granddaughter... Again, Thank You!
Hey! How about these ideas?
-- Rice inside, used for a Wedding card!
-- Or, Using a small punch, punch out tiny snowflakes
-- Tiny Glitter stars or confetti
-- Shredded paper
-- Catnip for a cat card
-- Dried Peppermint (yummy smelling)
-- Tiny dried cat food or tiny dry "Cat treats"
-- Little hard multi color candies
-- Red hot hearts (Valentines day)
Can you guys out there think of other things to put into Snow Globe Greeting Cards?
*** I don't know if these things & the things you mentioned above can be sent through the mail... But, IF you do decide to try sending one of these cards through the mail, I'd at least write "HAND CANCEL" on the envelope!
Forgot to mention mailing these - if you plan to send one in the mail, you should consider getting a bubble/padded mailing envelope, and also marking it "hand cancel" - that will help prevent the shaker window from getting crushed.
I have also used small plastic bags as the "Shaker Keeper". Fill them and then glue or tape around the edge of them. Be sure to take all the air out of them before you seal them. I have even used hair gel in them and have mailed them without any problems.
I visited this site hoping to come up with a good project idea for my daughters 10th birthday party...sounds great I'll let you know how it goes. Thanks!
great tip for shaker card ,I enjoyed and can't wait to get started on one . Good place to look for fillers would be the dollar stores and get the fun confetti .
Add your voice! Click below to comment. ThriftyFun is powered by your wisdom!