Collecting and saving your own seeds is easy and rewarding. It's a great way to save money, preserve and perpetuate scarce varieties and cultivate the best plants suited to your particular growing conditions.
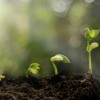
Selecting good seed parents is the cornerstone of improving and refining the plants in your garden. Your best plants are more likely to produce seeds that grow into plants with the characteristics you desire. Don't wait until fall to select good parent plants, keep in mind the qualities you want to pass along, and monitor your plant's performance throughout the growing season.
Select plants based their overall ability to produce, and make sure you save more than one plant to maintain a broad genetic base. Tie a string around the plants you've selected to remind yourself not to cut or harvest them before they set seed.
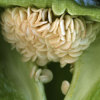
Collection: The fruits containing these seeds should be ripe before harvesting-even a bit overripe. Don't let the fruits dry out, however, or a tough covering will form around the seeds that may compromise storage.
Extraction: Scrape away the seedy part of the fruit from the pulp. To control bacterial canker, ferment the seeds of tomatoes, cucumbers and melons in a jar with _ cup of water for 3 days. Good seeds will sink to the bottom.
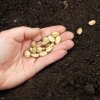
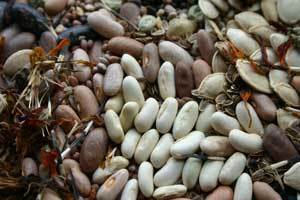
Collection: Collect seeds from edible seed crops when the seeds have thoroughly dried. Mature crops can be cut and stacked to finish drying before removing seeds.
Extraction: Seeds of beans and peas can easily be removed by hand
Collection: The seeds of these plants tend to ripen gradually. Plants may drop some seeds, while others are still ripening. Watch these plants daily and collect seeds by tying a small paper or plastic bag (with vents) over the seed head.
Extraction: Seeds from plants that are picked dry can be shaken through a screen to separate the chaff. Another method is to separate the chaff by floating them in water. "Dud" seeds will rise to the top and good seeds will sink to the bottom.
It's important that seeds are thoroughly dry before storage to protect against spoilage and poor germination. Remove any remaining vegetable matter with water, and spread seeds out on a screen to dry in the sun. Allow 3-4 days for small seeds and 5-6 days for larger seeds. Dry them until you're absolutely sure they're ready for storage.
Don't dry seeds in an oven. Rapid drying at temperatures higher than 90F to 100F can cause seed hulls to shrink and crack. If drying them inside, keep them in a warm place or enclose them in a tight container with an equal amount of silica gel (available at craft stores or camera supply stores). Most silica gels turn color when they reach their maximum moisture capacity. They can be re-dried and used again. Once your seeds are dry, store them immediately so they don't reabsorb moisture from humidity.
Cooler and dryer are better. Refrigerator or freezer storage is ideal providing seeds are kept in a vapor-proof container. Let them come up to room temperature before you remove them from their containers or condensation may form on the seeds.
After storing your seeds over winter, give them this simple viability test before you plant in the spring:
Select 10-100 seeds at random from storage and spread them out evenly on a damp paper towel. Roll up the paper towel and put it into an airtight plastic bag. Store the bag somewhere warm for 5 days, checking periodically to insure that the towel stays moist. Most seeds will germinate after 5 days. The percentage of seeds that germinate will tell you how well they stored and how heavily you need to sow them to ensure a good crop. If your rate is below 55%, replace the seeds with purchased ones.
About The Author: Ellen Brown is an environmental writer and photographer and the owner of Sustainable Media, an environmental media company that specializes in helping businesses and organizations promote eco-friendly products and services. Contact her on the web at http://www.sustainable-media.com
Add your voice! Click below to comment. ThriftyFun is powered by your wisdom!