15mhhm15
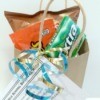
Diamond Post Medal for All Time! 1,298 Posts 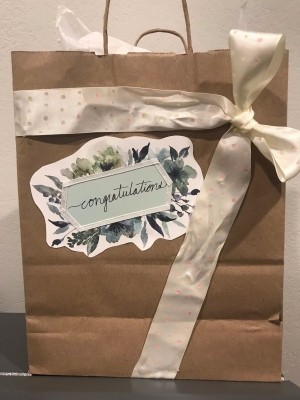 I needed a "Congratulations" gift bag and went to Dollar Tree. Many of the bags there were very thin for the fragile item I was gifting. I was afraid the bag would not hold up. I decided to make my own gift bag upcycling items I already had at home.
Total Time: 20 minutes
Yield: 1 giftbag
Supplies:
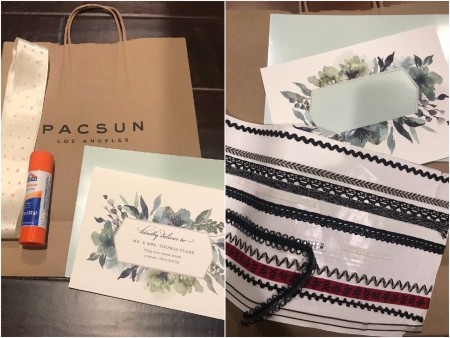
- Pacsun shopping kraft bag
- hot glue + hot glue gun
- glue stick
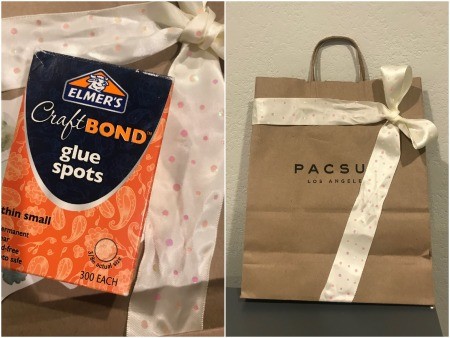
- Elmer's craft bond glue spots
- Shutterfly sample envelope
- teal cardstock paper sample
- ribbon
- ribbon sticker
- scissors
- Sharpie fine tip marker
Steps:
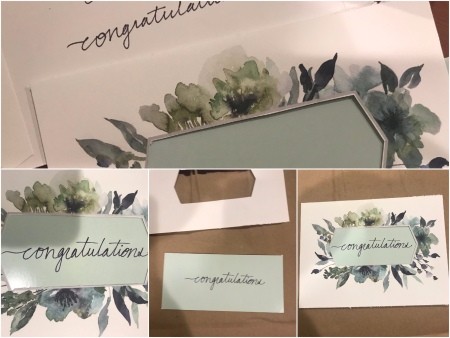
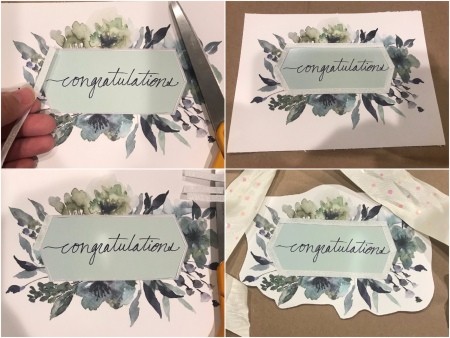
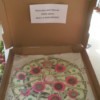
- I save random cards, envelopes, stickers, and samples that come in the mail to my home that could be reusable/upcycle for crafts, projects, or everyday general use. The floral envelope was from Shutterfly, it is a sample (not a real address). I used scissors and cut that part out.
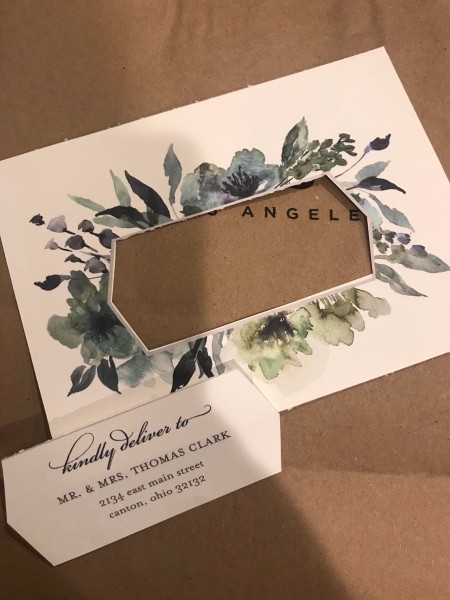
- Practice what you want to write in the center then write on another piece of paper to cut out (larger than the cut center piece to glue). Since my bag is for "Congratulations" that is what I put. You can make your bag into any theme (i.e. Christmas, birthday, housewarming, wedding gift). Then write a message, etc. depending on what you are working with.

- Optional: To hide the un-straight cut edges, I used ribbon sticker to go around the "Congratulations" (also pops it more in person because it's shiny). I trimmed the sign around the floral decoration removing the corners from the original sample.
- Using ribbon, I adjusted it to cover any logos. I was able to cover the bottom PacSun logo by positioning the tied ribbon bow like this. Also, I hot glued the main points (top left, underneath the bow, and bottom.) Then for the rest of the ribbon, I added glue spots.
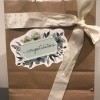
- Lastly place your congratulations sign to cover the bag logo in any position you like. Your bag is ready to be gifted!
Add your voice! Click below to comment. ThriftyFun is powered by your wisdom!