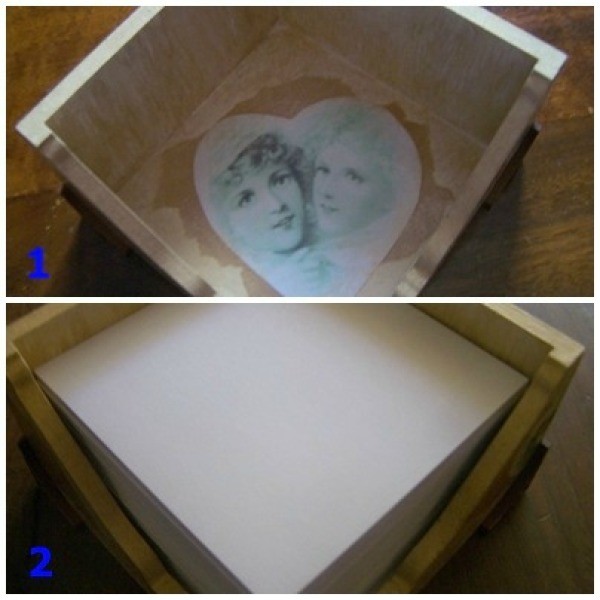
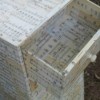
My teaching colleague and friend will celebrate her birthday soon. At our school, she is a Grade Tutor, and she is responsible for addressing behavioral and social problems with the learners in her grade. She often has to phone parents, or send learners to see the support staff members, like the social worker or the life coach. The learners are not allowed to walk around without permission from a teacher, so she is always in need of memo notes. This memo holder will make a suitable gift.
Approximate Time: 2 hours
Advertisement
Supplies:
a photo editing program
I used PhotoScape version 3.5, which can be downloaded free of charge from http://www.photoscape.org/.
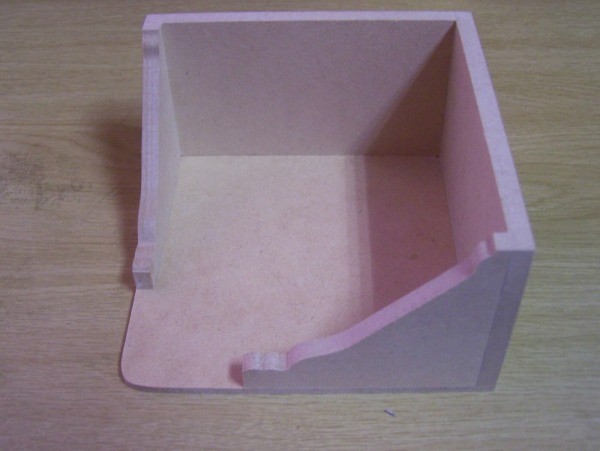
wooden memo holder, available from a craft shop
10/32 inch paint brush
fan-shaped paint brush
white water-based primer
Deco Art Glue
Modge Podge
water-based varnish
hairdryer
acrylic paint in the following two colors: flesh and old gold
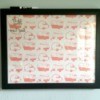
Victorian clipart
I downloaded clipart from http://antiqueclipart.com ~ the clipart on this site is part of the public domain and is not copyrighted.
a piece of brown paper
I used the type that one normally uses to cover school books.
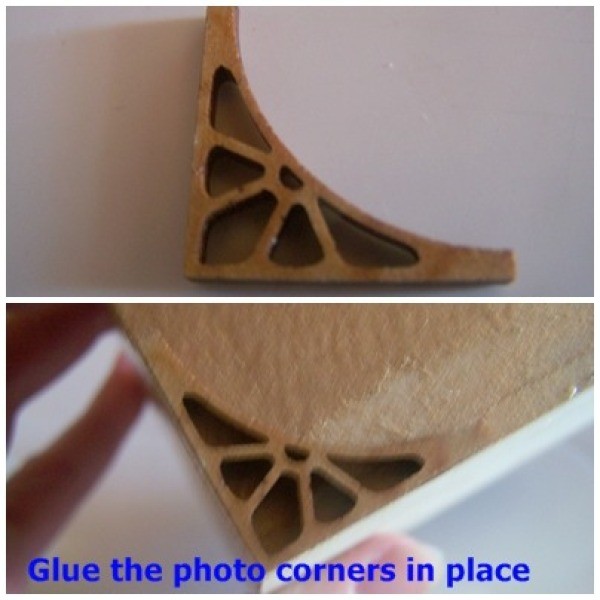
2 wooden scrapbook photo corners
see - http://www.designerdigitals.com/digital-scrapbooking/supplies/product_info.php/products_id/12529 for a possible supplier
Advertisement
strong bonding glue
pair of standard scissors
few sheets of old newspapers to protect the working area
fine sanding paper
an old cloth
Instructions:
Sandpaper the whole memo holder thoroughly inside and out. Dust well with a dry cloth before starting to paint.
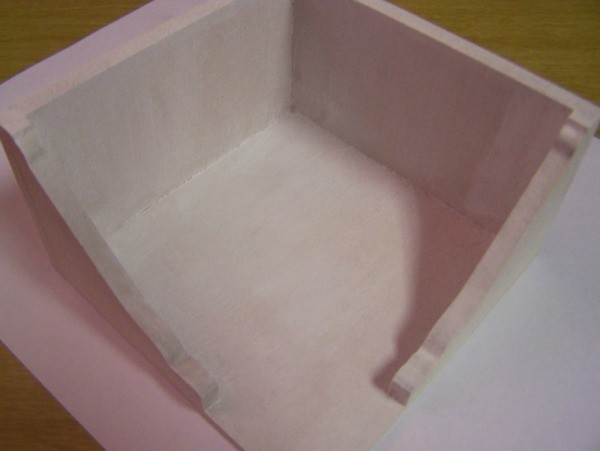
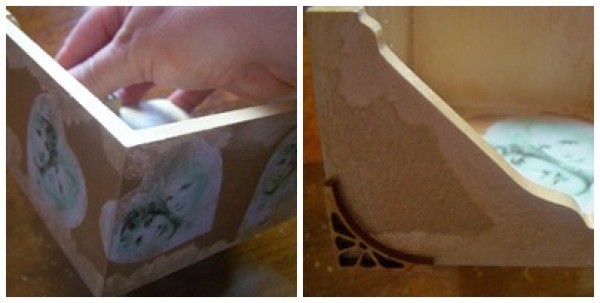
With a slightly wet 10/32 inch brush, paint a thin layer of the white water-based primer over the whole memo box, inside and out, and dry it thoroughly with a hairdryer. Make sure that all the corners and edges are well covered with the primer. Please note: Do not paint the back of the memo holder at all.
Next, using the same paint brush, add a thin layer of flesh-colored acrylic paint to the whole memo holder and dry the memo holder thoroughly with the hairdryer.
Advertisement
With the PhotoScape program, turn the color of the clipart into sepia. This will give the picture an aged look. Then, click on the Bright/Color Button, choose the Contrast Enhancement option and click on Low.
From the different frames that could be added to the picture, choose the Gradient08 frame.
Save the adjusted picture onto your computer. Then, print the picture via PhotoScape: Print 4 pictures using the 5 x 7 cm size option. Print 1 picture using the 3 inches x 4 inches size option.
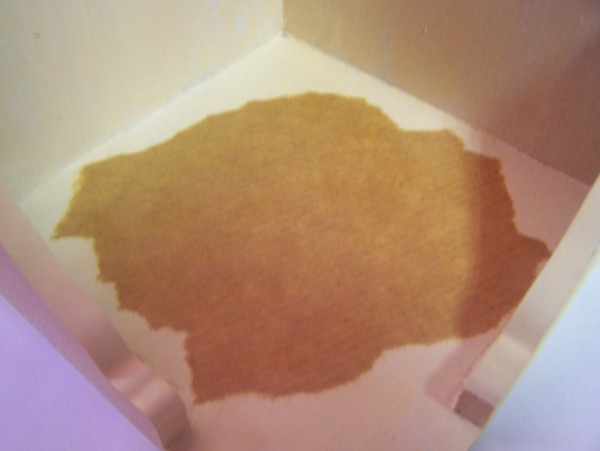
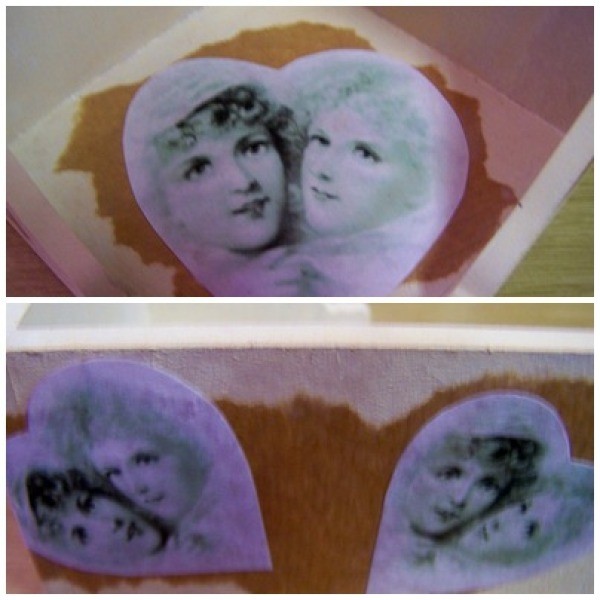
From the brown paper, tear a piece of paper that would fit the inside bottom of the memo holder. Also tear strips of paper that would fit around the outsides of the side panels.
Cut out the pictures and decide how they will be placed on the memo holder.
With the 10/32 inch brush, paint a substantial amount of Deco Art Glue to the back of the piece of brown paper that was torn for the inside bottom of the memo holder. Turn the piece of brown paper around and put it in position on the inside bottom of the memo holder, but do not press it down.
Advertisement
With the brush, spread glue to the front of the piece of brown paper, lightly applying pressure so that it will stick to the memo holder.
Working from the middle of the piece of paper, and from inside towards the outside, rub out all the air bubbles and excess glue from the back of the piece of paper. Use an old cloth to clear any excess glue from the memo holder.
Use the hairdryer to dry the piece of paper thoroughly.
Repeat steps 9-12 with the other pieces of paper, gluing these in place around the outsides of the side panels.
Repeat steps 9-12 with the bigger picture, gluing this in place in the inside bottom of the memo holder.
Advertisement
Then, repeat steps 9-12 with the smaller pictures, gluing these in place on the outsides of the side panels.
Glue the photo corners onto the corners of the memo box.
Using the fan-shaped paint brush, give the memo holder a wash with the old gold-colored acrylic paint. Remember not to use too much paint when using a fan-shaped brush, as this will lose the fan-shaped effect ~ remove excess paint by dabbing it on a sheet of newspaper before starting to paint.
Dry the memo holder thoroughly with the hairdryer.
With the 10/32 inch brush, paint a thin layer of Modge Podge over the whole memo holder. The Modge Podge will protect the pictures and give the product a smoother finish.
Advertisement
Dry the memo holder thoroughly with the hairdryer.
Repeat steps 18-19 ~ you need to apply at least 5 coats of Modge Podge, but remember that with every layer, the direction in which the Modge Podge is applied, must be changed from horizontal to vertical to horizontal, etc. Also, remember that after every layer of Modge Podge, the memo holder must first be dried thoroughly with the hairdryer.
With the 10/32 inch brush, add a layer of water-based varnish to the memo holder and dry with the hairdryer.
Use the strong bonding glue to glue the photo corners in place.
Tips:
To clean, wipe gently with a wet cloth and do not use strong detergents.
When doing decoupage, do not use the highest heat setting on the hairdryer.