social

Decoupaging Photos on Wood

December 3, 2015

lazy Susan with photos
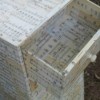
Decoupage is an easy way to place a photo on a wood surface.

Advertisement

Total Time: More than 24 hours

Source: This is a Martha Stewart Product
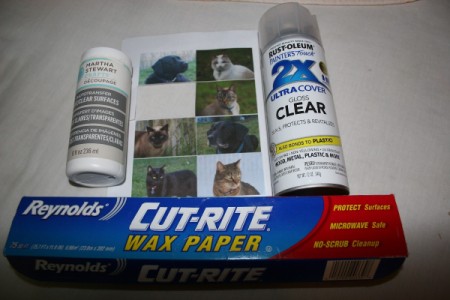
Supplies:

  • One photo printed on "regular" copy paper. Do NOT use a photograph printed on anything but copy paper!
  • wax paper
  • Martha Stewart Decoupage (There is one for light surfaces and one for dark surfaces. Choose according to what you are placing your photo on.)
  • Rustoleum Ultra Cover Clear Gloss
Decoupaged Photo on Wood
 

Steps:

  1. Print out your photo.
  2. Cut photo and lay right side up on wax paper.
  3. Spread decoupage evenly over the surface of the photo.
  4. Turn upside down (decoupage down on wooden surface) If you use something with a word, take this into consideration!
  5. Decoupaged Photo on Wood
     
  6. Wait 24 hours.
  7. Use a sponge and water to wipe off the paper and the photo will appear.
  8. Advertisement

  9. Spray the clear Rustoeum over the wooden surface.
  10. I would suggest trying this on a scrap piece of wood first. You will be pleased with the results of even your first attempt. As you can see, I used a lazy Susan and will be a welcome gift.

Comments

Anonymous
December 12, 20150 found this helpful

love it

 
August 18, 20160 found this helpful

If your local craft store does not have that or any decoupage glue, you can get it from Amazon.

Keep in mind that pictures will be mirror reversed.
With most paint programs CTRL M mirrors the picture. That way Aunt Millie's tattoo is readable, Ernie's 7 hairs are combed from left to right, and your porch did not suddenly move to the other side of the house.

Advertisement

If you are in a big hurry and can't wait 24 hours, you can print the picture or sign with a laser printer, iron it on to transfer the toner, then dissolve and wash away the paper with warm water.
When done, dab it dry without rubbing, dry it some more with a hair dryer, and spray or pour clear sealer on it.

Some people get better results with one method, some with the other. Try both and see which one works better for you.
Have FUN!
DeaarWebby

 
In This Page
Categories
Crafts DecoupageAugust 17, 2016
Pages
More
🐰
Easter Ideas!
🍀
St. Patrick's Ideas!
🌻
Gardening
Facebook
Pinterest
YouTube
Instagram
Categories
Better LivingBudget & FinanceBusiness and LegalComputersConsumer AdviceCoronavirusCraftsEducationEntertainmentFood and RecipesHealth & BeautyHolidays and PartiesHome and GardenMake Your OwnOrganizingParentingPetsPhotosTravel and RecreationWeddings
Published by ThriftyFun.
Desktop Page | View Mobile
Disclaimer | Privacy Policy | Contact Us
Generated 2024-02-26 17:20:09 in 6 secs. ⛅️️
© 1997-2024 by Cumuli, Inc. All Rights Reserved.
https://www.thriftyfun.com/Decoupaging-Photos-on-Wood.html