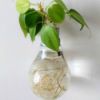
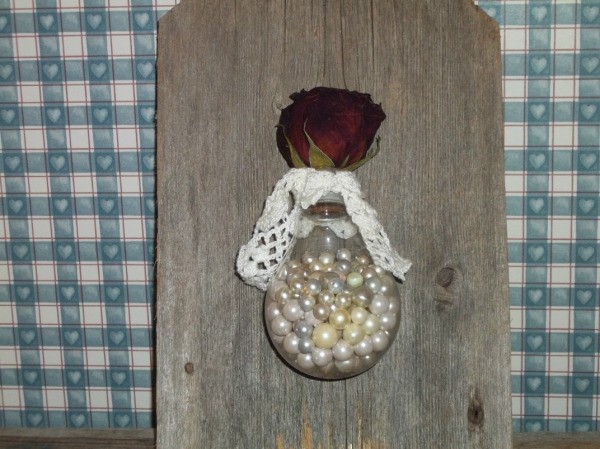
Clean out the inside of an old light bulb to create a clever wall vase. Yes, light bulbs are very fragile, but with care and patience they can be repurposed into an unusual art piece. Once opened and cleaned out, your new vase can hold water for fresh flowers, buttons, beads, or other small filler trinkets.
Note:
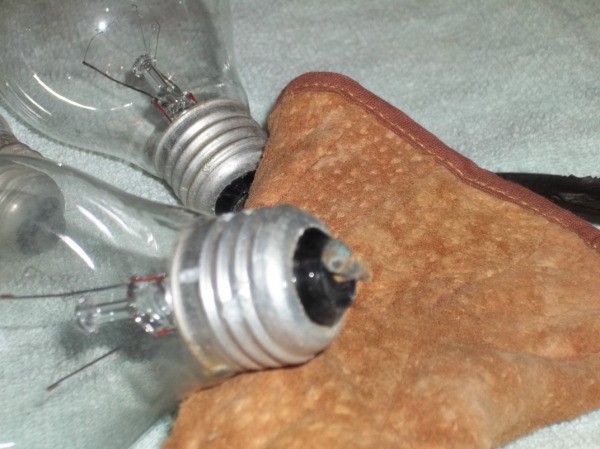
The metal screw end of the light bulb is the top when referred to in the instructions.
Warning:
Wear safety goggles and gloves when attempting this project.
Approximate Time: 1 hour
Supplies:
- safety goggles
- gloves
- old bath towel
- sharp knife
- needle-nose pliers
- screwdriver
- craft wire
- ruler
- wire cutters
- weathered wood scrap
- jigsaw
- marking pen
- drill and 1/16-inch drill bit
- decorative embellishments
Instructions:
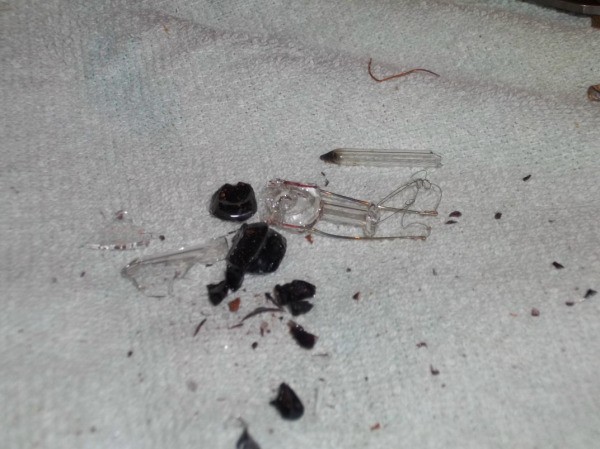
- Cover your work surface with an old bath towel. Use the side of a sharp knife to pry up the edge of the disk covering the top of the light bulb. Grasp the edge with needle-nose pliers and peel the disk off the top.
-
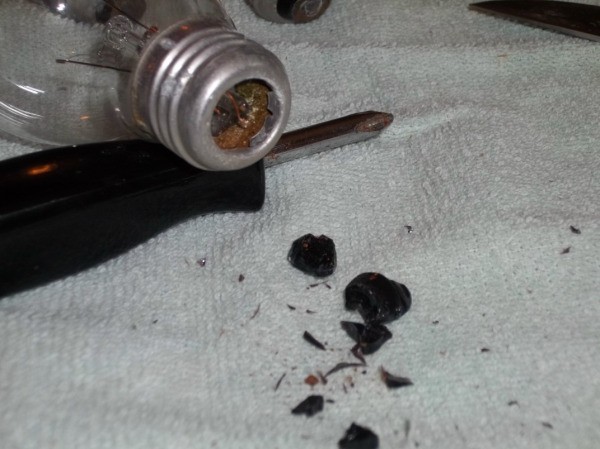
There is a solid ceramic plug in the top of the bulb. That is the black top shown in the pictures. Hold the metal screw end with one hand and firmly jab the plug with the tip of the needle-nose pliers. When the plug cracks, use the pliers to grab the edges and pull out the pieces. Note: When jabbing the end with the pliers, hold the bulb above your work space, not on it. This will prevent the bulb from taking any of the impact. Do not squeeze the bulb too tightly.
-
There is a thin glass tube just inside the opened end. Grab the tube with the pliers and twist it off and out. There will be a small puff of air, so do this step with the opening of the bulb facing down toward your towel.

-
The next level is a finger-like glass tube. The wires and glass "insulators" are in this tube. Hold the metal end and suspend the bulb above your work surface. Poke the end of a screwdriver into the bulb and pound the seal at the top of the tube. Once broken, insert your closed needle-nose pliers into the bulb and twist around the opening to break away the remaining glass of the tube. Shake out the broken glass and wires. If the wires get stuck in the opening, grab them with the pliers and pull them out.
-
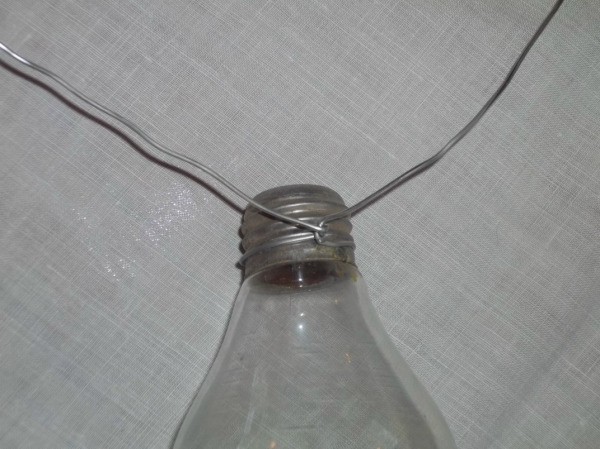
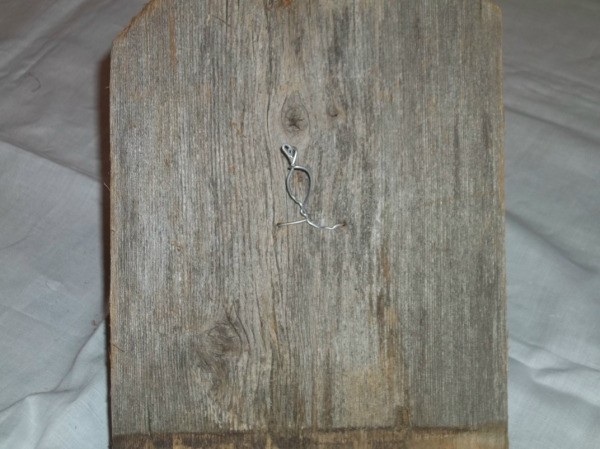
Cut a 20-inch length of craft wire using wire cutters. Wrap the wire around the bottom edge of the metal screw end. Bring the ends together and twist to secure it to the bulb.
-
Cut a scrap of weathered wood approximately 7 inches wide by 10 inches long using a jigsaw. The exact dimensions are not important. If you find a piece that is close in size, it can be used without the need for cutting.
-
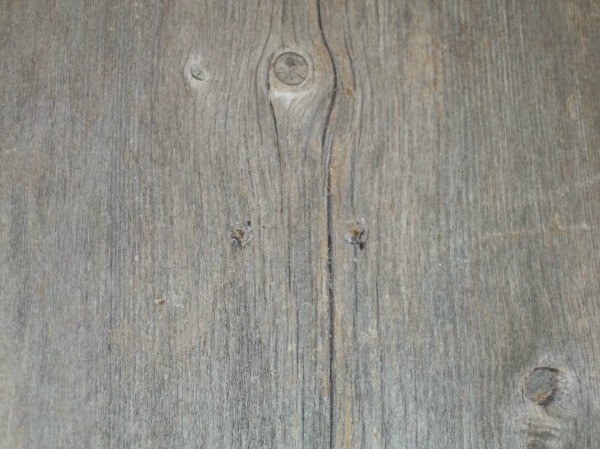
Lay the wood on your work surface. The side facing up will be the front. Lay the bulb on its side and center it on the board. Use a marking pen to make a dot on each side of the screw end where the wire is attached.
Remove the bulb. Drill holes through the board at each dot using a 1/16-inch drill bit.
-
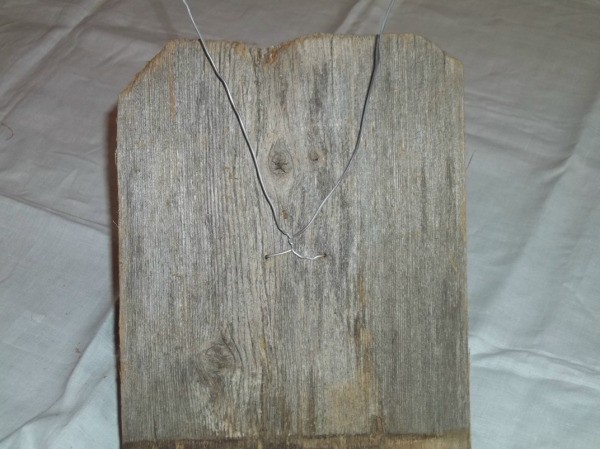
Lay the bulb back on the board. Insert one end of the twisted wire through one hole and the other end through the remaining hole. Bring the wire ends together on the back of the board and twist to secure.
-
Place your index finger over the twist and between the two wire ends. Bring the wire ends together above the finger and twist. Remove your finger. The loop created by your finger is the hanger for the board. Clip off the excess wire.
-
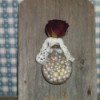
Fill the bulb with your desired trinkets or water, add a flower and decorate with a bit of lace around the neck.
By cyndee kromminga from Winfield, KS